Do You Need a Spotter for a Weight Bench at Home? Solo Lifting Safety Tips and Bench Buying Guide
Do You Really Need a Spotter on a Home Weight Bench?
I’ve trained alone in a detached garage for the past four years. My spotter is a stable floor, a bench that doesn’t wobble, and a habit of leaving a couple of reps in the tank on barbell sets. That setup has carried me through hundreds of workouts without a serious injury. It also got me pinned once, exactly the way you’d expect: I loaded a weight I knew was too heavy for a solo set, the bar slowed halfway up, and I had to wiggle it down to my hips and sit up. Nobody was there to help, and I was fine. The only injury was my pride.
A spotter does three things: catches a failed lift, helps you grind out an extra rep or two, and gives you confidence under a heavy bar. The first is real safety. The second is not necessary for muscle growth. The third is mental, and you can handle it by choosing loads you can control.
When a spotter actually matters
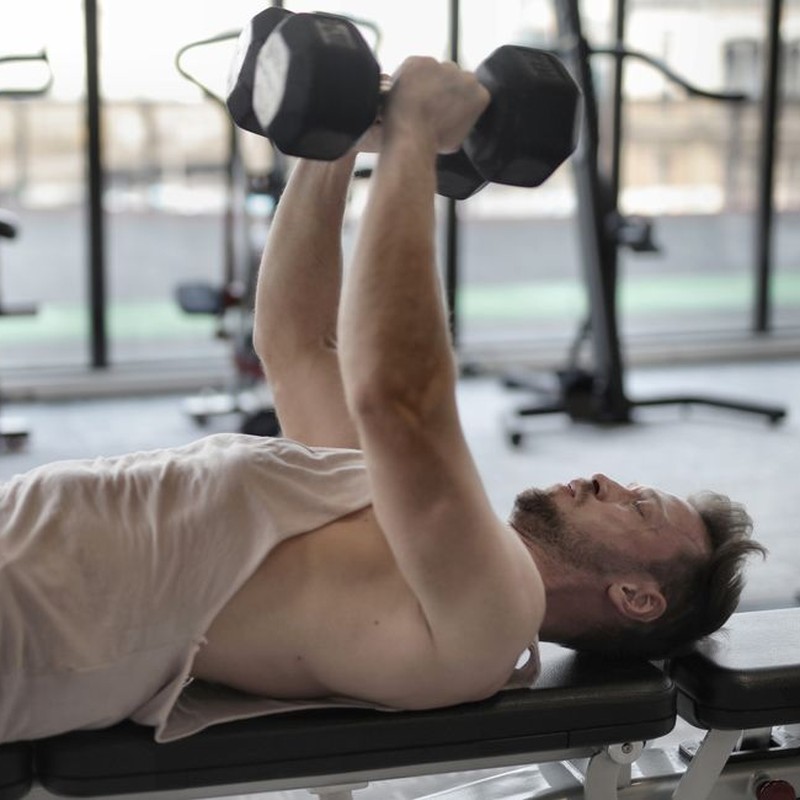
The risk depends on the exercise, not the piece of equipment. A barbell bench press or a barbell back squat puts a heavy steel bar over or across your body. If you fail, the bar stays on you, so spotting matters most on those lifts. With dumbbells, the risk drops sharply because you can drop or push them away. A machine press has a fixed path and no loaded bar above your face, so a failed rep just means you stop the set.
That’s the rule I use at home: a spotter is essential only when the failing weight stays on your body. If the weight can fall away from you, or you can duck out from under it, a spotter is optional.
The never-bench-alone myth
The idea that you always need a partner to build a strong chest is flat wrong. Push-ups, dumbbell presses, and controlled partial reps with safety pins all build muscle without a second person in the room. I spent one winter doing incline dumbbell presses and deficit push-ups in my garage. My dumbbell press went up 15 pounds per side over three months, and no one was there to call out a rep.
What made that work was not a spotter. It was a bench that stayed planted under load and a simple plan: stop each set with two good reps left on risky lifts. For a solo lifter, the real question is not “who will spot me?” but “what happens if I fail?” If the answer is “I can roll the bar off,” “I can drop the weight,” or “I can sit up and escape,” you are fine. If the answer is “I will be stuck,” then you need to change the exercise, the load, or the equipment.
Your bench is part of the safety system
When you live alone and train alone, the bench’s frame, padding, and feet are not just comfort features. A bench that rocks, slides, or shifts during a heavy set can turn a normal failed rep into a real injury. I once used a cheap bench that slid on concrete with 80-pound dumbbells, and that shook my confidence more than any missed rep.
As I compared benches for this guide, three models stood out for solo use. They are the starting point for the buying guide that follows.
- Stable base. Look for a wide footprint and rubber feet. The JOROTO MD55 Adjustable Weight Bench uses a reinforced steel frame and anti-slip pads, so it stays planted under hard dumbbell presses. It’s heavier than the other two here, and that extra mass helps keep solo sessions from turning into wrestling matches.
- Adjustable backrest. A slight incline gives you a safer angle for pressing alone, since a failed dumbbell rep is easier to control above your chest. The PASYOU Adjustable Weight Bench has several backrest angles and a budget price, making it a practical middle choice between the JOROTO and FLYBIRD.
- Easy to reposition. Place the bench so you have open floor on both sides for failed dumbbell reps, and that usually means moving it between sets. The FLYBIRD Adjustable Weight Bench is lighter and cheaper than the others, so it is easier to shift around a garage. It has a smaller footprint, but it still handles residential solo training.
Training alone and staying safe
If you want to use a barbell at home without a spotter, keep this rule: leave two full reps in the tank on every barbell set. On a barbell bench press, pick a weight you can handle for eight reps and stop at six. The extra muscle you might get from grinding out those last two forced reps is not worth the hospital trip.
Set the safety pins just below your chest if your rack has them, and use them for every solo bench session. If you are using J-hooks without a power rack, practice the roll of shame with an empty bar until it feels automatic. That is the exact move that got me out from under the bar the morning I loaded too much weight.
Before you buy, compare these benches side by side on price, backrest angles, and how they feel under a loaded bar. Use the Amazon links above to check today’s price and recent buyer reviews, because bench geometry changes between manufacturing runs. If you have already pressed alone on one of these benches, tell us in the comments how it held up under a failed rep.
Safe Ways to Bench Press Alone: The Roll of Shame, Safety Arms, and Ditching the Barbell
I train alone, so the first thing I sort out with any new bench setup is how to fail safely. A loaded bar on your chest is an engineering problem, and you need a way out before the set starts. Three tools solve it for most solo lifters. The roll of shame gets you free from a barbell. Safety arms catch the bar before it lands on you. Dumbbells remove the trapped-under-the-bar situation completely.
The Roll of Shame: Learn It Before You Need It
The roll of shame gets joked about, but it is the most useful escape move for a solo lifter. I have used it at home, on a rep that felt easy when I unracked it and impossible a second later. The steps are simple.
- Lower the bar to your chest under control. Let it settle; don’t fight it.
- Roll the bar down your torso toward your hips. Keep your elbows tucked and your core braced.
- Sit up as the bar reaches your lap, keeping the bar close to your thighs.
- Stand up with the bar on your thighs, then walk it to the rack or set it down.
Practice this with an empty bar until it feels automatic. Do five reps before your first solo session. When your arms are shaking at the bottom of a hard rep, you don’t want to be figuring out the movement for the first time.
You will hear people say to leave the spring clips off so you can tilt the bar and dump plates if you get stuck. I want to flag the trade-off. Loose plates can shift while you press, which changes the bar’s balance and can cause a nasty whip or a sideways dump in the middle of a rep. Treat clips-off as a debated last resort, not a default. If you do it, practice the empty-bar roll first, use a load you can control, and check that both sides start even. Better yet, use safeties or dumbbells for your heaviest presses.
Safety Arms: Set Them an Inch or Two Above Your Chest
If your bench or rack has safety arms, set them so the bar stops an inch or two above your chest when you are stuck. That small gap gives you full range of motion on normal reps, but on a failed rep the bar only drops a couple of inches and stops. You slide out, rest, and rerack.
Not every bench has safety arms. The workaround is to press inside a power rack or use spotter stands. The bench just needs to be stable; the rack does the catching. The JOROTO MD55 Adjustable Weight Bench is built for that setup, with a steel frame that stays put under a loaded barbell. The PASYOU Adjustable Weight Bench is another rack-friendly option at around $149.99, and the FLYBIRD Adjustable Weight Bench is a budget pick that fits most standard racks. Set your safeties before you load the bar, and check them every session.
Dumbbells: The Smarter Solo Press
If I am pressing alone at home, I usually reach for dumbbells before a barbell. The reason is simple: they have a safe failure mode. At the end of a failed set, you lower the dumbbells to your sides and set them down. No rolling, no pinned chest, no need for a hero finish. In the worst case
What to Look for in a Home Weight Bench Before You Buy
This is the comparison section. I’ve lined up six popular home benches and filtered them through the only question that matters for a solo lifter: will this bench keep you safe when you’re in the room by yourself? I’ve owned the JOROTO MD55 for about a year, and I’ve pressed on a friend’s Bowflex 5.1S. For the FLYBIRD, PASYOU, CAP Barbell, and Keppi, I pulled the spec sheets, watched teardown videos, and combed through buyer reviews. Here’s how the top home benches compare.
How the Top Home Benches Compare
- JOROTO MD55 — $239.99, 4.4 stars
- FLYBIRD — $109.99, 4.5 stars
- PASYOU — $149.99, 4.5 stars
- CAP Barbell — $149.99, 4.4 stars
- Keppi — $119.99, 4.3 stars
- Bowflex 5.1S — $449.00, 4.4 stars
I’ll use these six to walk through the four safety checks. Prices shift often, so the links go to the current Amazon listings.
1. Check the Weight Rating First
Every bench lists a maximum load capacity, and that number has to cover your body weight plus the bar and plates. If you weigh 200 pounds and you’re pressing 185, a 400-pound bench leaves almost no margin. A 300-pound rated bench is a hard no for any serious pressing.
For most home lifters, a bench rated at 600 pounds or more gives you a comfortable buffer without pushing you into commercial pricing. The JOROTO MD55 and the FLYBIRD are two of the most popular picks on Amazon, and both carry capacities that cover the vast majority of solo home lifters. The FLYBIRD lands around $110 when it’s on sale, which makes it a painless entry point if you’re just starting your home gym.
Ignore the marketing photos of someone repping 315 on a bench rated for 450. Read the fine print and add at least 25–50% on top of your heaviest expected load.
2. Give It the Wobble Test
A bench that wobbles is a safety hazard, not a convenience issue. When the frame flexes under load, the bar path shifts, your shoulders take an awkward angle, and a heavy rep can turn into a failed rep in a split second.
Look for wide steel feet, rubber floor grips, and a frame that stays quiet when you push sideways against the backrest. The PASYOU and CAP Barbell both sit around $150, but they earn their stability in different ways. The PASYOU uses a wide rear stabilizer and rubber feet that dig into hard floors and carpet. The CAP Barbell leans on a heavier gauge triangle frame, and buyers talk about zero side-to-side play even on incline presses.
I learned this the hard way with a cheap bench that rocked side to side the moment I racked the bar. The fix isn’t a mat under the legs. It’s a better frame from the start.
3. Locking Mechanisms Matter More Than Angle Choices
An adjustable bench is only useful if it stays exactly where you set it. That means both the backrest and the seat need reliable locking mechanisms that engage with a firm click and don’t shift when you apply pressure.
A bench that slips on a heavy set puts your body on a moving surface while you’re trying to support the weight. That’s how lifters end up with strained shoulders or a pinned chest. If you’re budget-minded, the Keppi offers solid angle adjustments for around $120.
Before you buy, watch a video review or check the product Q&A for complaints about backrest slop. If you already own a bench, push hard against the pad at every angle. If it moves, it needs to be replaced.
4. Don’t Forget the Floor Space
Your bench doesn’t exist in a vacuum. It shares the room with dumbbells, plates, and anything else you’ve stacked against the wall. A bench that takes over the entire area turns simple movement into a tripping hazard.
The Bowflex 5.1S costs around $450, but it folds up when you’re done, which keeps your lifting area clear and reduces trips and falls around equipment. Paying that much for fewer floor problems makes sense for a living room gym or a small apartment.
Measure your room before you order. Account for the bench’s footprint in the flat position and the room you need to walk around it with a loaded bar.
Which Bench Makes the Shortlist?
If I had to pick one bench for a solo lifter today, it would be the JOROTO MD55. It’s stable, adjusts smoothly, and the 4.4-star rating holds up in the actual user reviews. On a tighter budget, the FLYBIRD gets you 90% of the way there for less than half the price.
If space is the problem, the Bowflex is the answer, but only if you’re willing to pay for the fold-up convenience.
Check the current prices on Amazon for the benches above, and if you’ve already found a model that holds up well for solo training, share your experience in the comments. Real-world feedback from other home lifters is how we all get better.
Solo Lifting Safety Checklist: Run This Before Every Bench Session
The difference between a bad bench set and a trip to the emergency room is what you do in the three minutes before you touch the bar. I train alone in my garage three mornings a week, and this is the exact routine I run before every single session. It takes about three minutes, and it has saved me from more close calls than any spotter ever did.
1. Warm Up Your Pressing Muscles Before You Load the Bar
Pressing with cold muscles is one of the fastest ways to strain a shoulder, and when you train alone, a shoulder injury doesn’t just ruin a workout — it can take weeks to recover. Start with 15 to 20 push-ups to push blood into your chest, shoulders, and triceps. Then grab light dumbbells and do two sets of 12 to 15 presses with something that feels easy. Not working sets. Just enough to get the joints moving and the stabilizers awake.
I also do one set of band pull-aparts between warm-up sets to wake up the rear delts. It takes 45 seconds and makes the first work set feel way more solid.
2. Set Up Your Phone and a Check-In
Put your phone on the bench rack or on the floor right next to the bench. Not on the other side of the room. If you get stuck, you need to reach it without having to stand up and cross the room.
Send a text before you start: “about to bench 185, check on me in 30.” It takes five seconds and gives someone a reason to call if you go quiet.
Also think about where the bench is. A closed basement door turns a muffled yell into a silent emergency. Keep the door cracked, or set up somewhere your voice carries through the house.
3. Know Your Exit — Without Repeating It Here
The bailing moves from earlier in this article don’t need another walkthrough. If you haven’t practiced them, do a dry run before your first heavy set. This checklist is about making sure you never need them.
4. Inspect the Gear Before Every Set
I check four things every session, and it takes less than a minute:
- Rubber feet — are all four flat on the floor? A bench that rocks is a bench that fails mid-rep.
- Locking pins — are the backrest and seat angles fully clicked in? A slipping backrest can jam your shoulder before you know what’s happening.
- Bar collars and plates — are the collars tight and the plates loaded evenly on both sides?
- Safety pins or spotter arms — are they set so the bar catches an inch or two above your chest, not on it?
FTC Disclosure: Some bench links below are Amazon affiliate links. As an Amazon Associate I earn from qualifying purchases at no extra cost to you.
If you’re shopping for a bench for solo work, stability matters more than adjustability. The FLYBIRD Adjustable Weight Bench is the budget classic — it’s light and stores easily, but the rubber feet are small, so check them regularly if you’re pushing heavy weight on smooth flooring.
The JOROTO MD55 Adjustable Weight Bench has thicker rubber feet and a wider footprint, so it stays planted on my garage floor even during incline presses. For a truly solid base, the Bowflex 5.1S Stowable Weight Bench uses a longer frame that basically doesn’t move at all.
The PASYOU Adjustable Weight Bench and the CAP Barbell Adjustable Weight Bench are dependable mid-range options, but I’ve noticed the backrest knob needs a firm turn to stay locked. The Keppi Adjustable Weight Bench sits in the same budget range and handles presses up to around 250 pounds.
5. Progress in Small Jumps
Adding five pounds when you’re rested

Medical & Editorial Review: This article was reviewed by Liam Smith, founder of Apexfito, for accuracy and safety. Content is for educational purposes and is not a substitute for professional medical advice. Consult your physician before starting any exercise or nutrition program.
One Comment