Yoga for Beginners: 10 Essential Poses to Start Practicing at Home
Full disclosure: Some links in this article are affiliate links. We may earn a small commission at no extra cost to you if you make a purchase through them. Our recommendations are based on what real users report, not on commission size.
Why Home Yoga Works for Beginners
I used to think yoga wasn’t for me. I could barely touch my toes, and the photos of perfect contortions on Instagram made it look like a sport I’d already failed. Then a friend dragged me to a slow class, and I learned the secret: you don’t start yoga because you’re flexible. You start because you want to feel better, and flexibility shows up along the way.
At home, that lesson gets even easier. No one is watching you wobble in Warrior II. There’s no front-row fear and no instructor correcting you in front of strangers. Just you, a few square feet of floor, and twenty minutes that belong to you.
What a Beginner Actually Gains
Maybe you spend your days at a desk, or you want to move but high-impact workouts leave you sore. A short home practice can still deliver real results:
- Better flexibility. Hamstrings, shoulders, and hips loosen up with repeated, gentle stretching.
- Easier mobility. Bending, reaching, and twisting feel more comfortable in normal life.
- Less tension. Stressed neck and back muscles learn to let go.
- A clearer mind. Slow movement paired with steady breathing quiets the mental noise.
I’ve had evenings when I felt wired after work, did ten quiet minutes on my mat, and went to bed noticeably calmer. That mental reset is often the first thing people notice.
Is This Practice for You?
This home practice is built for:
- Complete beginners who have never taken a class and feel slightly intimidated.
- Desk workers whose bodies need a break from sitting all day.
- Anyone who wants a low-impact routine that meets them at their current level.
If that sounds like you, you’re in the right place.
Set Up Your Practice Space
You don’t need a dedicated yoga room. Grab about six feet of open floor where you can lie flat and reach your arms overhead without hitting furniture. A living room corner, a spare bedroom, or even a hallway works fine.
A nonslip mat helps keep your hands and feet planted, especially as you warm up. If you’re just starting, the Gaiam Essentials Thick Yoga Mat gives you extra cushion for your knees and wrists without much cost. You can check the current price on Amazon if that sounds useful.
Then close the door. If you live with a partner, roommates, or curious pets, shutting it sends a clear signal: this time is yours. Fifteen focused minutes always beat thirty half-distracted ones.
A Calm, No-Pressure Approach
Leave comparisons at the door. Some days your body will feel open and strong; other days it will feel tight. Both are fine.
When a pose feels off, ease out of it. When something feels good, stay a little longer. This practice is meant to be beginner-friendly, not intense or competitive.
Find your spot, roll out your mat, and take a deep breath. Give the session a try, then drop a comment below and share how it went — I’d love to hear what your home setup looks like.
Choosing Your First Yoga Mat: Budget, Grip, and Cushioning
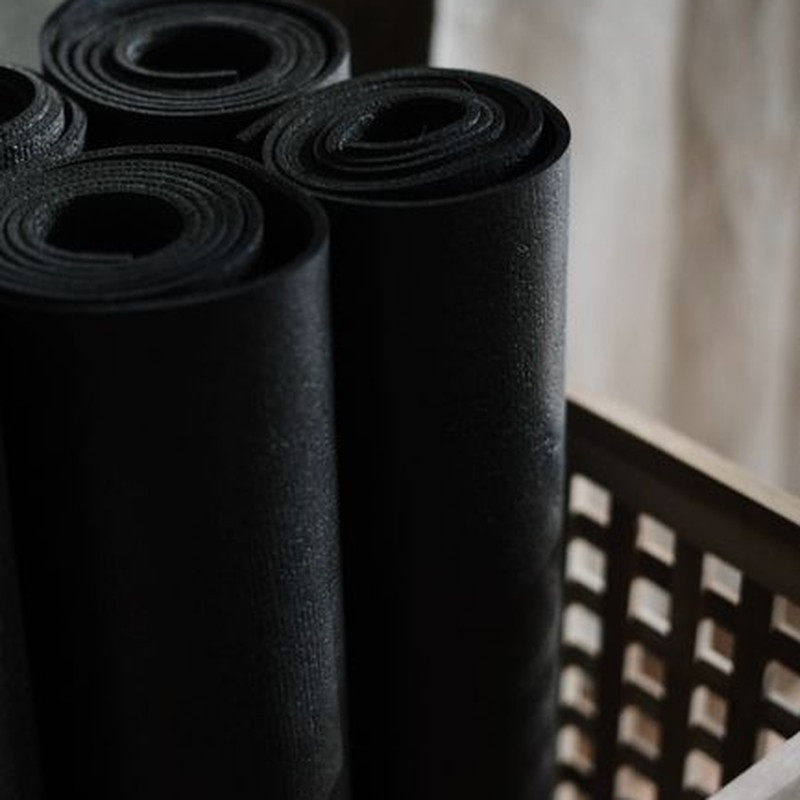
Before you unroll your mat, think about the surface under your body. A good mat can make yoga feel easier from the first downward dog. A poorly chosen one turns every pose into a battle with slippery floors and sore knees.
For beginners, thickness and grip matter most. Thickness affects how much cushion you feel in your knees, wrists, and spine when you lie down. Grip affects whether your hands and feet stay planted as you start to sweat. You want enough padding to feel comfortable and enough stability to feel grounded. Too much cushion can make standing poses feel unsteady.
Most standard mats are about 1/8 inch (3 mm) thick. That is fine if you practice on carpet or if you already have strong wrists and knees. On a hard floor, many people find 1/8 inch too thin. A 1/4-inch (6 mm) mat gives more cushion, but it may feel slightly less stable in balance poses. There is no single right answer; it depends on where you practice and what feels good to you.
If you want extra padding without spending much, the Gaiam Essentials Thick Yoga Mat is a common budget pick at around $24.98 with a 4.5-star rating. The thicker body cushions your knees and wrists during floor poses, which is exactly what many beginners need while they build upper-body strength. I have used this mat on bare wood and thin carpet, and the extra layer makes kneeling positions noticeably more comfortable than a skinnier mat. The grip is not the strongest, but it works well for slow, low-to-the-floor practice.
If you prefer a traditional mat with a tighter feel, the BalanceFrom GoYoga All-Purpose Yoga Mat costs around $25.99 with a 4.5-star rating. It measures 72 inches long, so it fits most bodies comfortably. The surface is dense and slightly textured, which helps in standing poses and downward dog. If you are taller than 5-foot-8, the extra length is a real advantage at this price.
If you want something between a bare-bones budget mat and a long-term investment, the
First Five Poses: Mountain, Cat-Cow, Downward Dog, Forward Fold, and Child’s Pose
Let’s start where you are. You don’t need a fancy setup or a perfect room. Just find a spot where you won’t be interrupted, and if you have a mat that keeps your hands and feet from sliding, great. A bare floor can work for some of these poses, but a little cushion makes kneeling positions more comfortable.
We’ll move through five shapes: Mountain, Cat-Cow, Downward Dog, Forward Fold, and Child’s Pose. Take five breaths in each pose unless I say otherwise. If something pinches or burns, slow down, soften the shape, or rest in Child’s Pose. This is your practice, not a performance.
1. Mountain Pose (Tadasana)
Stand with your feet hip-width apart, arms hanging naturally at your sides. Press all four corners of your feet into the mat: the base of your big toe, the base of your pinky toe, the inside of your heel, and the outside of your heel. Soften your knees so they’re not locked. Roll your shoulders away from your ears and let your arms hang heavy. Imagine a string pulling the crown of your head toward the ceiling while your feet stay grounded.
Take five slow breaths here. Notice how your weight shifts between your heels and the balls of your feet, and try to balance it evenly. Mountain Pose looks like you’re doing nothing, but it teaches you to stand with intention. You’ll use that same grounded awareness in every pose that follows.
2. Cat-Cow (Marjaryasana-Bitilasana)
From Mountain Pose, inhale your arms overhead, then exhale and fold forward. Bend your knees enough that you can place your hands on the floor, then walk your hands forward until your wrists are directly under your shoulders and your knees are directly under your hips. This is your all-fours position.
Spread your fingers wide and press the mat open. On your inhale, drop your belly toward the mat, lift your chest forward, and let your gaze come gently up. On your exhale, round your spine toward the ceiling, tuck your chin toward your chest, and draw your navel up toward your spine. That’s one round.
Move with your breath, not ahead of it. If you rush Cat-Cow, you lose the whole point of the pose. The movement should feel like a wave traveling through your spine. Aim for five slow rounds.
3. Downward-Facing Dog (Adho Mukha Svanasana)
From all fours, tuck your toes under, lift your hips up and back, and press your thighs back until your body forms an inverted V. Most beginners try to force their heels to the floor. You don’t need to. A slight bend in your knees is perfectly fine, especially if your hamstrings feel tight.
The work belongs in your arms and shoulders. Press the mat away from you with your hands, keep your neck long, and let your head hang naturally between your arms. If you notice your shoulders collapsing in toward your ears, slide your shoulder blades down your back and broaden across your collarbones.
Hold Downward Dog for three to five breaths. You can pedal your feet gently if that feels good through your calves. This pose is both a stretch and a strength builder, so don’t rush it.
4. Standing Forward Fold (Uttanasana)
Walk your hands back toward your feet and come into a Standing Forward Fold. Hinge at your hips, not your waist, and let your head fall heavy. This is the pose where gravity does the work, so don’t yank yourself down.
Bend your knees as much as you need so your lower back stays long. Place your hands on the mat, your shins, or blocks. I spent my first month of yoga keeping my knees bent and my fingertips on my shins. My lower back thanked me. Straight legs can come later; a happy spine matters more.
Take five breaths here. Relax your jaw, soften your shoulders, and let your arms dangle. A good Forward Fold should feel like a release, not a stretch contest.
5. Child’s Pose (Balasana)
From your fold, lower your knees to the mat and sit your hips back toward your heels. Stretch your arms forward and rest your forehead on the mat. If your hips lift away from your heels, place a folded towel under your thighs or bring your knees wider apart. That extra support makes a real difference.
Child’s Pose is your reset button. Use it whenever you need a breath between poses, not just at the end. Breathe into your lower back for five slow breaths and feel the stretch spread across your spine and hips. Let your whole body soften here.
Common Mistakes to Watch
Three mistakes tend to show up when beginners practice these poses at home without an instructor nearby. If you catch yourself doing any of them, just adjust and move on.
- Downward Dog: collapsing into your shoulders. Keep pressing the floor away and lengthen through your neck.
- Forward Fold: locking your knees and rounding your lower back. A bent knee is a smart knee.
- Cat-Cow: rushing past the breath. Let each inhale and exhale guide the movement.
If you need to rest between poses, drop back into Child’s Pose. That’s part of the practice, not a failure. Once these first five shapes feel familiar, you’ll be ready for the next half of the sequence. Try them at home and let us know in the comments how your first practice went.
Next Five Poses: Warrior I, Warrior II, Tree Pose, Cobra, and Bridge
The first five poses got your legs warm and your spine moving. Now the work shifts. These five ask for balance, a little more strength, and the ability to breathe through the moment when a pose starts to feel hard. If you’ve been using a towel instead of a mat, grab something with grip before you start.
Warrior I (Virabhadrasana I)
From your forward fold, step your left foot back about three feet. Bend your right knee until it stacks over your ankle. If you look down, you should still see your toes. Raise your arms overhead, palms facing each other, and start to square your hips toward the front of the mat.
This is where I see people struggle. The back hip wants to swing open, so the square is more of a suggestion. Shortening your stance makes it possible. A shorter Warrior I where your hips face forward beats a deep lunge where everything twists crooked.
Press through the outer edge of your back foot, soften your jaw, and stay for three to five breaths. Lower your arms, step the back foot forward, and do the other side.
Warrior II (Virabhadrasana II)
From your last Warrior I, keep the front knee bent and turn your back foot out to about 45 degrees. Open your hips and shoulders toward the long edge of the mat. Stretch your arms out straight from your shoulders, parallel to the floor, and look over your front fingertips.
The front knee should stay pointing over your second toe. The mistake I see most is the knee drifting inward as you sink lower. If that happens, shorten your stance or press the knee outward. Warrior II should feel strong and grounded, not wobbly.
Take three to five breaths, then lower your arms and step your feet together. Stand tall for one full inhale before moving into Tree Pose.
Tree Pose (Vrksasana)
Shift your weight into your left foot. Press the sole of your right foot against your inner left ankle, or slide it up to your calf. Please don’t put it directly on the knee. Bring your palms together at your chest, or raise your arms if your balance allows. Fix your gaze on a spot a few feet ahead. A steady gaze steadies the whole body.
Your standing leg should feel awake, not locked. I’ve watched beginners squeeze their toes into the mat so hard their calves cramp. Spread your toes and press down evenly instead.
If you wobble, stand next to a wall and rest a hand on it, or keep your toes down. That is how you build the strength for the full pose. When you are done, step the right foot down and switch sides.
From your last Tree Pose, lower your lifted foot and stand tall. Fold forward, place your hands on the floor, and step back to your hands and knees. If you want a few seconds to reset, sit your hips back toward your heels and let your forehead rest on the mat. Then come back to all fours and lower your belly to the floor.
Cobra Pose (Bhujangasana)
Lie on your belly with your hands under your shoulders and your elbows tucked close to your ribs. Press the tops of your feet into the mat, then lift your chest on an inhale. Keep your elbows bent and roll your shoulders away from your ears.
The cue I repeat in my own practice: don’t push. Lift with your back. If you press hard into your hands and yank yourself up, your lower back pays for it. Stay low, keep the movement small, and hold for three to five breaths before lowering down.
After your last Cobra, press back up to all fours. From there, lower your hips to one side and roll onto your back. It will feel awkward at first; that is fine. Lie flat, bend your knees, and plant your feet before moving into Bridge.
Bridge Pose (Setu Bandhasana)
Lie on your back with your knees bent and your feet flat, hip-width apart. Walk your heels in until you can graze them with your fingertips. Press through all four corners of your feet, squeeze your glutes, and lift your hips. Interlace your fingers underneath you and roll your shoulders underneath your chest. That little roll opens your chest more than you would expect.
Let your thighs and glutes do the lifting. If your lower back pinches, lower your hips an inch and squeeze your glutes harder. Hold for five breaths, then release your hands and roll your spine down gently.
Common Mistakes to Watch For
- Front knee collapsing inward in the Warrior poses. Keep that knee tracking over your second toe.
- Clenching your jaw. Check your face every few breaths. A soft jaw relaxes your neck and shoulders.
- Over-lifting in Cobra. If you are pushing with your hands, you are using the wrong muscles. Lift with your back and keep your elbows bent.
Try these five in order, right after the first five, and notice how your body responds. The poses are meant to ask something of you, just not so much that you hold your breath. If your mat is too slick or too thin for floor work, go back to the mat recommendations earlier in this article and find something with better grip and cushion, then come back and try again.
Which one gave you the most trouble? Leave a comment and tell me. I read every reply and I will answer what I can.
Putting It Together: A 10-Pose Home Practice Plan for Beginners
By now you have met all ten poses. This is where they come together into one session you can finish in 15 to 20 minutes, about the time it takes to brew a pot of coffee.
Pick a spot where you won’t bump into furniture and where the floor is clean. If you are still choosing a mat, the Gaiam Essentials Thick Yoga Mat gives you extra cushion for your knees. The BalanceFrom GoYoga All-Purpose Yoga Mat is a dependable budget choice I have seen in plenty of home gyms.
The Full Sequence
Move through these steps in order. Hold each pose for 3 to 5 slow breaths. Set your own pace, and come back to Child’s Pose anytime you need a breather. That is part of the practice, not a workaround.
- Mountain Pose (Tadasana): Stand tall at the top of your mat, feet hip-width apart, arms relaxed by your sides. Press down evenly through both feet.
- Cat-Cow (Marjaryasana-Bitilasana): Come to your hands and knees. Inhale as you drop your belly and lift your chest for Cow. Exhale as you round your spine and tuck your chin for Cat. Repeat for 3 full rounds.
- Downward Dog (Adho Mukha Svanasana): Tuck your toes, lift your hips up and back, and pedal your heels gently. Hold for 3 to 5 breaths, then repeat 3 times total. This is the heart of your warm-up.
- Forward Fold (Uttanasana): Walk your hands back to your feet and fold from your hips. Let your head hang heavy and bend your knees as much as you need.
- Child’s Pose (Balasana): Lower your knees to the mat, sit back toward your heels, and stretch your arms forward. Take 3 slow breaths here.
- Warrior I (Virabhadrasana I), right side: Step your right foot forward, rise up, and square your hips toward the front. Bend your front knee and reach your arms overhead. Hold for 3 breaths.
- Warrior I, left side: Step back to Downward Dog, then step your left foot forward and repeat the same pose for 3 breaths. This reset keeps both sides even.
- Warrior II (Virabhadrasana II), both sides: From Warrior I on your left side, open your hips and shoulders to the left with arms stretched wide. Look past your front fingertips for 3 breaths. To switch, pivot back to Downward Dog, step the right foot forward, and repeat on the right.
- Tree Pose (Vrksasana), both sides: Stand tall, place one foot on your inner calf or thigh, and press your palms together at your chest. Hold for 3 breaths, then switch sides.
- Cobra (Bhujangasana): After your second Tree Pose, lower your lifted foot, step back to Downward Dog, then bring your knees to the floor and roll onto your belly. Place your hands under your shoulders and lift your chest with soft elbows. Hold 3 breaths and lower back down.
- Bridge (Setu Bandhasana): Roll onto your back, bend your knees, and press your hips up toward the ceiling. Hold 3 breaths, then lower down one vertebra at a time.
- Return to Mountain Pose: Roll to one side and press up to standing. Close your eyes and take one full breath before you finish.
That is the entire practice. The order does the work: Cat-Cow and Downward Dog wake up your spine and shoulders, the standing poses build heat and leg strength, and the floor poses bring your body back down before you finish.
Your Weekly Rhythm
For the first two weeks, aim for 3 days per week. A Monday-Wednesday-Friday schedule works well for most beginners. Keep each session between 15 and 20 minutes. That is enough to build a habit without making yoga feel like a chore.
After two weeks, add a fourth day if your body feels comfortable. If you are still sore or tired, stay at 3 days for another week. I have watched friends jump into daily yoga and burn out before the first month was over. Rest days are when your muscles recover, and recovery is where the progress happens.
Safety Notes for Your Home Practice
- Stop any sharp or shooting pain. A stretch should feel strong but never like a pinch or a tear.
- Keep a light bend in your knees during Forward Fold and Downward Dog if your hamstrings feel tight.
- Never force a stretch. If you cannot breathe steadily, ease back a few degrees.
- If you feel dizzy, come to Child’s Pose and rest until the feeling passes.
Yoga should feel steady, not punishing. Your body is the boss. If a pose does not work today, skip it and try again tomorrow.
A Grounding Tip to End Every Session
The last moment of this practice is the one that matters most. Stand in Mountain Pose, close your eyes, and notice your breath moving in and out. Then take one final deep exhale before you open your eyes and step off your mat. That tiny pause is the whole point. It is what separates yoga from just stretching.
If you decide to upgrade your mat as you get deeper into practice, the Manduka PRO Yoga Mat holds up for years, while the Retrospec Solana Yoga Mat offers a textured surface and a lower price than the Manduka if you want something in between. Check current prices on Amazon, then come back and share how your first home practice felt in the comments.