Pilates for Beginners: How to Start a Home Practice That Sticks
Full disclosure: Some links in this article are affiliate links. We may earn a small commission at no extra cost to you if you make a purchase through them. Our recommendations are based on what real users report, not on commission size.
What Pilates Is, and What Your First Sessions Should Feel Like
If you have watched someone do Pilates and thought it looked like lying down with extra steps, you are half right. The first time I did a full beginner mat session at home, I was surprised by how much my abs shook during moves that looked almost boring on video. That is the whole point. Pilates is controlled, low-impact movement that trains your deep core, hips, and shoulders to work together. No jumping, no heavy loads, nothing pounding through your joints.
Joseph Pilates developed the method in the early 1900s, but the version most of us practice at home is a short set of floor exercises done with attention to breath and body position. A mat helps. It is not required. A folded blanket or a low-pile rug will carry you through your first few weeks while you figure out whether you actually enjoy this.
The Six Principles, Translated Into Habits You Can Use
You will see the classic six listed everywhere: breath, control, centering, precision, flow, and concentration. They sound abstract until you are on the floor at 7 a.m. trying to remember which one matters right now. Here is the version that actually helps.
- Breathe through the work. Inhale to prepare, exhale as you move. If you catch yourself holding your breath, that is a cue to slow down, not to push harder.
- Control beats speed. One slow rep you could stop halfway through is worth more than five fast ones you flop your way to the end of.
- Center on the deep core. A gentle drawing-in just below the belly button. Not a hard brace, and definitely not a sucked-in stomach.
- Be precise. Where are your knees pointing? Is one hip hiking up? Small corrections change which muscles do the work.
- Keep it flowing. Move from one exercise to the next without long pauses or collapsing between sets.
- Concentrate. Ten focused minutes beat thirty distracted ones with the TV on.
Tracking all six at once is a recipe for freezing up. Pick one per session. Breath first is the smartest place to start, because everything else gets easier once you stop holding it.
What the First Few Sessions Feel Like
Expect a mild, even burn through your abs, glutes, and inner thighs. The kind that makes you want to quit around rep six but never crosses into feeling like an injury. Shaking is normal too. It usually means a small stabilizing muscle is working harder than it is used to, which is exactly what you want.
What you should not feel: sharp joint pain, pinching in the low back, or a tight, strained neck. Those are setup problems, not fitness failures. If your neck aches during abdominal work, your chin is probably tucked too far, or your head is lifting from the neck instead of the upper ribs. Rest your head down for a few reps, or support it with one hand, and see if the ache disappears. If your lower back pinches, shrink your range of motion and check that your ribs are not flaring open toward the ceiling.
Next-day soreness from a first session tends to be mild and spread across the abs, seat, and inner thighs. If you can barely get down the stairs, you overdid it. Cut the next session roughly in half and build back up from there.
How It Differs From Yoga
People lump the two together because both happen on a mat and both use breath work. The pacing and the intent are different. Yoga holds poses longer, includes standing balance work, and spends more time in longer stretches. Pilates uses fewer long holds, more continuous controlled repetitions, and near-constant attention to keeping your pelvis and ribcage stable while your arms and legs move. If you already practice yoga, Pilates fills a different gap: core control and hip stability, without adding another high-impact day to your week.
How Long, How Often, and What Changes
Twenty to thirty minutes is plenty at the start, three sessions a week for the first month. That is enough to build the habit and let your muscles adapt without leaving you wiped out for the rest of the day. Leave a rest day between sessions when you can. If you feel good and want to move on an off day, a walk or some gentle stretching serves you better than a second full Pilates session during the first two weeks.
Most beginners notice changes in posture and core control within four to six weeks. Not a six-pack. More like standing taller without thinking about it, bracing automatically when you pick up a grocery bag, and low-back stiffness easing off after a long day of sitting.
Before your first workout, spend two minutes looking at what you already have at home. Mat thickness matters more than most beginners expect. I started on a thin yoga mat and my tailbone complained through every rolling exercise until I switched to something thicker. If you are shopping, check current prices on Amazon for a 10 mm mat and a light resistance band. Both are inexpensive, and together they cover nearly every beginner move in this guide. Then come back and tell me in the comments how your first week went, especially if something felt off, because there is usually a small setup adjustment that fixes it.
Set Up Your Space, Mat, and Weekly Schedule
You do not need a studio or a reformer to start Pilates at home. A clear 6-by-8-foot patch of floor, a mat, and a wall or sturdy chair within arm’s reach is the whole list. I started in a cramped apartment living room with a rolled-up towel under my tailbone, and it worked fine once I pushed the coffee table out of the way.
That space gives you room to lie down with your arms overhead, roll up to sitting, and stand without bumping into furniture. The wall is there for balance during standing work. The chair stands in for a barre or gives you a seat for seated exercises.
Hardwood and low-pile carpet both work. High-pile carpet is the one surface I would skip, since it makes balance work unpredictable and bunches under your hands. If thick carpet is all you have, lay a yoga mat or a large towel on top to flatten things out.
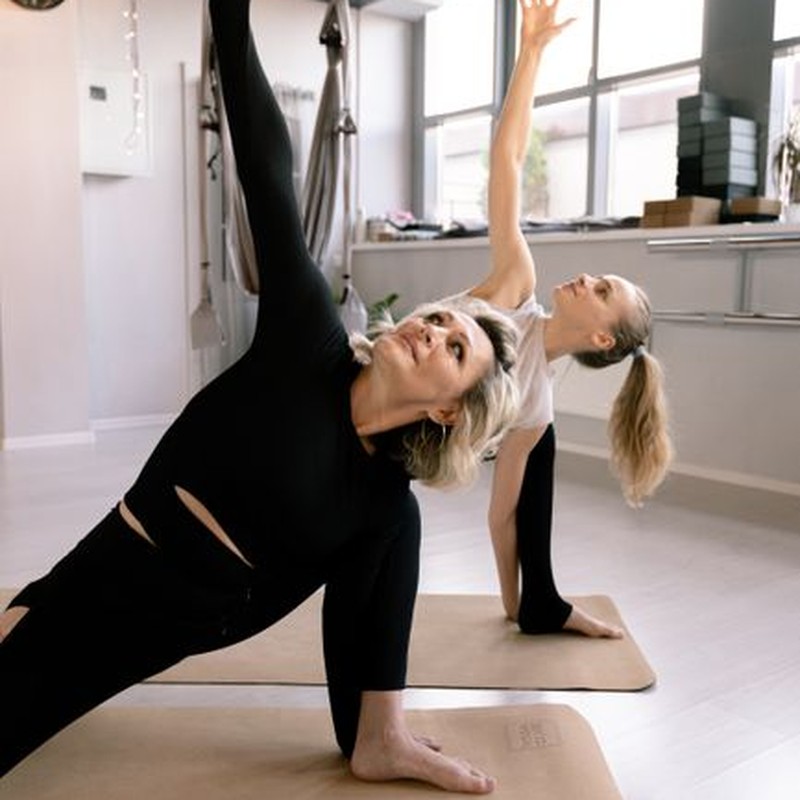
The mat matters more than the brand
Aim for 6 to 10 millimeters of thickness, roughly 1/4 to 3/8 inch. That range cushions your spine during rolling moves like the roll-up and bridges without making standing balance work feel wobbly. My 4 mm travel mat was fine for about a week. By the third roll-up I was hunting for a folded blanket.
Brand means very little here. I have used a $20 discount-store mat and a $70 name-brand one, and both did the job. Prices swing a lot depending on color and thickness, so check current prices on Amazon before you commit.
Wear fitted clothing
Leggings or shorts and a fitted tee. Loose shirts ride up during bridges and leg-lower work, and that tugging pulls your attention straight off the exercise. Mine ended up around my ribs mid-set of leg lowers, and I spent the rest of the round thinking about my hem instead of my abs.
Pick a repeatable time slot
Three 20-minute sessions beat one 60-minute marathon. Movement patterns stick through repetition, not through a single long grind on Sunday afternoon.
Mornings suit people who train before the house gets noisy. Evenings work for anyone who needs to unwind first. I practice at 6:30 a.m. because my house is quiet then. A friend does hers at 8 p.m. after her kids are down. Both schedules work.
Put it on your calendar like a dentist appointment. If you miss a session, do not double up the next day. Pick up where you left off and keep going.
Skip the reformer and accessories for now
A mat, a small pillow or folded towel, and a light resistance band will cover your first two months. The pillow supports your head during lying exercises. The band adds gentle resistance for arm work later. You do not need a reformer, a Pilates ring, or a magic circle to build core strength and mobility in your living room.
Most beginners quit because they bought too much gear too soon. If you are eyeing something bigger, check current prices on Amazon first and read the reviews carefully. A $400 machine collecting dust in the closet is a heavier reminder than a missed workout.
Already have a setup that works in a small space? Share it in the comments. I am always curious what people make work in a 400-square-foot apartment.
Six Foundational Exercises With Step-by-Step Cues
These six moves cover the whole map of beginner mat work: breath, spine articulation, deep core control, and hip stability. Do them in the order below. The sequence moves from lying on your back, to hands and knees, to side-lying, so your body warms up gradually instead of jumping straight into the hardest position.
One thing before you start: none of this is a race. I have watched plenty of beginners turn a gentle bridge into a sprint, and the result is always the same. The low back takes over and the abs quietly check out. Slow is the entire point.
1. Breathing and Pelvic Tilt
Lie on your back with knees bent and feet flat on the mat, hip-width apart. Arms rest by your sides, palms down. Put one hand on your lower ribs and the other on your hip bones so you can feel what actually moves.
- Breath: Inhale through the nose and let the ribs widen out to the sides. Exhale gently, draw the belly in, and let the pelvis tilt toward the mat. Two or three degrees of movement is plenty. This is a subtle rock, not a scoop.
- Reps: 8 to 10 slow cycles, roughly one breath every four to five seconds.
- Watch for: Using your legs to force the tilt. Your feet stay quiet the whole time. If your knees rock in and out, the motion has slipped out of your core and into your hips.
Most people feel this click somewhere around the third or fourth breath. If a full set goes by and nothing registers, put more attention on the exhale and less on the tilt.
2. The Hundred, Modified
Stay on your back with knees bent and feet on the floor. Head stays down. This is the version I recommend for your first month, and honestly for a lot of people after that too.
- Setup: Float the arms a few inches off the mat, reaching long toward your feet.
- Breath: Pump the arms up and down in small, brisk motions. Five pumps as you inhale, five as you exhale. That is one cycle, and you are aiming for 10 cycles total.
- Watch for: A lower back that arches off the mat, or a neck that grips and strains. Both are signals to keep the head down and shorten how far the arms travel. A two-inch pump works just as well as a six-inch one.
Your arms should feel like they are doing almost nothing. The work is in holding the rib cage calm while you keep breathing.
3. Bridge
Bring your heels close to your seat, about a hand’s length from your glutes, feet parallel.
- Setup: Press through the feet and peel the spine off the mat one vertebra at a time. Stack the hips, then the ribs, then the shoulders.
- Top position: Pause without over-squeezing the glutes. You want the back of your body long, not clamped.
- Reps: 8 to 10, rolling down slowly each time. Let the tailbone touch last.
- Watch for: The ribs flaring open at the top. If your chest is pointing at the ceiling and your low back feels pinched, you have gone too high. Come down a notch and reach the knees forward instead.
Rolling down is where the strength gets built. Rushing the descent skips most of the benefit.
4. Dead Bug Toe Taps
Bring both knees over your hips at a 90-degree angle, shins parallel to the floor. Reach both arms straight up toward the ceiling.
- Setup: Exhale and settle the low back into the mat. It should stay glued there for the whole set.
- Movement: Alternate tapping one toe to the floor while the pelvis stays completely still. Return that leg and switch.
- Reps: 8 taps per side.
- Watch for: The lower back lifting as the leg reaches out. If you feel a gap open up under your spine, reduce how far the toe travels. Tapping down only halfway still counts.
Speed is the enemy here. A slow tap holds the position; a fast one lets momentum carry your spine off the mat.
5. Bird Dog
Come onto hands and knees, wrists under shoulders and knees under hips.
- Setup: Reach one arm forward and the opposite leg back at the same time. Reach long rather than high.
- Hold: 2 to 3 seconds, then switch sides.
- Reps: 6 to 8 per side.
- Watch for: Hips tipping toward the ceiling, which turns the move into a twist. Keep the hip bones level, as if you were balancing a glass of water on your lower back.
If your wrists complain, make fists or rest on your forearms. Nothing about this exercise depends on a flat palm.
6. Side-Lying Clamshell or Leg Lift
Lie on one side with hips stacked directly on top of each other and knees bent to about 45 degrees.
- Clamshell: Keep the feet touching and open the top knee toward the ceiling, then close slowly.
- Leg lift: Keep both legs together and straight, then lift the top leg a few inches and lower it with control.
- Reps: 10 to 12 per side.
- Watch for: The top hip rolling backward to cheat extra range. If you suddenly gain 20 degrees of motion, that is your pelvis turning, not your hip opening. Rest a hand on the front of your hip to catch it.
The Mistake That Runs Through All Six
Rushing. Every one of these exercises has a version that looks impressive and does almost nothing, and it always involves speeding up.
Use this as your check-in. If your breath gets ragged, or your ribs pop up, or you lose count of reps, slow down and shrink the range before you add another repetition. Cutting the movement in half and doing it well beats muscling through a big range with sloppy control. Every time.
Do this set once through for your first few sessions. Two or three rounds later, when it feels genuinely easy and your breath stays even, is the right time to add a second pass.
If you are still working off a bare floor, a basic mat makes a real difference for your spine during the Hundred and the bridge. It is worth checking current prices on Amazon before you commit, since the budget options change often. And if one of these six clicked for you, or one of them felt completely impossible, tell me about it in the comments. Knowing which move trips people up helps me shape what comes next.
Putting It Together: A 20-Minute Beginner Flow and a Four-Week Progression
You have the six foundational moves. Now they need an order. The sequence below takes about 20 minutes from start to finish, and it is the one I still come back to on low-energy days because nothing in it asks more of me than I have to give.
All you need is a mat or a carpeted floor with a little room to lie down. I keep a folded blanket next to mine for extra padding under my knees during cat-cow and bird dogs. Small detail, big difference on hardwood.
Warm-Up (About 3 Minutes)
Lie on your back with knees bent and feet flat. This section wakes up your breath and your deep core without draining you before the real work starts.
Breathing and pelvic tilt (8 slow cycles): Inhale and let your belly rise. Exhale and gently tilt your pelvis so your low back presses into the floor. Move at the speed of your breath. If you find yourself racing, that is your cue to slow down, not push harder.
Cat-cow (8 reps): Come to hands and knees. Inhale, drop your belly and lift your chest. Exhale, round your spine and tuck your chin. I like a brief pause at the top of each rep to feel the stretch open through my mid-back.
Arm circles (10 each direction): Sit or stand tall. Draw slow circles, keeping your shoulders down and away from your ears. This loosens your upper back and warms the shoulders for the arm work ahead.
Main Set (About 12 Minutes)
Move from one exercise to the next with control. Rest 30 seconds between exercises if you need it. That rest is part of the workout, not a failure of it.
- Modified Hundred: Lie on your back, knees bent, feet flat. Lift your head and shoulders and extend your arms alongside your hips. Pump your arms up and down about 2 inches for 5 to 8 breaths. If your neck starts to complain, support your head with one hand.
- Bridges: 8 reps. Knees bent, feet hip-width, arms relaxed. Press through your heels to lift your hips, squeeze your glutes at the top, then lower one vertebra at a time.
- Dead Bug Toe Taps: 8 reps per side. Knees stacked over hips, arms reaching toward the ceiling. Lower one foot to tap the floor, then bring it back. Your low back stays pressed down the whole time. If it lifts, shorten the reach.
- Bird Dogs: 6 reps per side. From hands and knees, extend one arm and the opposite leg, reaching long, then return. Picture balancing a mug of coffee on your low back. Spill it and you have lost your stability.
- Clamshells or Side Leg Lifts: 10 reps per side. Lie on your side with knees bent and stacked. Open the top knee like a clamshell, or keep the leg straight and lift it. Keep your hips still and let the movement come from your hip, not your waist.
- Seated Spine Stretch: Sit tall with legs extended slightly apart. Inhale to grow taller, exhale to fold forward and reach through your arms. Take 3 long exhales here before rolling up.
Cool-Down (About 5 Minutes)
These moves signal your nervous system that the work is done. Do not skip them if you can help it.
- Knees-to-Chest: Lie on your back and hug your knees in toward your chest. Rock gently side to side if it feels good.
- Supine Twist: Still on your back, let both knees fall to one side and turn your head the other way. Breathe there, then switch sides.
- Child’s Pose: Kneel and sit back toward your heels, arms reaching forward. Stay for several breaths and let your back widen.
- Extended Exhale Breathing: Lie on your back. Inhale for a count of 4, exhale for 8. Do 6 breaths. The long exhale is what does the work here.
Your Four-Week Progression
Beginners get hurt by doing too much too soon, not by doing too little. This plan builds slowly on purpose.
- Week 1: Two sessions, main set only. Warm-up and cool-down are optional if time is tight.
- Week 2: Three sessions. Add 2 reps to every exercise in the main set. For the Hundred, that means 2 extra breaths.
- Week 3: Three sessions, and repeat the main set twice in one session with a 1-minute rest between rounds.
- Week 4: Three sessions. Take the Hundred to 10 full breaths and try straight-leg toe taps in dead bug. If your back complains, keep one heel down as you tap.
How to Progress Without Rushing
Add difficulty before you add speed. When the reps feel easy and your pelvis stays quiet, without rocking or arching, you have earned more range or more leverage. In dead bug, extend the leg further from your body. In clamshells, loop a resistance band above your knees. What you should not do is speed up the tempo to make it feel harder. Slow, controlled reps build more strength than fast, sloppy ones, and they keep your joints happy.
Short on time? Any 8-minute slice of this flow still counts. I have done just the warm-up and cool-down on hectic days, and it was enough to keep the habit alive. Through your first month, showing up consistently does far more for you than longer sessions ever will.
If you need a mat or a small pillow for support, check current prices on Amazon. And if you give this flow a try, tell me how it went in the comments. I read every one.
Form Mistakes to Fix, Safety Notes, and Making It a Habit
Most beginners I’ve taught online hit at least one of the mistakes below in their first month. None of them mean you’re doing it wrong. They mean your brain is busy remembering what comes next, and your neck quietly volunteered to cover the load.
Neck and jaw tension: the number one beginner issue
Watch for your chin jutting forward and your throat working hard. That’s your neck doing the job your abs should be doing. The fix is small: keep the chin slightly tucked, like you’re holding a plum under it, and let the back of your head stay heavy on the mat.
During the Hundred, leave your head down entirely until your abs can hold it up without strain. Nobody’s timing you. Head down, knees bent, feet on the mat is a complete Hundred. Add the head lift weeks later, when it feels easy.
The jaw surprises people. Put a thumb on one side of your jaw and a finger on the other, then do ten pumps of your arms. If you’re clenching, you’ll feel the muscle bulge. A hard-set jaw almost always travels with a tight neck, so softening one loosens the other. Try the Hundred with your lips together but your back teeth slightly apart. It feels strange for two sessions, then it’s just how you do it.
One more check: rest two fingers lightly on the front of your throat and curl up. If you feel cords standing out and straining, you’re pulling with your neck instead of your belly. Come back down and try a smaller curl.
Lower-back pinching during leg lowers
If your lower back pinches, arches, or burns as your legs move away from you, your pelvis lost its position. Your ribcage slid up, your abs let go, and your lumbar spine took the load.
Three fixes, roughly in the order I’d try them:
- Reduce the range. Lower your legs half as far. If it still pinches, less than that.
- Keep one foot on the mat. Slide one heel along the floor the whole time. Alternating legs is a real version of this exercise, not a lesser one.
- Slide a hand under your sacrum. The back of your hand against the mat gives instant feedback — you’ll feel the exact moment your lower back presses into it. That’s your signal the pelvis moved, and it’s time to reset.
I used the hand-under-the-sacrum trick myself for about three weeks before single-leg lowers stopped pinching. Not glamorous. It works.
When to back off, and when to stop
Soreness for a day or two after a session is normal, especially in your deep abs and inner thighs. That’s adaptation. Joint pain is not normal, and it doesn’t improve by pushing through it.
Stop the session if you feel:
- Sharp, stabbing, or shooting pain anywhere
- Numbness or tingling in your legs, feet, or hands
- Pain that shows up during the workout and is still there hours later
- Dizziness, or a headache that builds as you go
Back off, not out, when something feels mildly off. Fewer reps, smaller ranges, or an easier variation. Ten honest minutes beats thirty minutes of gritting your teeth.
Talk to your provider first if any of these apply
Pilates is low-impact, which makes it sound universally safe. It isn’t universally safe for everyone on day one.
Get clearance before starting if you’re pregnant or postpartum, recovering from abdominal or back surgery, or managing a hernia or a disc issue. And here’s the part people skip: say the word Pilates, then describe what you’d actually be doing — lying on your back, lifting your head and shoulders off the floor, curling your spine, drawing your knees toward your chest. A provider who hears \”gentle core work\” may picture something very different from the Hundred. Spelling out the movements gets you a real answer.
Same for a diastasis, the abdominal separation that can follow pregnancy, or any ongoing pelvic floor issue. Plenty of these exercises adapt beautifully, but the adaptation needs to come from someone who has assessed you in person, not from a video.
Making it a habit
Motivation shows up on day one and disappears by day nine. Habits carry you past that.
Attach the practice to something you already do without thinking. Right after your morning coffee. Before your evening shower. While the kettle heats. The existing routine becomes the reminder, so you stop relying on willpower to remember.
Then remove one decision. Lay your mat out the night before, in the spot where you’ll use it. Unroll it before bed, step onto it in the morning. Sounds trivial. It’s the single change that moved my own practice from sporadic to five days a week.
Track it with an X on a calendar. That’s the whole system — no app, no logbook, no measuring. One X per session, even a ten-minute one. After four weeks, that row of marks tells you more about your progress than how you felt on any individual Tuesday. Rough days are noisy. Four weeks of Xs is signal.
If you miss three days, don’t rebuild the plan. Lay the mat down and do five minutes of the Hundred and Bridge. Momentum restarts faster than it builds.
Before you buy anything
A mat helps — six millimeters is a good thickness for spine work on a hard floor — but a folded blanket works fine for your first few weeks. If you’d rather start with real gear, check current prices on Amazon for a beginner mat and a light resistance band. Both come up at reasonable prices, and prices shift week to week.
If you’ve been following along, tell me in the comments which cue finally made the Hundred click for you. Chin tucked? Head down? Jaw soft? That answer helps the next beginner more than anything else on this page.