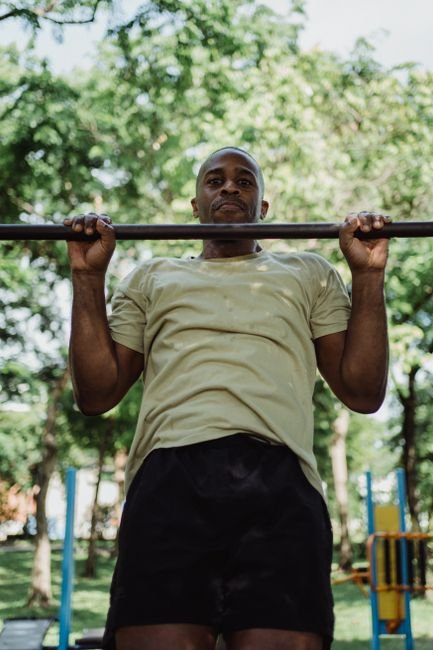
Australian Pull Ups
Australian Pull-Ups (Inverted Rows): The Beginner Gateway
You walk into a gym, look at the pull-up bar, and realize you can barely hang for ten seconds. Your lats feel weak, your grip gives out, and the idea of pulling your entire body weight upward seems impossible. Most people quit right here. They assume upper-body pulling strength is something you either have or you don’t.
That assumption costs them months of progress. The Australian pull-up—also called the inverted row—offers a way out. It lets you build horizontal pulling strength using your body weight at an angle you can actually control. For busy adults who train at home or in packed commercial gyms, this movement is the logical starting point that most programs skip entirely.
What Australian Pull-Ups Actually Do
>An Australian pull-up is essentially a bodyweight row performed horizontally beneath a bar. You hang underneath a racked barbell, suspension trainer, or sturdy table edge, keep your body straight, and pull your chest toward the bar. The movement trains your lats, rear deltoids, rhomboids, middle trapezius muscles, and biceps in a coordinated pull.
From a programming standpoint, the exercise occupies the same category as bent-over barbell rows or seated cable rows. The NSCA’s guidelines for resistance training emphasize multi-joint movements that involve multiple muscle groups across more than one joint. The inverted row fits this definition cleanly: shoulder extension, scapular retraction, and elbow flexion all happen simultaneously.
The horizontal pull pattern also balances the heavy emphasis on pressing that dominates most beginner routines. If you do push-ups, bench presses, or overhead presses without an equivalent pulling volume, you create the postural imbalance that leads to rounded shoulders and occasional shoulder pain. The Australian pull-up fixes that imbalance without requiring a gym membership or complicated equipment.
Setting Up at Home
>You don’t need a power rack or suspension system to start. A sturdy table, a low bar at a park, or even a broomstick wedged between two chairs can work in a pinch. What matters is stability: whatever you use must support your body weight without shifting or collapsing.
For a classic barbell setup, set the bar at roughly hip height inside a squat rack. Lie on the floor underneath it. Reach up and grab the bar with an overhand grip, hands about shoulder-width apart. Straighten your legs so your heels rest on the ground and your body forms a straight line from ankles to shoulders. This is your starting position.
If the bar sits too low, your hips sag into the floor and you lose core engagement. Too high, and the angle becomes so steep that the movement turns into an arm curl rather than a full-back exercise. Hip height is the sweet spot for most adults starting out.
At home without a rack, a dining table can substitute if it has a thick, stable edge. Grip the edge the same way you would a bar. Keep your body rigid. The limitation here is grip comfort, so consider wrapping a towel over the edge if the wood digs into your hands.
Suspension trainers add an instability challenge that increases core demand, but they are not required for beginners. Start with a fixed bar. Master the pattern first. Add instability later when you can complete three sets of twelve clean repetitions at a challenging angle.
The Step-by-Step Technique
Walk up to the bar and stand facing it. Reach forward and grab it with palms facing away from you, hands shoulder-width apart. Walk your feet forward and lower your hips until your arms are fully extended and your body forms a straight diagonal line. Your heels stay on the floor.
Before you pull, brace your core as if someone were about to poke your stomach. Squeeze your glutes. This keeps your hips from sagging, which is the most common form breakdown. Your body should stay rigid from shoulders to ankles throughout the set.
Initiate the movement by retracting your shoulder blades—pinch them together and down toward your back pockets. Then bend your elbows and pull your chest toward the bar. The bar should touch somewhere between your lower chest and upper abdomen depending on your limb lengths. Pause for a brief moment at the top, feeling tension across your upper back. Lower yourself under control until your arms are fully extended again.
That full range of motion matters. Half reps feel easier in the moment, but they skip the bottom position where scapular protraction and retraction train the smaller stabilizing muscles around your shoulder blades. The ACSM’s position on resistance training highlights that full range of motion produces better strength and hypertrophy outcomes than partial reps across most populations.
Breathe continuously. Exhale as you pull yourself up. Inhale as you lower. Holding your breath creates unnecessary tension that distracts from the muscles you are actually trying to train.
Angle Progression: Finding Your Level
The beauty of the Australian pull-up is its scalability. By adjusting your foot position, you change the percentage of body weight you are lifting and the leverage your muscles must overcome.
High Angle (Beginner): If the bar is at chest height and you stand nearly upright, the movement becomes very light. This version works for absolute beginners, older adults returning to exercise, or anyone rehabilitating from a shoulder injury. Focus on squeezing the shoulder blades together at the top even if the resistance feels minimal.
Hip Height (Standard): With the bar at hip height and legs extended, you are lifting roughly fifty to sixty percent of your body weight depending on your proportions. This is the standard starting point for most adults. Work here until you can perform three sets of ten to twelve repetitions with good form.
Low Angle (Intermediate): Lower the bar to knee height or elevate your feet on a box or bench. Your body becomes more horizontal, which increases the load and shifts more emphasis onto the lats and upper back. The exercise now approaches the difficulty of a full horizontal row with significant external load.
Feet Elevated (Advanced): Placing your feet on a bench while your hands stay low increases the percentage of body weight you are pulling and changes the line of pull slightly. This variation challenges the upper back and rear deltoids more aggressively. It also demands greater core stability to prevent the hips from dropping.
If you outgrow all of these variations, you can add a weight plate on your chest or wear a loaded backpack. But most busy adults training two to three times per week will spend months progressing through the angles before they need external load.
Common Mistakes That Waste Your Time
Sagging Hips: When your core fatigues, your hips drop toward the floor. This turns a back exercise into a weird push-up hybrid and strains your lower back. Fix it by squeezing your glutes and bracing your abs before every rep. If you cannot maintain the straight line, stop the set.
Pulling with the Arms First: Many beginners initiate the movement by yanking with their biceps before engaging the shoulder blades. This limits back activation and turns the exercise into an arm curl. Lead with your shoulder blades. Retract them first, then bend the elbows.
Flaring the Elbows: Letting your elbows shoot out to a ninety-degree angle puts your shoulders in a compromised position. Keep your elbows tucked at roughly forty-five degrees from your torso. This angle recruits the lats effectively while keeping the shoulder joint in a safer alignment.
Rushing the Negative: The lowering phase—called the eccentric—is where a significant portion of muscle damage and subsequent adaptation occurs. Research supported by the ISSN on hypertrophy mechanisms consistently shows that controlled eccentric tempos contribute to muscle growth. Take two to three seconds to lower yourself. Do not collapse back to the start.
Inconsistent Angle: Some people set the bar at one height, perform a few reps, then unconsciously inch their feet closer to make it easier. Pick your angle. Own it. If you need to make it easier, do so deliberately rather than cheating mid-set.
How to Program It
Treat the Australian pull-up as your primary horizontal pull movement if you are a beginner. Perform it two to three times per week on non-consecutive days. Start with three sets of eight to ten repetitions at an angle that leaves you with two reps in reserve at the end of each set.
When you can hit three sets of twelve with clean form, progress. Either lower the bar, elevate your feet, or slow down the eccentric phase. The principle of progressive overload does not require barbells. Your body weight provides plenty of resistance if you manipulate the leverage intelligently.
Pair Australian pull-ups with a pressing movement in the same session. Push-ups and inverted rows complement each other perfectly for a minimal-equipment home routine. Perform them as a superset—one set of rows, brief rest, one set of push-ups—to save time and keep your workout balanced.
The Takeaway
You do not need to master a full pull-up on day one. You need a movement that builds the foundational strength and body awareness required to get there. The Australian pull-up gives you exactly that. It scales from a near-vertical beginner row to a challenging horizontal pull that rivals weighted rowing variations. It requires minimal equipment, trains the muscles that keep your shoulders healthy, and fits into a twenty-minute home workout without complaint.
Start at hip height. Master the straight-body position. Progress the angle when your reps get easy. Do the work consistently, and within a few months you will look back at that pull-up bar with the confidence that your back can actually handle what you are asking it to do.
About the author: href=”https://www.apexfito.com/liam-smith-author-founder-of-apexfito/”>Lia m Smith is the founder of Apexfito and writes evidence-based training guides and gear reviews.
Medical & Editorial Review: This article was reviewed by Liam Smith for accuracy and safety. Content is for educational purposes only.
Related reading:
One Comment