Knee Pain When You Train? 8 Bodyweight Exercises That Help
Full disclosure: Some links in this article are affiliate links. We may earn a small commission at no extra cost to you if you make a purchase through them. Our recommendations are based on what real users report, not on commission size.
Why Knees Ache When You Lift and Run, and the Red Flags Worth Respecting
Achy knees rarely announce themselves. First you notice a dull throb on the stairs. A week later, the last two sets of squats feel off. Nothing popped, nothing swelled, you can still walk, so you keep training and assume it will settle down.
It usually doesn’t settle down on its own. It also usually isn’t a torn meniscus. I’ve watched lifters spend months avoiding squats out of fear, and I’ve watched others push through a hot, swollen knee for six weeks until a doctor told them to stop. The difference between those two groups came down to reading a few signals early.
Three problems cause most non-traumatic knee pain
If your knee started hurting gradually, with no fall, twist, or collision, it’s almost always one of these:
- Patellofemoral pain. Ache around or under the kneecap, worse with squats, lunges, stairs, and long sits. The kneecap isn’t gliding smoothly against the femur, often because the quads and glutes aren’t controlling the leg well enough under load.
- Patellar tendon irritation. A more pinpoint ache just below the kneecap, worst on the first few reps and again a few hours after training. Common in runners who added mileage and lifters who added jump work in the same month.
- IT band friction. Pain on the outside of the knee at one consistent spot, showing up after a certain distance or a certain number of squats. It’s tied to hip control and to a sudden jump in downhill running or weekly mileage.
None of these are structural disasters. All three respond to the same approach: load the knee and hip with controlled bodyweight work, build capacity gradually, and stop adding volume faster than the tissue can absorb it.
Your 24-hour response is the best feedback tool you have
Pain during a set tells you something. Pain the next morning tells you more. I have people rate their knee twice, right after training and again the next morning. If the morning number is higher than their normal baseline, that session was more than the knee could handle that day.
Here’s the range I give beginners. Keep symptoms at a 3 out of 10 or lower while you train, and be back at baseline within 24 hours. If pain climbs past a 3 or 4, or you wake up stiffer and sorer than yesterday, cut volume but keep the movement pattern. Trimming total training by roughly a third while you add the exercises below works better than stopping completely. Tendons and joints handle steady load far better than they handle sudden rest.
Red flags that mean see a professional first
- Sharp, pinpoint pain you can cover with one finger
- Locking, catching, or the knee giving way
- Swelling that appears within an hour of training
- Pain that gets worse week over week even after you back off
- Inability to bear weight or fully straighten the knee
Any of those and you want a physical therapist or sports medicine doctor looking at it before you train around it. That isn’t caution for its own sake. Some of these findings change which exercises are safe for you, and no article can sort out which ones apply to your knee.
One expectation to set before we start. The eight exercises in this routine build strength and control in the quads, glutes, and hips. They don’t diagnose anything, they won’t fix a mechanical problem a clinician needs to examine, and they aren’t a substitute for an evaluation. What they do well is give your knee a consistent, equipment-free way to get stronger week after week.
Before You Start: A Two-Minute Knee Check and Warm-Up
I used to skip this part. Lace up, get under load, deal with the ache later. What finally changed my training was spending two minutes before the first rep figuring out what my knee was actually doing that day. Two minutes sounds like nothing, but it decides whether a session builds you up or quietly grinds you down.
Three steps: score the pain, run two quick tests, then warm up and set up. Do all of them before the first exercise.
Step 1: Score your knee from 0 to 10
Rate it as it feels right now, not how it felt last week.
- 0 to 3: Workable. Train as planned. If the pain settles back down within an hour after you finish, you are in a good range.
- 4 to 6: Cut one or two sets and shorten the range of motion. Recheck after the warm-up before you commit to the full session.
- 7 or higher, or any sharp catching: Skip the workout. Move through the warm-up gently, ice if that helps you, and try again in a day or two.
The rule that has served me best: if pain lingers into the evening, that session was too much. Drop a set or two next time. Not forever, just next time.
Pain that wakes you at night, swelling that will not go down, or a knee that feels like it might give way when you walk belongs with a doctor or a physical therapist. That is not a bodyweight circuit problem.
Step 2: Two movement tests
You are looking for asymmetry here, not perfection.
Chair squat. Stand in front of a chair, feet shoulder-width, and sit down slowly under control, then stand back up. Do three. Watch for a knee that caves inward, a side that stalls halfway up, or a side that makes you grab the armrests.
Ten-second single-leg stand. Stand on one foot, hands out for balance if you need them. Hold for ten seconds, then switch. Some wobble is normal. Note which side feels weaker, shakier, or takes longer to settle.
Start every exercise in this routine with the weaker leg. Leading with that side keeps your rep counts honest, because the strong side sets the pace and the weak side just tries to keep up.
Step 3: Five minutes of warm-up
- 3 to 5 minutes of easy walking, light cycling, or marching in place. Conversational effort, not a sweat session.
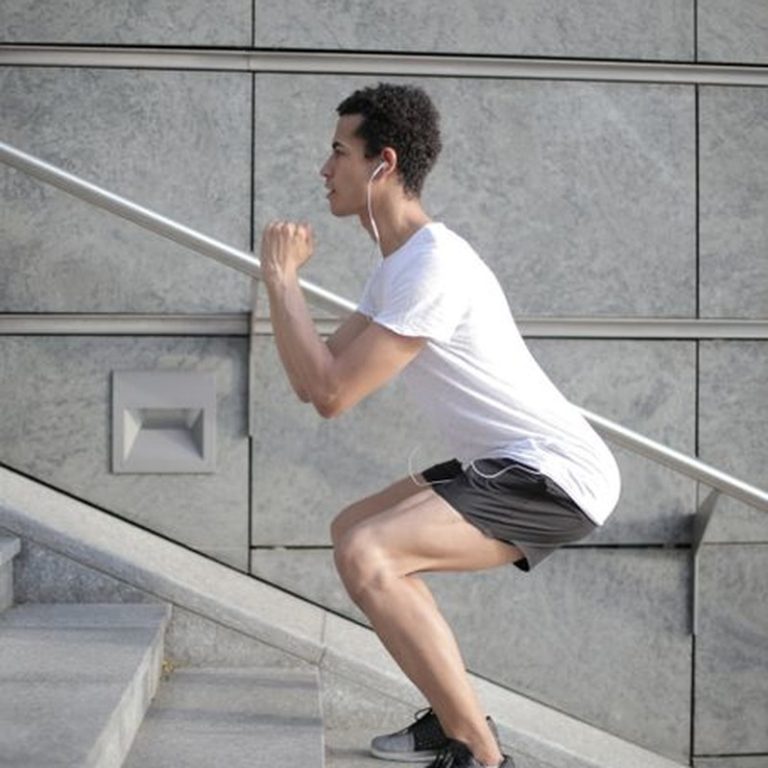
- 10 slow bodyweight squats. Three seconds down, brief pause, stand up. Do not chase depth.
- 10 leg swings per side, front to back, one hand on a wall for balance.
If your knee feels better after this than it did before, you are cleared to start. If it feels worse, that is your answer for the day.
Step 4: Surface, shoes, and chair height
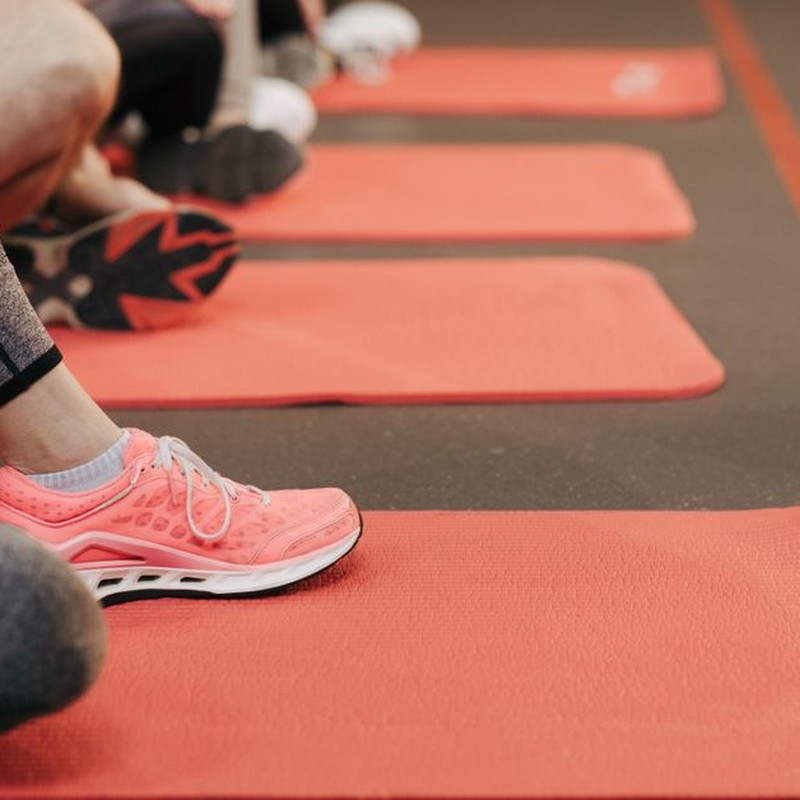
Train on a hard, non-slip surface. A thin mat over a wood floor is ideal. A thick rug is the wrong call. I learned that one with heel slides on plush carpet, where my heel caught mid-rep and my knee jammed forward. Firm ground lets the heel glide. If you need a thin mat, check current prices on Amazon before you buy, since anything too cushy works against you here.
For standing work, wear shoes with a flat, stable sole, or go barefoot if your feet and ankles handle it. Cushioned running shoes add wobble during wall sits and step-ups. Wobble at the knee is exactly what you are trying to avoid.
For seated work, pick a chair that puts your knees at roughly 90 degrees when you sit. A low couch turns every sit-to-stand into a deep squat. That is more load than most beginners need on day one, and it is a common reason people wake up sore and blame the exercises instead of the furniture.
Run this check before every session, including the easy ones. It takes two minutes and it tells you how hard to push that day. Baseline set. On to the eight exercises.
Exercises 1 Through 4: Quad Control and Isometric Work
When a knee is irritated, heavy squats and lunges are off the table for a while. That doesn’t mean you sit around waiting for it to calm down. These first four exercises teach your quad to fire without grinding the joint, and they build the base of strength that makes everything later in this routine safer. I’ve run this exact sequence with runners coming off a knee flare-up and lifters who can’t squat without that pinch under the kneecap. You need a mat or a carpeted floor. That’s it.
Do them in order. The first three are gentle. The wall sit is where you’ll feel the burn.
1. Quad Set
Setup: Sit or lie down with one leg straight. Bend the other leg if that’s more comfortable. Press the back of your straight knee down into the floor. Not a slam — a firm, steady push.
Hold: 5 seconds, then relax completely.
Reps and sets: 10 reps, 2 to 3 sets.
What you should feel is the muscle just above your kneecap tightening. If you feel a grind or a sharp pain inside the joint, you’re pressing too hard or too deep. Back off. I put a rolled-up towel under the knee so I have something to press into. It gives feedback and keeps the motion honest.
This one looks like nothing. It isn’t. The quad set is how you wake up the muscle that supports your knee without loading it.
2. Straight-Leg Raise
Setup: Lie on your back. Bend one knee and plant that foot on the floor to protect your low back. Keep the other leg straight. Lock the knee first by tightening your quad and pressing the back of the knee down, then lift the straight leg 12 to 18 inches. Hold 3 seconds. Lower over 3 seconds.
Reps: 10 to 12 per side.
If your low back arches off the floor as you lift, shorten the range or plant the bent-knee foot more firmly. A small arch is normal. A big one means you’re lifting too high or your core isn’t ready for it. Height doesn’t matter here. The lock and the control do.
3. Heel Slide
Setup: Lie on your back. Slide one heel toward your butt as far as it travels without pain, then straighten the leg slowly. That’s one rep.
Reps: 15 per side.
Wear a sock on a smooth floor. It makes the slide smoother and stops you from tensing up halfway through. Stopping short of pain is the entire point. If you feel a pinch at 70 degrees of bend, stop at 60. Next week you might get to 65. That counts as progress.
Don’t rush the return. The slow straightening is where a lot of the strengthening happens. Count one, two, three on the way out. Say it out loud if that’s what it takes — I’ve done that more times than I can count when my own knee was acting up.
4. Wall Sit
Setup: Stand with your back flat against a wall, feet shoulder-width apart and roughly a foot or two away from the wall. Slide down until your knees are around 60 degrees. Not a full 90-degree chair pose.
Hold: 20 to 45 seconds for 3 rounds. Rest 30 to 60 seconds between rounds.
Skip the full 90-degree version if it pinches under your kneecap. I’ve watched too many people force a deep wall sit because they think shallower doesn’t count. Shallower counts. A 60-degree hold you can do without pain beats a 90-degree hold that leaves you limping to the car.
Keep your back flat and your knees tracking over the middle of your feet. If your kneecap drifts inward, push your feet down and slightly out. That lines the joint back up and keeps the quad doing the work.
The Two Mistakes That Show Up Most
Rushing the tempo. Slow, controlled reps are where the strength gain comes from when a knee is irritated. Move fast and you’re just traveling through the motion. Count the seconds out loud. I do it in my living room and my dog stares at me. That’s fine.
Letting the knee cave inward. It happens on wall sits and straight-leg raises more than anywhere else, usually in the last few reps when you’re tired. Push the foot down and slightly out, and keep the kneecap tracking over the middle of the foot. Same cue, both exercises.
When to Back Off
If any of these four produces a sharp pain in one spot, reduce your range of motion first. Go smaller. Only drop the exercise entirely if the pain keeps showing up even at a tiny range — that’s a signal to get the knee looked at, not to push through it.
If a mat or a foam roller would make these more comfortable, check current prices on Amazon. And if you run this sequence, tell me in the comments how your knees respond.
Exercises 5 Through 8: Hips, Glutes, and Real-Life Movement
Your knees don’t work alone. Every time you stand up, climb a stair, or push off the ground, your hips and glutes are supposed to share the load. When they’re weak, the knee joint picks up the slack. That’s why the back half of this routine goes after the muscles above the knee.
These four moves look simple. They are not easy. I’ve used them with runners coming back from patellofemoral pain and with lifters who couldn’t squat without aching, and the pattern holds: strengthen the hip, and the knee quiets down.
Exercise 5: Glute Bridge
Lie on your back with knees bent and heels about 12 inches from your butt. Press through the whole foot, not just the toes or heels, and lift your hips until they’re level with your knees. Stop there. Don’t arch your low back to get higher. Squeeze the glutes hard for a full two seconds at the top, then lower slowly. Do 12 to 15 reps for 2 sets.
The most common mistake is pushing the hips too high and feeling the work in the low back. If your hamstrings cramp, slide your heels a few inches closer to your body. This one carries straight over to getting out of a couch or a car seat without wincing.
Exercise 6: Sit-to-Stand
Find a sturdy chair. Sit with feet flat and knees bent about 90 degrees. Stand up without pushing off with your hands. Then sit back down slowly, taking a full three seconds to lower. That slow descent is what builds control, so don’t flop into the seat. Do 10 reps.
If you can’t stand without hands yet, use a taller chair or push lightly off your thighs, then work toward no hands. This is the most real-life move in the routine. You do it getting out of bed, off a toilet, out of a lawn chair. The control you build here is what keeps your knee from locking up during those moments.
Exercise 7: Step-Up
Use a step 6 to 8 inches tall. Most people grab a 12-inch box and then wonder why their knee hurts. Go lower than you think you need. Set your whole foot on the step. Lead with the achy leg only if it’s completely pain-free. If it isn’t, lead with the stronger leg and lower with the other. Push through the top leg to stand, then lower with control. Do 8 to 10 reps per side. Hold a wall or rail if balance is shaky. There’s no shame in it.
I tried this on a low step at home after a run and my knee felt far better than it did with my usual 18-inch plyo box. The lower height lets the hip and glute do the work instead of forcing the knee to grind. Stairs are usually the first thing that hurts when a knee acts up, so this one pays off fast.
Exercise 8: Clamshell
Lie on your side with knees bent about 45 degrees and feet stacked. Keep your hips perpendicular to the floor. Open the top knee like a clamshell, then close it slowly. Do 15 reps per side.
Rest a hand on your top hip to feel whether it’s moving. If the hip rolls backward, you’re using your low back instead of your glute. That’s the cheat. The clamshell is small, but it hits the gluteus medius, which stabilizes your pelvis on every step you take. A weak glute medius is a common reason runners get pain on the outside of the knee. It looks easy. Don’t rush it.
How to Tell You’re Cheating
The bridge and the clamshell are the two easiest moves in this routine to fake. If you feel most of it in your low back or the front of your hip, you’re arching instead of squeezing. Stop, drop your ribcage down, tuck your pelvis slightly, and try again. I’ve had to reset mid-set more times than I can count.
One more rule: don’t add resistance until all eight moves have been pain-free for a full week. A light band or a small dumbbell comes later, not in week one. Your knees have to earn the right to load.
If you’re already thinking about picking up a band, you can check current prices on Amazon. And if you’ve tried these four moves, share your experience in the comments. Which one helped your knees the most?
Your Weekly Plan, Progression, and Recovery Rules
You have eight exercises. Now you need a schedule you can repeat without overthinking. For my own achy knees after long runs, the template is simple: run the full circuit three days a week, with at least one rest day between sessions. Monday, Wednesday, Friday works for most lifters and runners. Tuesday, Thursday, Saturday is fine if that fits your life. Spacing is what matters. Your knee needs the easy days as much as the training days.
If you lift or run on the same day, do the circuit after your main workout or as a separate session at least six hours later. I split it when my main session includes squats or hard running intervals. When my legs feel good and my form is still crisp, I tack it onto the end. Never rush the circuit to check it off. Sloppy reps on a tired knee turn small aches into two-week setbacks.
Here is a weekly layout that covers the basics:
- Day 1: Full circuit, two or three sets of each exercise.
- Day 2: Easy walk, easy cycling, or rest.
- Day 3: Full circuit.
- Day 4: Rest or 10 minutes of easy movement.
- Day 5: Full circuit.
- Day 6: Main lifting or running session, plus easy walking if you feel stiff.
- Day 7: Rest.
If your main sport already fills five or six days, drop the circuit to two days a week for the first two weeks. Three sessions is the goal, not a requirement. A knee that stays calm with two sessions beats one that gets irritated by four.
How to progress over six weeks
Progression here is not about adding weight every session. Add a little more time under tension, then a little more resistance, then back off when your knee says no.
Weeks 1 and 2: Do two sets of each exercise with no added resistance. Slow the tempo. I use a two-second lower, a one-second pause, and a controlled lift. You should feel your quads and glutes working, not a sharp pinch inside the knee. If two sets feel like plenty, stay there. The first two weeks are for learning positions.
Weeks 3 and 4: Pick one upgrade, not both. Either add a third set or slow the lowering phase to three seconds. I usually add the third set first because it is easier to recover from. If you choose the slower lowering phase, cut your reps by one or two. A three-second lower on a single-leg bridge will humble you fast.
Weeks 5 and 6: Add a light resistance band to the glute bridges and clamshells, or hold a small dumbbell for the step-ups. Keep the band light. You want extra glute activation, not a max-effort set. No band? A slow three-second tempo is still a worthy progression. Same for step-ups: a gallon of water or a backpack with a few books works at home.
After week six, repeat the cycle. Start back at two sets with no resistance for one week, then move through the progressions again. Your knee will tell you if you moved too fast. Mild soreness in the quads and glutes is normal. Pain inside the joint is not. If knee pain shows up two hours after training, the next session needs to be easier, not longer. That rule has saved me more training time than any brace or sleeve.
Recovery rules that carry the plan
Sleep does most of the repair work. Aim for seven to nine hours. If you are sleeping five or six and wondering why your knee is angry, fix that before you add another set. Eat enough total calories and protein, too. A knee running on a deficit and low protein has fewer materials for recovery. I aim for a palm-sized serving of protein at each meal and keep easy carbs around on training days.
On rest days, do not sit completely still if your knee feels achy. Ten minutes of easy cycling or a short walk usually feels better than full stillness. Blood moving through the joint helps it feel less stiff. Keep the effort easy enough that you could hold a conversation. If walking hurts, try cycling with light resistance. If cycling hurts, try a gentle walk on flat ground. Find the one that feels better and repeat it.
Other recovery basics that matter more than gadgets:
- Sleep 7 to 9 hours.
- Eat enough calories and protein.
- Walk or cycle easy on days between sessions.
- Skip heavy knee-dominant work if the joint is swollen or hot.
- Back off the circuit if pain lasts more than a day after a session.
A basic resistance band set and a foam roller cover almost everything you would add later. I keep a cheap band set in a drawer and a foam roller by the couch. They get used more than any fancy tool I have bought. Check current prices on Amazon before you buy, since band sets and knee sleeves swing a lot in price. The inexpensive set does the same job as the premium one. Put the money you save toward good shoes or a few sessions with a physical therapist if your knee keeps flaring.
What to do next
Start with week one tomorrow. Two sets, no resistance, slow tempo. Write down how your knee feels during the session and two hours after. That note is your real progress tracker. If the joint stays calm, move to week three. If it complains, repeat week one. There is no prize for rushing a cranky knee.
Drop a comment and tell us which of the eight exercises gave your knee the most relief, and what movement you are still working around. Other lifters and runners read those threads and borrow the fixes that worked. If you are shopping for a band set or a knee sleeve, check current prices on Amazon first. Prices move around, and the basic gear is all you need to run this plan.