Lower Back Pain: Exercises and Daily Habits That Actually Help
Full disclosure: Some links in this article are affiliate links. We may earn a small commission at no extra cost to you if you make a purchase through them. Our recommendations are based on what real users report, not on commission size.
Lower Back Pain: What’s Actually Going On (And When to Get Help)
If your lower back has been nagging you for weeks, you’re in a very large club. Roughly eight in ten adults deal with it at some point, and for people who sit all day and then lift, it’s close to a rite of passage. The frustrating part is how vague the advice gets. Rest more. Stretch more. Buy a new chair. None of it explains why your back hurts on a Tuesday morning when you didn’t do anything unusual the day before.
After years of my own flare-ups and watching clients run the same loop, I’ve stopped looking for the one bad rep. The pain is almost never about a single moment. It’s a long, quiet accumulation.
The slow build, not the single moment
Eight hours in a chair shortens your hip flexors and shuts down your glutes. Your lower back ends up doing work it wasn’t built to do all day. Then you get to the gym and deadlift a weight your core never learned to brace against, and tissue that’s been carrying the load for months finally complains.
Three things tend to show up together:
- Glutes that don’t fire. When your hips can’t extend properly, your back takes over. Test it standing: squeeze one glute hard. If the movement feels foreign, or you cramp in your hamstring instead, you’ve found part of the problem.
- A core that lags behind the load. Bracing isn’t sucking in your belly. It’s creating tension around your spine before the weight moves. Most beginners brace after the bar is already off the floor.
- A daily routine that never lets the tissue settle. Sitting, driving, how you sleep, the way you pick up a laundry basket — those add up faster than one hard training session.
None of it is dramatic, which is exactly why it gets ignored until it isn’t.
Red flags: stop and call a doctor
Most back pain is mechanical and responds well to smart movement. Some of it isn’t. Run through this list before you try a single exercise in this guide. If any of it applies, skip the workout and get seen today, not next week.
- Pain that shoots down one leg, especially past the knee
- Numbness or tingling in the groin or saddle area
- Loss of bladder or bowel control
- Sudden severe pain after a fall or car accident
- Unexplained weight loss, fever, or pain that wakes you at night
- Leg or foot weakness that’s getting worse instead of better
These symptoms are uncommon, and I’m not trying to scare you. But they point to nerve compression or something structural that needs imaging and a real diagnosis, not a mobility routine off social media. Saddle numbness and bladder changes are urgent — go to an emergency room rather than waiting on a clinic appointment.
If you’ve been told you have a disc issue
Plenty of people hear “bulging disc” or “degenerative disc disease” and assume their lifting days are finished. That’s not what the evidence shows. Imaging studies have found disc bulges in a large share of people with zero back pain, so the picture on your MRI doesn’t always explain the pain you feel.
What a diagnosis does mean is that you train differently for a while. Keep the spine neutral under load, stay away from heavy weights in ranges that reproduce the pain, and build tolerance gradually. A deadlift isn’t off the table. A rounded-back max attempt is. If a movement sends symptoms further down your leg, back off and bring it up with your doctor or physical therapist.
The goal isn’t a looser back
Twenty minutes of floor stretching feels good, and there’s nothing wrong with it. But if stretching is your whole strategy, you’re chasing the symptom. Your back often isn’t tight because it needs to be longer. It’s guarding because it doesn’t trust the muscles around it to do their job.
What actually helps is a core that braces on command, glutes that drive hip extension, and a daily setup that stops re-irritating the tissue. The rest of this guide covers exactly that: a bodyweight routine you can do at home with no equipment, progressions for when it gets easy, and habit changes that matter more than most people expect.
One practical note before we go further. If you’re thinking about picking something up for this — a mat, a foam roller, a lumbar support for your chair — check current prices on Amazon and compare before you buy. The bodyweight work here costs nothing, but a twenty-dollar item that keeps you consistent beats a two-hundred-dollar gadget you use twice. And if something finally helped your back, leave it in the comments. Readers’ practical tips are usually better than anything a textbook says.
Daily Habits That Take Pressure Off Your Lower Back
Most lower back pain doesn’t come from one bad lift. It comes from eight hours of sitting followed by one bad lift. That part never gets mentioned at the gym, and it’s the part you can actually control without buying anything or booking an appointment.
Here are the habits that made the biggest difference for me and for the desk workers and lifters I’ve trained. None of them take more than a few minutes.
Stand Up Every 30 Minutes (Seriously, Use a Timer)
Set a repeating alarm on your phone or watch. When it goes off, stand up. That’s it. Walk to the water cooler, do a lap around the kitchen, or just stand at your desk and roll your shoulders back a few times.
Sixty seconds is enough. The goal isn’t a workout, it’s breaking the cycle of your hip flexors staying shortened and your glutes going to sleep. I started doing this two years ago during a stretch where I was writing eight hours a day. By Friday of week two, my back felt noticeably different.
Want those 60 seconds to count for more? Add five slow standing hip hinges. Hands on your hips, push your butt back, chest up, then stand tall. It resets your posture better than any stretch I’ve tried.
Fix Your Sitting Position Once, Then Stop Thinking About It
You don’t need a $900 chair. You need three things lined up:
- Feet flat on the floor. Not crossed, not tucked under the chair.
- Hips slightly higher than your knees. If your chair sits too low, use a firm cushion or a folded blanket.
- Lower back supported, so you can feel what neutral actually feels like.
That third one is where a rolled-up towel comes in. Roll a bath towel into a cylinder about the thickness of your forearm, put it behind your lower back, and lean into it. Most people with back pain have lost any sense of what a neutral spine feels like, and the towel gives them something to feel for. After a week or two you’ll catch yourself the moment you start to slump.
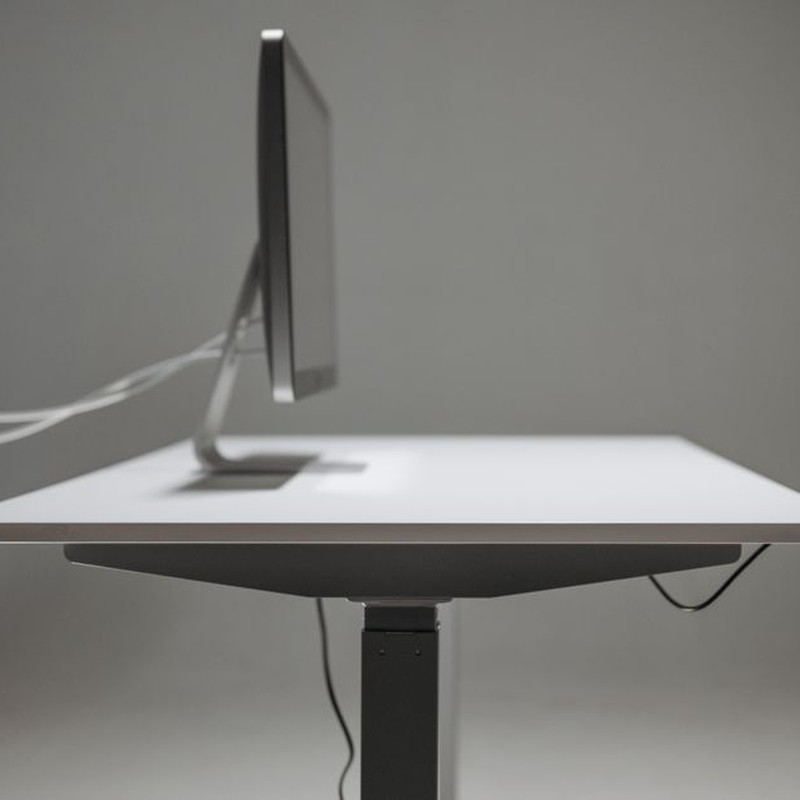
Put your laptop on a stack of books so the screen sits at eye level. Crane your neck forward all day and your upper back rounds, which your lower back pays for by 4 p.m.
Lifters: Your Warm-Up Isn’t Optional Anymore
Five minutes before you touch a barbell. That’s the whole ask.
This is the exact circuit I run before every heavy session, and it takes less time than scrolling your phone between sets:
- Glute bridges: 12 slow reps, squeeze at the top for two seconds
- Bird dogs: 8 per side, pause when the arm and leg are extended
- Cat-cow: 10 slow reps, breathe through the whole thing
- Bodyweight hip hinges: 10 reps, hands on hips
Cold glutes and a stiff lower back are a bad combination under a loaded bar. Warm tissue tolerates load better, and bird dogs wake up the deep core muscles that stabilize your spine while you squat or pull.
One more rule: if a lift hurts your back, stop and drop the weight. Not forever, just for that session. Pain that’s sharp, one-sided, or shoots down your leg is a signal to back off. Rebuild at 60 percent of what you were using and film a set from the side to check your form. Ego is expensive. A disc is more expensive.
Learn the Hip Hinge and You’ll Use It All Day
Watch people pick up a grocery bag. Most bend at the spine, rounding their lower back while their hips stay put. That’s the same pattern that hurts them in the gym, just with lighter weight.
Here’s how to practice the hinge at home, no equipment:
- Stand with feet hip-width apart. Hold a broomstick or rolled towel against your back so it touches your head, your upper back, and your tailbone.
- Keep those three contact points and push your hips straight back, like you’re closing a car door with your butt.
- Let your knees bend slightly, but don’t turn it into a squat. Chest stays up.
- Stop when you feel a stretch in your hamstrings or when the towel loses contact with your lower back. That’s your limit for now.
- Drive your hips forward to stand tall.
Three sets of 10 every morning for two weeks. Then use it for everything: laundry baskets, dog food bags, your toddler, and every deadlift and row you do after that.
If a foam roller or a lumbar support cushion for your desk chair would make this easier to stick with, check current prices on Amazon. A rolled towel works fine in the meantime.
Have you tried any of these? Tell me what helped and what didn’t in the comments. I read every one.
Core Stability Exercises for Beginners (No Equipment Needed)
When your lower back is angry, the last thing you want is complicated equipment or a 45-minute routine. I have tweaked my own back more than once from heavy deadlifts and long days hunched over a laptop, and the exercises below are the ones I hand to beginners first. No gear. Just floor space and about 10 minutes.
The point is not burning calories. It is teaching your deep core and glutes to hold your spine steady so your lower back can stop gripping. Muscle fatigue is fine. Sharp pain is not. If an exercise produces a sharp stab, stop and skip it that day.
Do these daily if you can. Two sets of each is a good starting dose. Short on time? Dead bug and bird dog give you the most return.
Dead Bug
This is my go-to for learning how to brace without holding your breath. Lie on your back, arms straight up toward the ceiling, knees bent at 90 degrees so your shins are parallel to the floor.
Press your lower back into the floor. You should feel a gentle tightening through your abs. Slowly lower your right arm and left leg toward the floor, then bring them back. That is one rep. Do 8-10 per side.
Common mistake: your lower back lifts as you extend. Cut the range. Only reach as far as you can while your back stays flat. I tell clients to picture a grape under their lower back and not to squash it.
Bird Dog
Start on all fours, hands under shoulders, knees under hips. Keep your spine neutral, not sagging, not arched. Imagine balancing a glass of water on your lower back.
Reach your right arm forward and your left leg back at the same time. Keep your hips level and hold for two seconds, then switch. Do 8-10 per side.
Common mistake: kicking the leg too high so your back sags or rotates. Small and controlled beats big and wobbly. If you feel it in your lower back rather than your glutes and core, lower the leg a few inches.
Glute Bridge
Lie on your back, knees bent, feet flat and hip-width apart. Squeeze your glutes and lift your hips until your body forms a straight line from knees to shoulders. Hold two seconds at the top. Do 12-15 reps.
Feeling this in your lower back means you are arching instead of using your glutes. Tuck your pelvis first, tilting your pubic bone toward your belly button, then lift. That one adjustment changes everything. It took me weeks before my glutes actually took over.
Pelvic Tilt
Lie on your back with knees bent and feet flat. Gently flatten your lower back into the floor by rocking your pelvis. You are not lifting your hips. Hold five seconds, release, and repeat for 10 reps.
This is the gentlest way to wake up your deep core, and it is what I do in bed on mornings when my back is too sore for anything else.
Run them one after another or as a circuit with 30-60 seconds of rest between sets. Two sets of each takes about 10 minutes. Feeling good? Add a third set. Rough day? Stick to pelvic tilts and dead bugs.
Slow down. Speed hides sloppy form. Breathe the whole time instead of holding your breath.
Once these feel easy, slow the dead bug down another notch or add a light dumbbell across your hips for the glute bridge. No rush. Core stability builds over months, not days.
If you try this, tell me how it goes in the comments. And if a mat or foam roller would make floor work easier on your back, check current prices on Amazon.
Gentle Stretches and Mobility for Lower Back Relief
Stretching is where people hurt their backs the most. I have watched guys grab a foot and yank a hamstring like they were pull-starting a lawn mower, then act surprised when their back locked up two hours later. The muscles around an unhappy lower back are already guarding. Yanking on them tells your nervous system to clamp down harder.
What follows is the short list I hand to desk workers and lifters who are uncomfortable but not in an emergency. No equipment. No setup longer than a few seconds. And none of it should hurt while you do it.
Rules for every stretch below
- Breathe out as you settle in. Holding your breath tenses the exact muscles you are trying to relax.
- Hold static stretches 20 to 30 seconds. Cat-cow is the exception, where you move through 10 slow cycles instead.
- Never bounce. Bouncing fires the stretch reflex, which makes a muscle contract rather than lengthen.
- Stop before pain. A gentle pull is the target. Sharp, hot, or electrical feelings mean back off.
- Two rounds per stretch is plenty. Five rounds is not five times the benefit.
Knee-to-chest
Lie on your back with both knees bent and feet flat. Bring one knee toward your chest and put your hands behind the thigh, not on top of the kneecap. The other leg can stay flat on the floor or stay bent with the foot planted. Bent is usually friendlier when your back is sensitive. Hold 20 to 30 seconds, breathe, then switch sides.
This decompresses the lower back without wrenching it. If pulling the knee in sends pain down your leg or makes things worse, skip it and move on. That is not failure. It is a sign your back wants a different approach today.
Child’s pose
Kneel on the floor, bring your big toes together, and let your knees spread wide. Sit back onto your heels, walk your hands forward, and let your chest sink toward the floor. Breathe into the back of your ribs so you feel the lower back expand. Stay 30 seconds to a minute.
Knees complaining? Slide a pillow or rolled towel behind them, or sit on a thick book instead of your heels. Some people feel worse with the knees spread wide, so try narrower and see which one your back prefers.
Cat-cow
Set up on all fours with hands under shoulders and knees under hips. On an inhale, drop your belly, lift your chest, and tilt your tailbone up. On an exhale, round your spine and tuck your chin. Move slowly enough that your breath sets the tempo. Ten cycles.
If I could only keep one movement from this list, this is it. The gentle flexion and extension pumps fluid through the spinal segments and takes the edge off morning stiffness. Do not crank your neck at either end. If your wrists ache, do the same motion seated in a chair with your hands on your thighs, or come down onto your fists.
Piriformis stretch (figure-4)
Lie on your back with knees bent and feet flat. Cross your right ankle over your left knee, then reach through the gap and grab behind your left thigh. Pull the left thigh toward your chest until you feel it in the right hip and glute. Hold 30 seconds, then switch sides.
Tight glutes tilt the pelvis forward and drag on the lower back all day, which is why this one earns its spot. If you feel a pinch in the front of the hip, ease off the pull or let the leg drift lower. Sharp hip pinching means stop and try a seated version instead.
Two quick additions worth 90 seconds
Half-kneeling hip flexor stretch: kneel on one knee with the other foot forward, tuck your pelvis under, and squeeze the glute of the kneeling side. Hold 30 seconds per side. Desk work shortens the front of the hips, and that pulls the lower back into an arch.
Supine twist: on your back, drop both knees to one side while keeping your shoulders down. Hold 20 to 30 seconds per side. Keep it lazy. This is not a competition.
A seven-minute routine you can repeat daily
- Cat-cow: 10 slow cycles
- Child’s pose: 45 seconds
- Knee-to-chest: 30 seconds per side
- Figure-4: 30 seconds per side
- Supine twist: 25 seconds per side
- Five slow belly breaths with your back resting flat
Warm muscles stretch better, so run this right after a walk, a shower, or a light set of the exercises from the earlier sections. If you only have two minutes, do cat-cow and knee-to-chest and call it done. Consistency beats duration every time.
When to skip the stretch and call someone instead
Pain that shoots below the knee, numbness or tingling in the leg, weakness in the foot, night pain that wakes you, or numbness around the groin and inner thighs are all reasons to see a doctor rather than stretch through it. Morning stiffness that lasts more than 45 minutes most days is worth mentioning too. Stretching is a tool for tension and range of motion, not for nerve symptoms.
A cheap yoga mat or a folded blanket on a hard floor makes this routine a lot more comfortable, and a firm pillow for child’s pose is worth keeping nearby. If you need one, check current prices on Amazon and grab something basic. And if a specific stretch here finally loosened up months of tight mornings for you, tell me which one in the comments. That is how the next person reading this finds their answer.
Putting It Together: A Sample Pain-Free Routine and Recovery Tips
You have the pieces now: cat-cow, pelvic tilts, dead bugs, bird dogs, glute bridges, knee-to-chest, and child’s pose. What’s left is arranging them into a rhythm you can repeat on good days and trim back on rough ones. The version below takes about 15 minutes. I run it as a morning reset after too many hours at my desk, and as a warm-up before leg day when my back feels stiff but not sharp.
The 15-Minute Daily Routine
Do this on the floor. Move slowly enough that you can breathe through every rep. If anything sends pain down your leg, drop that exercise for the day or shrink the range until it stays quiet.
- Warm-up (5 minutes): Cat-cow, 8 to 10 slow reps. Pelvic tilts, 10 to 12 reps. Add shoulder rolls or a gentle march in place if you feel stiff.
- Main set (8 to 10 minutes): Dead bugs, 2 sets of 8 to 10 per side. Bird dogs, 2 sets of 8 to 10 per side. Glute bridges, 2 sets of 10 to 12. Rest 30 to 45 seconds between sets.
- Finish (2 to 3 minutes): Knee-to-chest stretch, 30 seconds per side, twice. Child’s pose for 30 to 60 seconds, breathing into your back ribs rather than just your belly.
That’s the whole thing. No equipment, no gym, no complicated counting. One set is fine on a bad day. If two sets feel easy and your back stays calm the next morning, add two reps before you add a third set.
A Sample Week for Desk Workers and Lifters
Aim for 4 to 6 days of gentle movement per week. You don’t need the full routine every day. Walking and easy stretching count.
- Monday: Full 15-minute routine.
- Tuesday: A 15 to 20 minute walk, then cat-cow and pelvic tilts only.
- Wednesday: Full 15-minute routine.
- Thursday: Walk, plus knee-to-chest stretch and child’s pose.
- Friday: Full 15-minute routine.
- Saturday: Something you enjoy, like a longer walk, light hike, swim, or bike ride.
- Sunday: Rest, or 5 minutes of gentle floor stretching if you feel locked up.
Lifters can slot this in on off days or as a pre-leg-day warm-up. If you’re in pain, hold off on heavy squats and deadlifts until sitting, standing, and walking all feel normal again. When you come back, test goblet squats or trap bar deadlifts if a barbell is what irritates you. Start light, two or three sets of 8. Add 5 pounds only if your back feels the same or better the next day.
Trap bar pulls have always treated my back better than straight-bar deadlifts, but that’s my back. Change one variable at a time. Swap three things in one week and you won’t know which one helped.
How to Progress Without Flare-Ups
Add reps before you add load. When you can do 2 sets of 12 dead bugs, 2 sets of 12 bird dogs, and 2 sets of 15 glute bridges with no next-day pain, add a third set. Slow down before you go heavier. A five-second dead bug hold beats a fast, sloppy one every time.
Use the next morning as your scorecard. Same or better means you earned the next step. Worse means you drop back to the last pain-free version for a week. Soreness in your abs or glutes is normal. Sharp pain, numbness, tingling, or weakness is not. If those show up, stop and get checked by a doctor or physical therapist.
Recovery Habits That Make the Routine Work
Exercises are half the story. The other half is how you sleep, sit, walk, and handle stress. These habits are boring, and they matter more than most people expect.
- Sleep position: Sleep on your side with a pillow between your knees. If you sleep on your back, put a pillow under your knees. Stomach sleeping arches your low back, so if you can’t break the habit, slide a thin pillow under your hips.
- Hydration: Your discs need water to stay spongy. Keep a bottle at your desk and sip through the day instead of chugging once at noon. Pale yellow urine is an easy target.
- Daily walking: A 10-minute walk after meals loosens a stiff back better than a lot of people give it credit for. It moves blood through the area without loading your spine hard.
- Stress: Stress turns the volume up on pain. Your jaw, shoulders, and low back tighten when you’re wound up. Try five minutes of slow breathing: inhale for 4, hold for 4, exhale for 6. Or walk without your phone.
- Desk setup: Feet flat, screen at eye level, elbows near 90 degrees. Stand up every 30 to 45 minutes. A timer beats willpower.
Optional Gear and a Note on Amazon Prices
You can start with a towel and a carpeted floor. If you want more comfort, a foam roller for your glutes and upper back, a yoga mat for floor work, and a lumbar support pillow for your desk chair all help. I used a rolled-up towel as a lumbar roll for months before I bought a real pillow, and it worked fine.
If you do decide to buy, check current prices on Amazon before you order. Prices swing often, and you don’t need the fanciest version. A basic high-density foam roller, a 6mm mat, and an adjustable lumbar pillow are enough. Skip anything that promises a cure. Nothing replaces consistent movement.
Your Next Step
Run this routine for a few weeks, 3 to 4 sessions per week, plus daily walks. Don’t judge it after two days. Back pain tends to improve in waves, and consistency beats intensity when your back is angry.
What’s worked for you? Share your experience in the comments. If you try this routine, tell us which exercise helped most and which one you had to modify. Your note might be the thing that gets another desk worker or lifter out of pain.