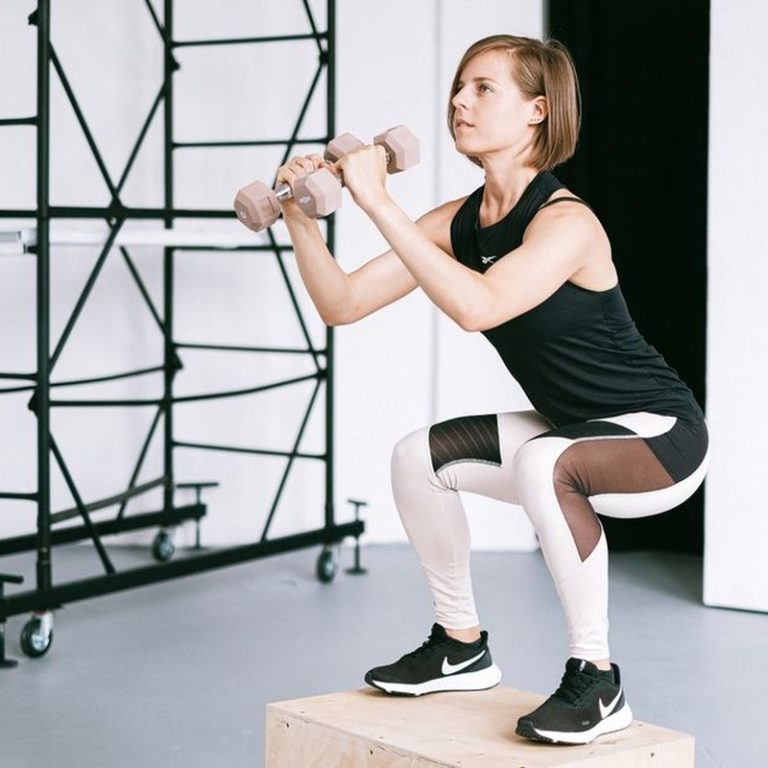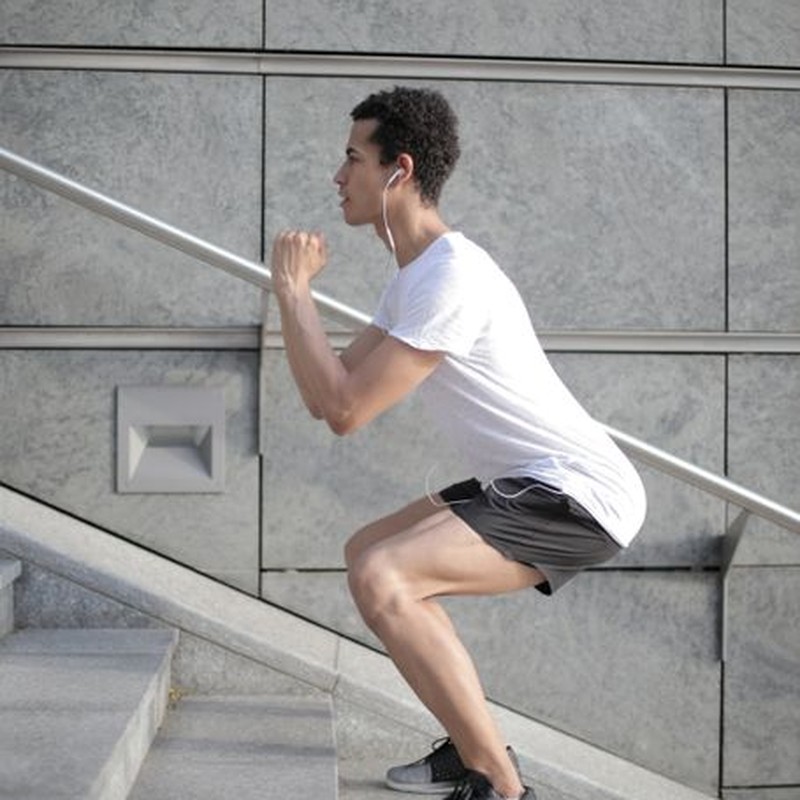
Knees Over Toes: A PT on Why Knee Travel Isn’t the Villain
Full disclosure: Some links in this article are affiliate links. We may earn a small commission at no extra cost to you if you make a purchase through them. Our recommendations are based on what real users report, not on commission size.
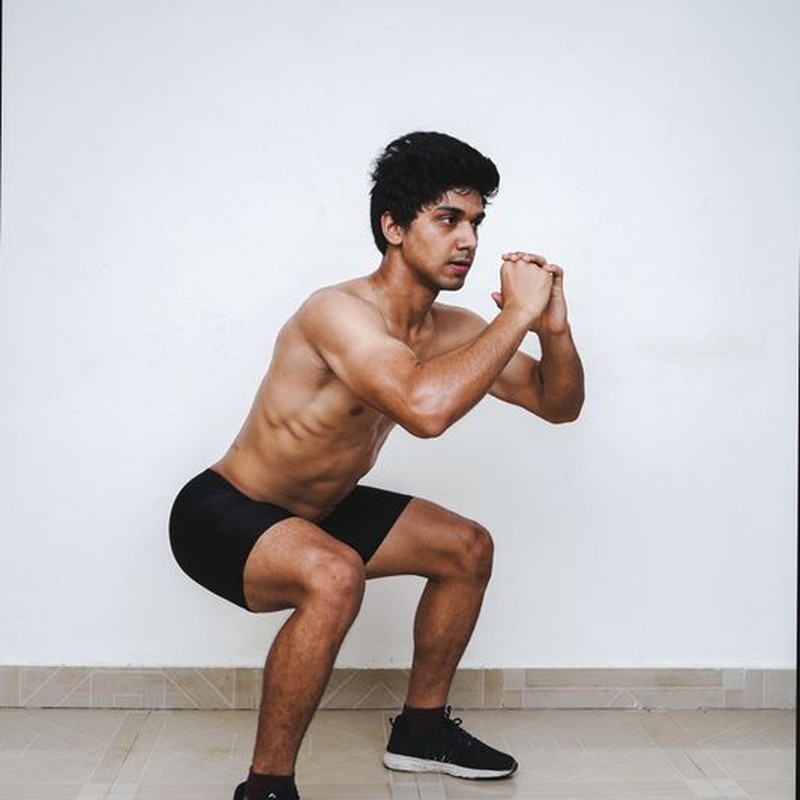
Where the Never-Let-Your-Knees-Past-Your-Toes Rule Came From
I still hear it on gym floors. Someone sinks into a squat, their knees drift forward an inch or two, and a nearby lifter says the line like it came down from a mountain: keep your knees behind your toes. The cue has a real origin, and it is not a law of anatomy. It grew out of older rehab and biomechanics teaching that treated any forward knee travel as an automatic red flag. In a clinic, that made sense. Picture a therapist working with someone two weeks out of knee surgery, or a patient with a fresh patellofemoral flare-up, or an older adult who winces at the bottom of a chair squat. Keeping the shin closer to vertical shifts load away from the joint at a moment when the tissue cannot tolerate much. Limiting knee travel was a protective strategy for a specific person in a specific phase of healing.
Then the guidance traveled. It left the clinic and landed in general strength coaching, group fitness classes, and high school weight rooms, where it got applied to healthy lifters with no injury history and no pain. A rule designed to protect a healing knee became a rule about all knees. The reason it stuck is not that it was ever a research finding. It is easy to coach. You can watch a squat from across the room and shout one correction. Assessing how far the knee travels, how fast it moves, how much load is on the joint, and whether the tissue doing the work has adapted to that load takes longer. The simple version travels faster.
The conversation has been widening for a while. In late September 2026, Verywell Health published an interview with a physical therapist about how knees-over-toes exercises can protect the knee. It is one PT’s explanation, not a formal position statement from every clinician, but it is a sign that the blanket warning is no longer the only thing people hear. Search interest backs up how niche this still is. Google Trends puts US searches for ‘knees over toes’ at about 2.0 over the last 30 days against a 2.6 twelve-month average, on a 0-100 index where 100 is peak popularity. Flat, low-volume interest. A slow argument inside strength and rehab circles, not a mainstream panic.
So here is the reframe I want you to carry through the rest of this article. Knee position is a dosing question, not a yes-or-no question. Four variables do the real work:
- How far the knee travels forward
- How fast it gets there
- How much load is on the joint when it happens
- How prepared the surrounding tissue is to handle that load
A knee drifting past the toes under control, with a body that has gradually built tolerance for that position, is not the same event as a knee collapsing forward under a heavy bar on someone who has never trained the position. Same joint angle. Completely different risk.
If you have been avoiding forward knee travel for years, run a two-minute audit before your next session. Film one bodyweight squat from the side with your phone propped on a water bottle. Watch where your knee goes and whether your heel stays down. Then try a slow, controlled knee-to-wall ankle drill and see how far your knee can travel before the heel lifts. Write down both numbers.
Nothing in that audit requires equipment, a gym, or a coach. It requires you to stop treating knee position as a moral question and start treating it as a number you can move.
What Actually Happens Inside the Knee When It Travels Forward
Before the drills, it helps to know what forward knee travel actually is. It is not a mistake you make in the squat rack. It is a position you have been in all day.
Run through your morning. You sat down on a low chair, which pushed your shins forward past your feet. You walked down a flight of stairs. You crouched to grab a dropped set of keys off the floor. If you drive, you slid sideways into the seat with your knees bent well past your toes and your feet flat on the floor mat. Nobody coached you through any of that, and most people get through it without a single symptom.
So the question is not whether knees can pass the toes. They can, and they do. The question worth answering is what the joint is doing while it happens, because that is what makes the drills in the next section make sense.

Compression Is a Load, Not an Injury
When your shin angles forward, your knee bends more. The kneecap presses into the groove on the thigh bone and the joint surfaces behind it ride closer together. That is compression. It sounds alarming out loud, but compression is a mechanical load, the same way tension on a muscle is a load. Tissue adapts to loads it meets gradually. It does not adapt to loads it avoids forever.
The physical therapist in that recent Verywell Health interview made roughly this point: the shin angle is not what decides whether a knee is safe. Dose and control are.
Where the Load Goes When You Keep the Shin Vertical
Holding your shin vertical does not delete the load. It moves it. I spent a couple of years squatting with a deliberately vertical shin because that is what I was taught, and while my knees felt fine, my lower back complained constantly and my torso drifted more horizontal every month to keep the bar over midfoot.
That is the trade. An upright shin typically shifts work toward the hips and the lumbar spine, and it usually forces the chest down. For some lifters that is a reasonable trade. For anyone with a cranky back, it is often a worse deal than letting the knee travel.
Neither position is free. That is the whole point.
The Ankle Is Usually the Gatekeeper
How far your knee can travel is largely decided below the knee. Dorsiflexion, the motion of the shin moving over the foot, lives at the ankle. When the calf is tight and that range is limited, your body has three options: let the heel lift off the floor, find the shin angle somewhere else in the chain (often by rounding the lower back), or stop the squat higher than you would like.
That is why heel elevation shows up in so many knee-friendly setups. A wedge, a small plate, or a folded towel under the heel lets the shin angle forward while the heel stays planted. The knee gets its range, and the ankle stops gatekeeping it.
Test it at home. Squat to your normal depth with flat feet and note where you stop. Then put a two-inch wedge, a small plate, or a folded bath towel under both heels and squat again. If you suddenly drop an inch or two lower with your back staying flat, your ankle range was the limiter, not your knees. If nothing changes, your ankle is not the bottleneck and you can skip the wedge entirely.
Your Quads Do Real Work Here
Forward knee travel puts the quadriceps under more tension, including the portion that helps control the kneecap. Those muscles govern how the knee decelerates and absorbs force. A knee that can produce and absorb force through a long range tends to handle stairs, curb steps, and landings better than one that has only ever worked in a short, safe-feeling arc.
You do not need a barbell to feel this. Stand up from a chair slowly, three seconds to stand, feet flat and shins angled forward. You will feel the quads working right around the knee. Then repeat it while forcing your shins vertical by sitting way back. The work migrates up into your hips and back. Same chair, same body, different distribution.
What Changes Once There Is a Bar on Your Back
Most people hear the old cue for the first time in a squat rack, not on a staircase, so it helps to see how these mechanics play out under load.
Bar position. A high bar sits on top of the traps and keeps the torso more upright, which lets the knee travel forward more. A low bar sits lower across the rear delts and tends to drive the hips back and the chest down, which usually means less forward knee travel. If you switched from one to the other and suddenly got yelled at about your knees, that may be the whole explanation.
Stance width. A wider stance with toes turned out gives the knee less distance to travel forward. A narrow, toes-forward stance asks more of your ankle and sends the knee further over the toes. Neither is wrong. They just distribute the demand differently.
Ankle mobility. Same gatekeeper as the bodyweight test. Limited dorsiflexion means something else in the chain has to give, and under a loaded bar the thing that usually gives is your torso angle or your depth.
Segment length. Femur length, torso length, and where the bar can actually sit on your frame all shift the balance point. A lifter with long femurs and a short torso often needs more forward shin angle to keep the bar over midfoot. Telling that lifter to hold a vertical shin is telling them to fall backward or to shift the load to their spine.
None of this means every squat should bury your knees past your toes on purpose. It means the position is a tool with a cost and a benefit, and putting a barbell on your back does not change the math. It just makes the math heavier, and adds a bar path you have to stay under while you solve it.
A Beginner Knees-Over-Toes Progression You Can Do at Home
Most knee routines hand you a list of exercises and let you sort out the order yourself. That is backwards. Your knee doesn’t care what a movement is called. It cares how much range you are asking it to control, and whether you can hold that control while still breathing normally. So this plan is built as four stages rather than four exercises. Spend two to four weeks at each one before moving up.
Run it twice a week with at least two days between sessions, roughly twenty minutes each time. The only gear involved is a book, a low step, and something to prop your heel on. Each stage below lists its sets, tempo, and progression rule once, in one place, so you can print this and stop scrolling.
Stage 1: Flat-ground split squat
Split stance, feet about hip-width apart, front foot flat. Lower straight down. Your back knee drops toward the floor, and your front shin is allowed to angle forward over your toes. You are not chasing maximum forward travel here, you are just refusing to block it.
The cue I give clients is to think about the back knee going down rather than the body going forward. If you drop instead of lower, the drill loses its whole point. I set mine up next to a wall the first week, and it made the difference between a controlled rep and a wobble.
Prescription: 2 to 3 sets of 6 to 10 reps per side. Two to three seconds down, brief pause at the bottom, stand up under control.
If you feel unsteady, narrow the stance slightly or rest one hand on a counter. Balance is not the target yet. Knee control at a forward shin angle is.
Stage 2: Raise the front heel
Once flat-ground reps feel steady, put the front foot on something. A thick book, a low step, or a folded towel in place of a wedge. Two inches is enough. That elevation buys you more room for the knee to travel forward while your heel stays down.
Same reps, same tempo, deeper range. This is usually where people first feel the front of the knee working instead of just the quads and glutes. That sensation is expected, not a warning sign. Going higher than two inches is not a shortcut, it is a harder drill you have not earned yet.
Prescription: 2 to 3 sets of 6 to 10 reps per side. Same tempo as Stage 1. Move up in elevation only when the current height feels boring, not when it feels survivable.
Stage 3: Backward walking
This is the least dramatic and most useful piece of the progression. You get a long-range knee load with almost no impact and no eccentric beating, which is why it shows up in so many rehab clinics.
The classic version is a treadmill at a slow speed with a slight incline, or a gentle hill outside walked facing backward. If you have neither, walk backward on a flat floor indoors. Pick a clear hallway or a stretch of driveway, take deliberate long steps, and go slowly enough that each step is a controlled reach rather than a shuffle. Five to ten minutes of that is a real dose. It looks silly. It works anyway.
Prescription: 5 to 10 minutes, twice a week. Hold a rail or walk with someone nearby if backward feels unstable. There is no prize for skipping that.
Stage 4: Step-downs from a low step
Stand on a low step with one foot hanging off the back edge. Bend the standing knee and lower the free foot toward the floor, letting the shin travel forward over the toes as you descend. Tap lightly and stand back up without pushing off the back foot.
Slow is the entire point. Rushing turns a strength drill into a balance test, and balance is not what is limiting you here.
Prescription: 2 sets of 5 to 8 reps per side. Three seconds down, tap, stand. Use a step low enough that you never slam into the bottom of the range.
Three rules that apply at every stage
Add range before you add load. A deep, controlled rep does more for knee capacity than a heavier shallow one, especially in the first couple of months. There is no weight to add in this plan anyway, which is exactly why it works as a starting point for someone who has spent years shortening every knee angle.
Give a new range six to eight weeks before you judge it. Tendons and cartilage respond on a slower clock than muscle. Stiffness in week two is not a verdict on whether the drill suits you.
If something feels cranky, alternate directions week to week instead of pushing through it. Split squats one week, step-downs and backward walking the next. That keeps the dose from piling onto the same tissue and gives you a built-in deload without a spreadsheet.
A realistic week looks like Monday split squats, Thursday step-downs plus backward walking, then the same two sessions the following week with the order flipped. Twenty minutes, done, twice a week, two days apart. That is the entire commitment for the first six weeks.
If you run these four stages for a month, I want to hear which one surprised you most. Post it below. Reports from people who actually did the work beat another set of guidelines every time.
Soreness, Red Flags, and When to Back Off
Earlier in this article I covered what normal soreness looks like after knee-over-toes work. This is the other half: the signals that mean stop, and the rule for what to change when something flares up.
The short version: soreness is feedback, sharp pain is a stop sign, swelling is a flashing red light.
Feedback you can keep training through, with adjustments. A dull ache in the quads or calves that shows up during a set and fades within a day or two is tissue adapting to a new range. A stop sign is sharp pain in one specific spot, the kind that shows up every session even at light loads. A flashing red light is one of four things: swelling, warmth compared to the other knee, a joint that feels unstable or gives way, or pain that’s there when you’re sitting still.
Those last four are your referral list. Get assessed by a licensed physical therapist before you load that knee again. Locking — not being able to fully straighten or bend the joint — belongs on the same list. Training around any of this means you’re guessing at your own diagnosis. Guess wrong for a few months and it stops being a training problem.
When something flares but doesn’t hit that list, change one variable. Depth or volume. Not both. If you cut your step-down depth and your sets in the same week and the ache clears, you’ve learned nothing about which change did the work. Pick one, hold it for five to seven days, then retest.
Beginners: if you feel a pinch at the front of the kneecap or the knee wobbles on the way down, reduce depth first. Range is easier to rebuild than an irritated tendon.
For gear, the honest answer is that this whole progression runs on a hardcover book and a staircase. If you’d rather have a slant board or a wedge, that’s a comfort upgrade, not a requirement — check current prices on Amazon before you buy so you’re not overpaying for a piece of foam.
None of this is medical advice. It’s education, and it’s no substitute for someone actually looking at your knee. If any of the red flags above show up, book with a clinician instead of reading another comment thread.
Speaking of comments: what worked for you? Lifters sorting useful cues from gym folklore get more out of real reports than another blanket rule, so drop your setup, your tweaks, and what you’d skip next time.