How Many Calories Does 10 Minutes of Jump Rope Burn? Calculator, Comparison, and Beginner Plan
Full disclosure: Some links in this article are affiliate links. We may earn a small commission at no extra cost to you if you make a purchase through them. Our recommendations are based on what real users report, not on commission size.
How Many Calories Does 10 Minutes of Jump Rope Actually Burn?

If you’re trying to decide whether 10 minutes of jump rope is worth the sweat, you want a number you can plan around. For most adults, the honest range is about 90 to 200 calories in a 10-minute session. That range is wide because your body weight and your effort level change the number more than anything else.
Body weight is the biggest factor. To give you a practical set of benchmarks, I’m using a steady, continuous pace — roughly 100 to 120 skips per minute, with soft knees, a light bounce, and the rope clearing by a few inches. In exercise science terms, that pace works out to about 12 METs. You don’t need to memorize that, but it’s the same intensity value used in the calculator section later in this article, so the numbers below will match your own estimates.
At that pace, here’s what a 10-minute block looks like for different body weights:
- Around 115 calories for a 120 lb person
- Around 145 calories for a 150 lb person
- Around 170 calories for a 180 lb person
- Around 190 calories for a 200 lb person
Those numbers assume you keep jumping. The moment you add double unders, high knees, or snappier rope turns, your heart rate climbs and the total moves toward the upper end of the range. I tried this one morning with a speed rope and a strict 10-minute timer. I kept a steady rhythm instead of sprinting, and my session landed at about 145 calories according to the same formula. It didn’t feel like an easy walk, though. My forearms and shoulders were fried by the last two minutes, which is exactly what I want beginners to understand about this exercise.
Jump rope uses more of your upper body than you’d expect. Your forearms, shoulders, and hip flexors are all working to keep the rope moving and your footwork sharp. That’s why 10 minutes of jump rope can feel more demanding than the calorie number suggests. The type of rope also changes the effort: a heavy rope forces your arms to work harder, which nudges the burn upward, while a light speed rope rewards fast wrists and makes double unders easier.
On the other end, slow bouncing with constant stops will pull you down toward the 90-calorie mark. That’s still a useful movement pattern when you’re learning, but don’t expect a big burn if you’re pausing every few seconds. If you’re just starting out, use this simple progression: set a timer for 10 minutes and do 20 seconds of jumping followed by 40 seconds of rest or easy stepping. Repeat that cycle for the whole block. Do that two or three times a week. Once 20/40 feels comfortable, shift to 30 seconds on and 30 seconds off. After that, aim for continuous jumping for the full 10 minutes.
Form matters as much as the timer. Keep your elbows tucked near your sides and turn the rope with your wrists, not your whole arms. Jump only high enough to clear the rope and land softly on the balls of your feet. If you keep stopping to fix the rope, slow down your wrist speed until the rhythm feels natural. These numbers are estimates, not laboratory measurements. Your metabolism, the exact rope you use, and how efficiently you move all play a role, so treat the benchmarks as a starting point.
Try the 20/40 progression for a week and see where your own 10-minute burn lands. Come back and share your pace, your body weight, and the rope you used in the comments.
Jump Rope Calorie Calculator: How to Estimate Your Own Number

You don’t need a smart watch to get a reliable calorie estimate. A simple formula based on your body weight and your jump speed will put you in the right range, and after a couple of sessions you’ll know exactly what ten minutes of rope work costs you.
Calories per minute = MET × 3.5 × your weight in kilograms ÷ 200
MET is short for metabolic equivalent. It describes how hard an activity is compared with sitting quietly, which has a value of 1. For jump rope, use these two values:
- 9.8 for easy skipping — the relaxed pace you’d use while learning, warming up, or doing short interval rounds.
- 12.0 for a steady, active jump rope session with few breaks and a consistent bounce.
Here’s a typical example. A 150-lb person weighs about 68 kg (divide pounds by 2.2). At MET 12.0:
12 × 3.5 × 68 ÷ 200 = 14.3 calories per minute
Over ten minutes, that’s roughly 143 calories. At the easier MET 9.8, the same person burns about 11.7 calories per minute, or 117 calories in ten minutes. If you’re heavier, the number goes up. If you’re lighter, it goes down.
I use this formula with my own morning sessions. At around 178 lb, I weigh about 81 kg. At MET 12.0, my calculation is 12 × 3.5 × 81 ÷ 200, which works out to 17 calories per minute — about 170 calories in a ten-minute continuous jump. My chest-strap heart rate monitor usually lands within 5–10 calories of that, so I know the math is doing its job.
Two variables move the final number more than anything else: your body weight and your pace. A heavier person burns more calories at the same speed, and a faster jump burns more than a lazy bounce. That’s why running your own numbers matters more than copying a number from someone else’s comment section.
To keep the estimate honest, only count the time the rope is actually moving. Ten minutes of jumping means ten minutes of work — not the minute you spent untangling the cable or the water break you took between rounds. Set a timer, jump for ten continuous minutes, and stop with your thumb on the button.
If you’re doing intervals, say 30 seconds on and 30 seconds off, count only the jump time. Ten minutes of jumping with rests between rounds is ten minutes of work, but it may take you 15 or 20 wall-clock minutes. If you do nine one-minute rounds with rest in between, you’ve done nine minutes of work, not ten.
Here’s how to turn the formula into a quick check:
- Weigh yourself and divide by 2.2 to get your weight in kilograms. If your scale reads in kilograms, skip this step.
- Choose your MET: 9.8 if your pace is easy or you’re new to the rope, 12.0 if you’re moving at a steady, active bounce.
- Multiply your weight in kilograms by 3.5, then by your MET value, and divide by 200.
- Multiply that per-minute number by the number of minutes the rope is moving.
For a more personal reading, an armband or chest-strap heart rate monitor can estimate your calories from your heart rate response. That extra data is useful if you want to compare one session to another, but you don’t need it to get a reliable target. The formula above gets you close enough to set a calorie goal for the day, and it’s a practical way to measure progress: as your conditioning improves, you’ll be able to keep a steady 12.0 pace for longer, and your calorie burn will show it.
Jump Rope vs Running: Which Burns More Calories in 10 Minutes?

People often ask me whether a jump rope can replace their afternoon run. The honest answer is that it depends on how long you can keep each one going. Let me give you the numbers I use with beginners, then a quick way to pick.
Calorie burn in the same 10-minute block
For a 150-lb person, a steady moderate jump rope session bumps you to about 145 calories in 10 minutes. Running at a 10-minute mile pace, which is 6 mph, comes in around 115 calories. That means jump rope beats a standard easy run by about 30 calories in that short window.
Speed changes the comparison. If you run at an 8-minute mile pace, about 7.5 mph, your burn jumps to roughly the same 145 calories. In MET terms, which just measures how demanding an activity is, a solid rope session and an 8-minute mile sit close together. So the advantage isn’t automatic. A slow jog will lose to jump rope; a hard run will not.
Impact and muscle work
Both are high impact, but they land differently. When I run, I take a longer stride and feel the landing more through my heels and midfoot. When I jump rope, I stay on the balls of my feet, keep my knees soft, and limit how high I bounce. On a rubber mat, I find jump rope easier on my knees than road running. On concrete, that flips. Surface matters.
Muscle recruitment also separates them. Jump rope forces your calves to absorb every landing and then push you up again slightly. Your shoulders, forearms, and grip all work to keep the rope moving at a steady speed. Running uses your legs hard too, but your arms mostly help with balance and rhythm. They are not carrying the same load as they do during a rope session. That subtle difference is why ten minutes of rope can leave your shoulders and calves feeling it the next day in a way a short run does not.
Why running often wins over 30 minutes
Ten-minute calories only tell part of the story. The bigger factor is how long you can sustain the workout. In my experience with beginners, someone who can run for 20 minutes may only manage 5 to 7 minutes of continuous jump rope before tripping or losing rhythm. That is not a universal rule; with practice, the ratio changes. But it explains why a 30-minute run usually adds up to more total calories than a single 10-minute rope session.
Duration also changes how a workout feels on a random Tuesday. A 30-minute run can be almost autopilot after the first ten minutes. A 30-minute jump rope session requires constant focus, quick feet, and regular breaks. Both are real cardio, but one is much easier to stretch out.
How to decide in 30 seconds
- Only have 10 minutes and want to stay in your driveway? Jump rope.
- Have 25 to 40 minutes and a route you actually enjoy? Run.
- Want to strengthen calves, shoulders, and forearms while you do cardio? Jump rope.
- Want a steady rhythm without worrying about footwork? Run.
- Sore knees? Try run on a soft trail or jump rope on a rubber mat and see which one feels better.
Try this sample week if you want both without spending time planning:
- Day 1: 10-minute jump rope intervals: 20 seconds fast, 40 seconds easy
- Day 2: 20-minute easy run
- Day 3: rest or 15-minute walk
- Day 4: 10-minute steady jump rope
- Day 5: 25-minute run
- Day 6: 5-minute jump rope warm-up plus 15-minute bodyweight circuit
- Day 7: rest
Add one minute to your jump rope sessions each week, or extend one run by 5 minutes every other week. Small jumps keep the plan realistic while your endurance improves.
Before you buy a rope, check current prices on Amazon and read what buyers say about handle comfort and cable length. Those details matter more than the brand. After you try one of these 10-minute blocks, come back and tell us in the comments: which one left you breathless first?
The 4-Week Jump Rope Primer: A 10-Minute Beginner Plan

Ten minutes of jump rope can feel longer than twenty minutes on a treadmill. That’s a good thing: you get more work done in less time, but you have to build up to it. This four-week schedule turns those ten minutes into a repeatable cardio habit without asking you to be a jump-rope athlete.
You don’t need to jump every day. Plan for three or four sessions a week, and for the first two weeks, put at least one full rest day between sessions. That rest day is not a sign of weakness. Your calves, shins, and Achilles tendons need time to adapt to the repeated impact. When I started, I tried to jump five days in a row. By day three, my calves felt so tight that I had to take two unscheduled days off. I should have listened to my body earlier.
The Weekly Schedule
| Week | Jump / Rest Pattern | Total Jump Time |
|---|---|---|
| 1 | 30 seconds easy jumping + 30 seconds rest, repeated 10 times | 5 minutes |
| 2 | 45 seconds jumping + 30 seconds rest, repeated 8 times | 6 minutes |
| 3 | 60 seconds jumping + 30 seconds rest, repeated 7 times | 7 minutes |
| 4 | 4 minutes jump, 2 minutes rest, 4 minutes jump | 8 minutes |
Every session is built around a roughly ten-minute block. The work-to-rest mix changes as you go, but you are never trying to grind out a long run. Use a timer or a free interval app, and if you miss a few jumps, don’t restart. Just keep moving until the work block ends.
Week 1 should feel almost boring. The 30-second work blocks are meant to teach your feet to stay light and your arms to stay patient. If you finish a block gasping, you are jumping too high or spinning the rope too fast. Jump just enough to clear the rope, about an inch or two.
When I first tried this, I kept kicking my heels up behind me. That fired up my hamstrings and made everything harder. The fix was simple: stay tall, keep your elbows close to your ribs, and land softly on the balls of your feet. Your knees should stay soft, too. Your hands make small circles near your hips, not big windmills.
Week 2 bumps the work blocks to 45 seconds. You still get 30 seconds of rest, so the recovery is long enough to reset. At this stage, breathing should be the main challenge, not coordination. If your calves start to cramp, stop, shake them out, and then continue with slow bouncing. The habit matters more than hitting the exact interval count.
Week 3 is where the jumping starts to feel like a real workout. You do 60 seconds of easy jumping with 30 seconds of rest between seven rounds. The first three rounds might feel fine. The last two will probably make you want to slow down. That’s okay. If you need to shorten a round to 45 seconds, do it. The goal is to keep moving through the whole session, not to earn a gold star.
Week 4 changes the format. Instead of stopping every minute, you jump for four straight minutes. Going from 60-second rounds to four straight minutes is a bigger mental shift than the numbers suggest. You cannot rely on the clock resetting every 60 seconds, so slow the rope down and bounce lower. Jump for 4 minutes, rest for 2 minutes, then jump for 4 minutes again. That’s 8 minutes of jump time and 2 minutes of rest, for a clean 10-minute session. If you need to break the first four-minute block into two two-minute chunks, that’s fine. Over the week, try to make those chunks longer.
During week 4, pay attention to how your breathing changes. In week 1, you probably breathed hard during the last few blocks and recovered fast. By week 4, you should feel less frantic and more steady. That’s a sign your cardio engine is getting used to the work.
All of those sessions assume you are jumping on a surface with some give. A rubber mat, a wooden floor, or even a cheap exercise mat works. Concrete will punish your shins and knees. If outdoor concrete is your only option, keep the jumps low and stop at the first sign of pain.
And if a bad day hits and you only have energy for slow bouncing, that still counts. Replace the hard rounds with bouncing in place, swinging the rope without jumping, or just marching while turning the rope. This keeps the routine alive and gets you back to full jump sessions sooner.
Try the full four weeks before you judge yourself. The first week is about coordination, the second about rhythm, the third about endurance, and the fourth about confidence. By the end, ten minutes of jump rope can feel as normal as tying your shoes.
Before you start, check current prices on Amazon for a basic jump rope or a compact interval timer. And after a session or two, come back and leave a comment about how the schedule felt. Your feedback helps other beginners decide if this plan is worth trying.
How to Pair Jump Rope With Strength Training and Other Cardio
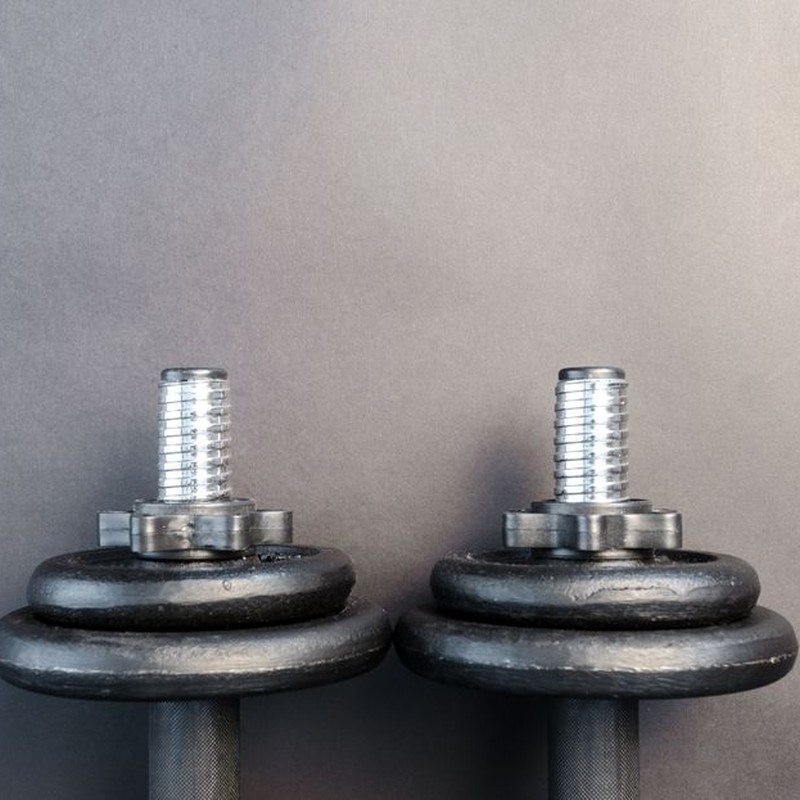
If you already do a short strength workout, the simplest setup is to put the jump rope after lifting. That keeps your joints and nervous system fresh for squats, presses, and rows, and it makes the rope a conditioning finisher rather than a pre-lift warm-up. I tried this at home after a 30-minute dumbbell session, and the rope work felt like a crisp finish instead of a grind.
Before you jump, spend 2–3 minutes warming up: march in place, do a few bodyweight squats, swing your arms, and maybe do 30 seconds of easy jumps with the rope. After you finish, walk slowly for a minute and shake out your calves. That small cool-down makes the next session easier to start.
If the jump rope is your only planned workout, keep it simple: do your 10 minutes of jumping, then add 15–20 minutes of walking or easy cycling. That gives you a longer total session without pushing the rope part into an uncomfortable zone. You still work on rope rhythm, but you don’t have to turn every jump into an all-out sprint.
A basic beginner week
- Monday: 30 minutes of full-body strength training, then 10 minutes of jump rope
- Wednesday: 10 minutes of jump rope, then 15 minutes of walking
- Friday: 30 minutes of full-body strength training, then 10 minutes of jump rope
That setup gives you 30 minutes of jumping in the first week. For a beginner, 30–40 minutes of jumping spread across 3 to 4 days is enough to build consistency. If you add walking or cycling, keep those at an easy effort so total weekly cardio stays moderate while your body gets used to the landing impact.
How to progress without overdoing it
Don’t rush from 10 minutes toward 20. Wait until two full weeks feel manageable, then add 45–60 seconds to one session per week. Example: Monday stays 10 minutes, Wednesday becomes 11 minutes, and Friday stays 10. Next week, add the extra minute to Friday. That slow upward move gives your calves, ankles, and aerobic system time to adapt.
If fat loss is the goal, pair the jump rope with full-body strength work and a consistent daily calorie intake you can actually maintain. Strength work preserves muscle, the rope adds steady calorie burn, and your nutrition decides the speed of the change. Aim for a modest calorie deficit based on your normal intake, not a very low-calorie crash diet that leaves you drained. Food should support the training you’re doing, not fight against it.
Check current prices on Amazon for jump ropes and dumbbells, and come back to the comments to share how your first few weeks go.
Medical & Editorial Review: This article was reviewed by Liam Smith, founder of Apexfito, for accuracy and safety. Content is for educational purposes and is not a substitute for professional medical advice. Consult your physician before starting any exercise or nutrition program.