Sacroiliac Joint Pain: Why Your Lower Back Hurts and the Exercises That Help
Full disclosure: Some links in this article are affiliate links. We may earn a small commission at no extra cost to you if you make a purchase through them. Our recommendations are based on what real users report, not on commission size.
Why Your Pain Sits on One Side: A Quick Look at the Sacroiliac Joint
If your lower back pain has a favorite side, put the sacroiliac joint on your short list. I have watched people spend months treating a disc problem only to find the real trouble sitting a few inches lower. This joint rarely announces itself with a dramatic pop or a shooting pain down the leg. It just makes one-sided sitting, standing, and stair climbing feel wrong.
The anatomy in plain language
The sacroiliac joint is the seam where the sacrum, the triangular bone at the base of your spine, meets the ilium of your pelvis. You have two of them, one on each side. They move only a few millimeters.
That is not a design flaw. Their job is load transfer. Every step you take, they pass force from your upper body down into your legs and back up again.
Suspension bushings on a car are a rough comparison. They are not built for big motion. They are built to absorb and redirect force. When they get irritated, the whole system feels off, and you feel it in the same spot every time.
What the pain pattern usually looks like
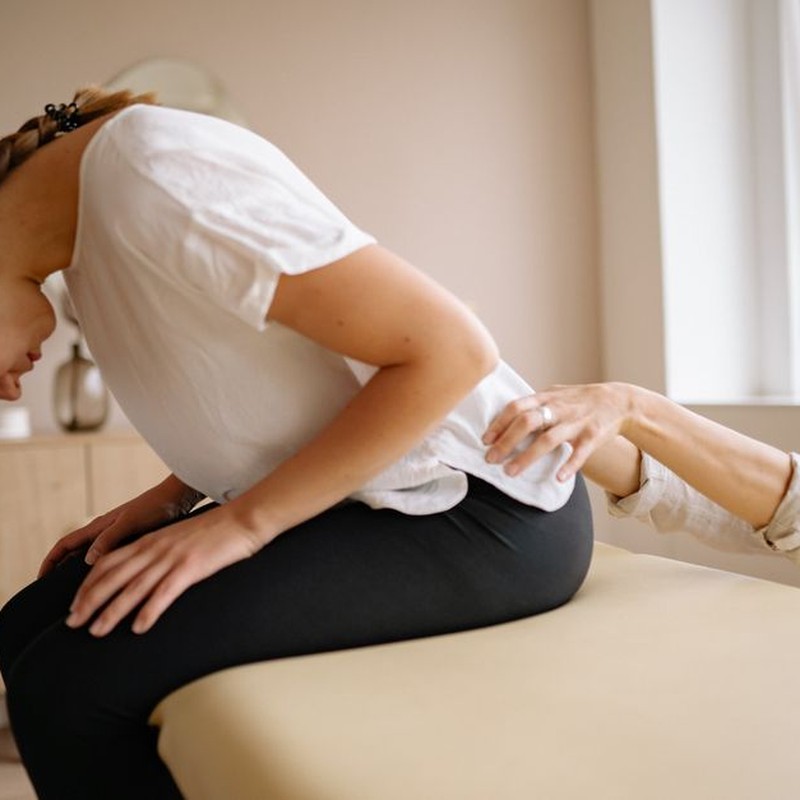
Because the joint barely moves, SI joint pain tends to sit right at the joint instead of radiating far down your leg. Most people point to a spot just below the beltline, near the two dimples at the base of the back. The pain can spread into the buttock, the groin, or the back of the thigh, but it usually stops before the knee.
Sharp, electric pain that shoots to your foot is a different pattern. That points more toward nerve involvement than the SI joint itself.
Classic triggers are lopsided and rotational:
- Standing on one leg to put on pants or socks
- Twisting to get out of a car
- Rolling over in bed
- Climbing stairs
- Carrying a toddler on one hip
Long stretches of sitting can stir it up too. The joint gets compressed, and the muscles that normally help stabilize the pelvis stop doing their share.
What makes the joint more vulnerable
Several things change how much load the SI joint has to absorb. Pregnancy hormones loosen the ligaments that hold the pelvis together. A true leg-length difference changes how weight lands on each side. Osteoarthritis can wear down the joint surfaces over time. And people who have had a lumbar fusion often load the SI joint harder because the segment above it no longer moves.
A September 2026 Harvard Health report on SI joint pain pointed out that this joint is frequently overlooked when lower back pain gets diagnosed. That matches what I see. People get shuffled between hip stretches and core routines without anyone checking the joint itself.
One caveat worth repeating
The SI joint is a common culprit in lower back pain. It is not the only one. Facet joints, discs, hip arthritis, and muscle strains can all mimic it. Recognizing the pattern helps you have a better conversation with a clinician. It does not replace one.
Here is a practical way to use this without trying to diagnose yourself. Write down three things: where you point when the pain is worst, which movements bring it on, and whether the pain stays above your knee. Bring that list to your appointment. In my experience, that level of detail moves the conversation forward faster than saying your back hurts.
While you wait to be seen, sidestep the obvious triggers. Do not push through sharp pain. Sit down to dress instead of doing the one-legged pants dance. If stairs are the problem, take them one at a time and use the rail. These are not cures, but they keep a sensitive joint from getting more irritated before anyone has looked at it.
Before You Start Exercising: Red Flags and How SI Joint Pain Gets Diagnosed
Before you roll out a mat and start any SI joint routine, do a quick self-check. Most one-sided lower back or buttock pain is not an emergency. A few symptoms, though, mean you stop reading and call a clinician today rather than next week.
Call now or go to urgent care if you have:
- Numbness around the groin and inner thighs, sometimes called saddle numbness
- Trouble controlling your bladder or bowels
- Weakness in one or both legs that is getting worse fast
- Pain that wakes you every night and does not change when you shift positions
- Fever, unexplained weight loss, a recent fall, or a history of cancer with new back pain
These are uncommon. When one shows up, the entire approach changes. You are no longer dealing with a mechanical joint irritation that responds to exercise; you are dealing with something that needs a medical workup first. I have watched people stretch through night pain and a low-grade fever for weeks because they figured it was just their SI joint acting up again. That gamble can cost you.
For everyone else, meaning no red flags, just that familiar one-sided ache that flares on stairs or when you stand on one leg, the path usually starts with a primary care visit or a physical therapist. Do not expect one magic test to settle it. A September 2026 Harvard Health piece on SI joint pain describes how clinicians use a cluster of provocation maneuvers: pressing and rotating the pelvis in several positions, then noting how many of those moves reproduce your exact pain. Several positive tests plus pain in the right spot carries more weight than any single test on its own.
Imaging is where the frustration sets in. X-rays, CT scans, and MRIs can show arthritis or inflammation in the SI joint. Those same findings also turn up in plenty of people with zero pain. A scan report is therefore one piece of the picture, not a verdict on where your pain comes from. Readers have told me they saw the word “degeneration” on an MRI and panicked, only to learn later that the finding probably had nothing to do with their symptoms.
Ask about your hip while you are at it. Hip osteoarthritis refers pain to the groin and buttock in a way that overlaps heavily with SI joint pain, and the treatments diverge. A clinician who examines both joints can save you months of guessing. A training partner of mine spent twelve weeks on SI joint exercises for what turned out to be a hip problem. The exercises were fine. They were just aimed at the wrong joint.
One more step before any routine: keep a two-week log. Jot down what you were doing when the pain flared, exactly where it landed, whether it stayed above the knee, and what made it better. That record usually tells a clinician more than “my back hurts all the time.” I started logging my own flare-ups and the trigger was almost always something specific, like twisting to get out of a low car seat, not “everything.”
If you want a heating pad, a foam roller, or a wedge pillow to make the wait more comfortable, check current prices on Amazon. If you have already been through the SI joint diagnostic wringer, share your experience in the comments: which tests you had, what helped, and what you wish someone had told you sooner.
The Beginner Exercise Sequence: Bodyweight Moves That Build Pelvic Stability
This is the sequence I would hand a friend who texted me about one-sided buttock pain and no diagnosis yet. No equipment, no gym, about 15 to 20 minutes on a living room floor. Nothing in it bends or twists the spine, which matters because those two motions irritate an unhappy sacroiliac joint more reliably than anything else.
Harvard Health covered sacroiliac joint pain in September 2026, and the practical thread through that reporting is simple enough: the joint responds to graded loading. It does not respond well to total rest, and it does not respond well to aggressive stretching or self-adjusting. You are reteaching the muscles around the pelvis to do their job, at a load the joint can tolerate today.
Three ground rules before rep one:
- Keep pain during any exercise at 3 out of 10 or lower. Mild discomfort that fades as you warm up is acceptable. Sharp, pinching, or electrical is not.
- Symptoms should not travel down the leg past the knee or spread into new territory.
- The next morning should feel the same as usual or better. If a session leaves you worse for more than a day, that dose was too much.
1. Breathing and pelvic tilts
Lie on your back with knees bent and feet flat. Breathe in slowly through your nose, then exhale and gently flatten your lower back toward the floor by tightening your abdominals. Hold five seconds, then release completely. Two sets of eight reps is plenty on day one.
This is not really a strength exercise. It is a calibration exercise, teaching you what a neutral, gently braced pelvis feels like before you put load through it. I do it right after getting out of bed, before the day stiffens everything up.
2. Glute bridges
Bridges are the workhorse here. Squeeze your glutes first, then lift your hips only as high as you can without arching your lower back. The moment your ribs flare and your back arches, you have gone too far. Aim for two or three sets of ten with a two-second hold at the top.
If a standard bridge pinches in the front of the hip or deep in the buttock, two fixes work well. Press your feet into the floor and lift just an inch, holding for a few seconds. Or place a folded towel between your knees and squeeze it lightly throughout, which keeps the pelvis square. I have used the towel trick on days when my own SI joint was cranky, and it made the difference between a comfortable set and a sharp one.
3. Clamshells and side-lying hip abduction
These target the gluteus medius, the muscle that keeps your pelvis level when you stand on one leg. Lie on your side with knees bent and feet together, then open the top knee without letting your pelvis roll backward. Ten to fifteen slow reps per side. If your hip flexors take over and the front of your hip starts doing the work, shorten the range.
This is often the missing link for people whose pain flares on stairs, curbs, and while pulling on pants standing up. Those are all single-leg moments, and a weak gluteus medius lets the pelvis drop on the unsupported side, which loads the SI joint.
4. Bird dogs and dead bugs
Both train the deep core without bending or twisting the spine. For the bird dog, start on hands and knees and extend the opposite arm and leg only as far as you can while keeping your hips level. Most people reach too far and start rotating. Stop the reach before that happens. For the dead bug, lie on your back with arms up and knees over hips, then lower one arm and the opposite leg slowly while keeping your lower back gently pressed down. Five to eight controlled reps per side.
Slower beats further every time. If you can knock out eight sloppy reps in ten seconds, do five clean ones in thirty instead.
5. Knees-to-chest and figure-4 stretch
Finish with two gentle mobility moves. Pull your knees toward your chest while lying on your back, then cross one ankle over the opposite knee for a figure-4. Hold each twenty to thirty seconds and stay in a range that feels like a mild stretch, not a stretch plus pain.
This is the point in the session where things should loosen rather than tighten. If either position sharpens the buttock pain, skip it and go back to pelvic tilts.
How to run it in a normal week
Do the whole sequence three times a week on non-consecutive days: Monday, Wednesday, Friday, or Tuesday, Thursday, Saturday. Give yourself two weeks at the starting doses before adding anything.
Once the whole thing feels easy and your symptoms have not flared, add a third set to bridges and clamshells, or slow the holds to three seconds. After that, progress to single-leg bridges or a side plank from the knees, one change at a time. Two upgrades at once makes it impossible to tell which one you tolerated.
The honest expectation is that consistency over four to eight weeks does more for pelvic stability than any single perfect session. Skip the days you feel genuinely worse, but do not wait to feel perfect before starting again.
The only thing worth spending money on is a slightly thicker mat if your floor is hard tile or concrete, since you will be on your back and side a fair amount. You can check current prices on Amazon before buying. And if you try this sequence, tell me in the comments which move helped most and which one flared you up. That pattern is genuinely useful for the next reader trying to figure out where to start.
Daily Habits, Progression, and What to Do When It Flares
The exercises get all the attention, but how you move through the other twenty-three hours is what decides whether the joint calms down or keeps getting poked. I have watched people do perfect clamshells every morning and then undo the whole thing by standing on one leg to pull on their jeans. The mechanics are simple. The SI joint likes a pelvis that stays level, and it complains when you spend your day hinging, twisting, or loading one side.
Here is what that looks like in practice.
- Sleep with a pillow between your knees. Side sleeping without support lets the top leg drop, which rotates the pelvis and tugs on the joint all night. A firm pillow keeps the hips stacked. Stomach sleeping is the hardest position for most people with SI pain, and back sleeping with a pillow under the knees is a decent second option.
- Sit down to put on pants and shoes. Balancing on one leg is the most common way people irritate this joint without realizing it. A chair by the door costs nothing and saves a lot of grief.
- Stand with your weight even. If you are stuck on your feet for long stretches, like a trade show or a kitchen shift or a slow-moving line, rest one foot on a low step or a box. Shift sides every few minutes instead of parking all your weight on one hip.
- Carry heavy things in front, with both hands. A grocery bag on one hip is a lateral load the SI joint has to fight. Holding the load centered in front of you keeps the pelvis square. If it is too heavy to carry that way, make two trips or grab a cart.
None of these are dramatic. That is the point. Small positional changes do a lot of quiet work over a full day, and they cost you nothing but a little awareness.
Run the routine four to five days a week for the first three weeks, then reassess. That window is long enough to know whether you are headed in the right direction and short enough that you are not grinding away on something that is not helping. After that, progress one variable at a time. Add a couple of reps. Add a two-second hold at the top of each rep. Or move from a two-legged bridge to a single-leg version with one foot lifted. Pick one, not all three at once.
If you add something and the pain climbs for more than a day, drop back to the previous version for another week. That is not failure, that is how the tissue adapts. I have had readers tell me they pushed through a nasty flare because backing off felt like starting over. It does not. A week at the easier level keeps the habit alive and lets the joint settle down.
Expect a timeline measured in weeks, not days. Most people notice the pain is less frequent and less intense somewhere in the four-to-eight-week range if they stay consistent, and stability work tends to keep paying off for months after that. The Harvard Health report from September 2026 frames exercise as a first-line approach for SI joint pain rather than a last resort, which lines up with what most physical therapists do in practice. They do not hand you a belt and send you home. They teach you to control the pelvis, then build load tolerance around it.
Flares happen anyway. The response that works is cutting volume, not the whole routine. Drop to pelvic tilts, gentle bridges, and knees-to-chest for a few days. Those movements are low-load and keep things moving without asking the joint to do much. Skip anything that involves a wide stance, deep squatting, heavy hinging, or aggressive stretching into end range, because those load the joint at exactly the angle that tends to irritate it.
For symptoms, heat on the lower back and buttock for fifteen to twenty minutes can take the edge off. Ice works better for some people, so use whichever gives you relief. I keep a microwaveable heat pack by the couch and a gel ice pack in the freezer, because the answer changes depending on whether the ache feels stiff or hot.
Two pieces of gear are worth knowing about. A pelvic support belt can help during flare-ups or long days on your feet, since it wraps around the hips and gives the joint a little external support. A thicker exercise mat makes floor work easier on a sore back, especially if you are doing bridges and tilts on hardwood. Both are inexpensive and easy to find. Check current prices on Amazon before you commit, since they swing a fair bit through the year.
If you have been through this, drop a comment with what actually helped your SI joint pain. A specific exercise, a belt, a cue your physical therapist gave you, a position change you would never have guessed. Readers comparing notes is often more useful than any single article, and it is how the rest of us figure out what to try next.