Tricep Workouts You Can Do at Home: 8 Exercises for Stronger Arms
Full disclosure: Some links in this article are affiliate links. We may earn a small commission at no extra cost to you if you make a purchase through them. Our recommendations are based on what real users report, not on commission size.
Why Triceps Deserve More of Your Time
Walk into any gym and you’ll see people hammering curls. Biceps get the mirror time. But consider this: your triceps make up roughly two-thirds of your upper arm mass. You can’t curl your way to bigger, defined arms. You have to train the back.
I learned this the hard way. For months, I did curls and wondered why my arms looked the same. A trainer finally pointed out that I was ignoring the entire back half of my arm. Once I added direct triceps work, the change showed up in weeks.
Your triceps have three heads: long, lateral, and medial. All three straighten the elbow, so they work every time you press, push, or extend. But they don’t all get the same tension. Overhead movements put extra load on the long head, the one that gives your arm thickness and that defined horseshoe shape. If you skip overhead work, you’re leaving size on the table.
Resistance bands are ideal for this. With dumbbells, gravity pulls straight down, and at the top of a press the resistance nearly disappears. Bands get harder as they stretch, so tension stays on the muscle through the full range of motion. Your triceps have to fight harder right where you need it most: at full extension.
One good band set is enough to do presses, pushdowns, extensions, and kickbacks at home. No heavy dumbbells, no bench, no spotter, no gym membership. I’ve been training with bands at home for two years, and they’re not a fallback; they’re my main equipment.
Start with the WODFitters Resistance Band Set. It comes with several resistance levels, handles, door anchors, and an ankle strap, so you can hit all three heads from different angles. It runs about $30 — check current prices on Amazon. If you prefer loop bands, the Fit Simplify Resistance Loop Bands Set is useful for lighter moves and warm-ups.
Start with a resistance that lets you do 12 to 15 clean reps. If you’re yanking the band or your form falls apart, go lighter. Controlled tension builds more strength than a band that snaps into place.
Don’t relegate triceps to the last five minutes after curls. Put them first, work through the full range, and one band set will be enough to build serious arm strength at home. Try it for a few weeks and share how it goes in the comments.
Pick the Right Bands for Your Home Tricep Workout
Choosing the right resistance bands can make or break your home tricep workout. You want continuous tension through every rep, not a band that goes slack at the top or bottom. A set with multiple resistance levels lets you warm up light, then switch to heavier bands as your triceps get stronger.
Here’s what I’ve actually used and what I’d buy again.
- WODFitters Resistance Band Set — around $29.99, 4.6-star rating. This is the set I reach for most. It comes with multiple bands and handles, so you can scale resistance as you progress. I’ve used it for overhead extensions, pushdowns, and presses without needing anything extra.
- Fit Simplify Resistance Loop Bands Set — around $19.95, 4.6 stars. If you want loop bands for banded pushdowns or tricep push-ups, this budget set holds up. Mine still have the same snap after a year of regular workouts.
- INNSTAR Resistance Bands Set — around $33.99, 4.5 stars. The door anchor is the selling point. Anchor it at chest height and you can do tricep pushdowns that feel surprisingly close to a cable machine, without the bulky equipment.
- Serious Steel Heavy Resistance Bands Set — around $49.99, 4.6 stars. These heavy-duty bands are worth it once your triceps demand more load. They handle close-grip floor presses and high-volume sets without stretching out or wearing thin.
- TheraBand CLX Resistance Band Set — around $29.99, 4.5 stars. This flat band ties to any length, so it’s ideal for controlled overhead extensions where you can adjust the tension mid-set. It also packs down small for travel.
- Whatafit Resistance Bands Set 20-100LB — around $39.99, 4.5 stars. Color-coded tube bands with handles and a door anchor make transitions between exercises quick. You’ll always know exactly how much load you’re grabbing.
If you’re new to band training, start with the WODFitters set. It’s the most versatile for the price. If you already have handles and only need loops, grab the Fit Simplify set. And if the cable-machine feel is what you’re after, the INNSTAR set with the door anchor is worth the extra cash.
Before each workout, do a quick tension check. Hook up the band, run a few slow reps, and make sure it doesn’t pinch or slip. That five-minute check saves you from fumbling mid-set.
Product prices on Amazon change, so check the current price before you order. If you train with these bands, tell us in the comments which set you used and how your triceps felt.
Overhead Extensions and Kickbacks: Tricep Exercises 1–4
For these first four moves, you want a resistance band with padded handles. I used the WODFitters Resistance Band Set for all of them. The longer tube bands give you better tension control than a loop band, and the handles make overhead pressing a lot more comfortable on your palms. If you only have loop bands, you can knot one around a door anchor, but you’ll spend more time fighting the band than actually working your triceps.
1. Overhead Band Tricep Extension
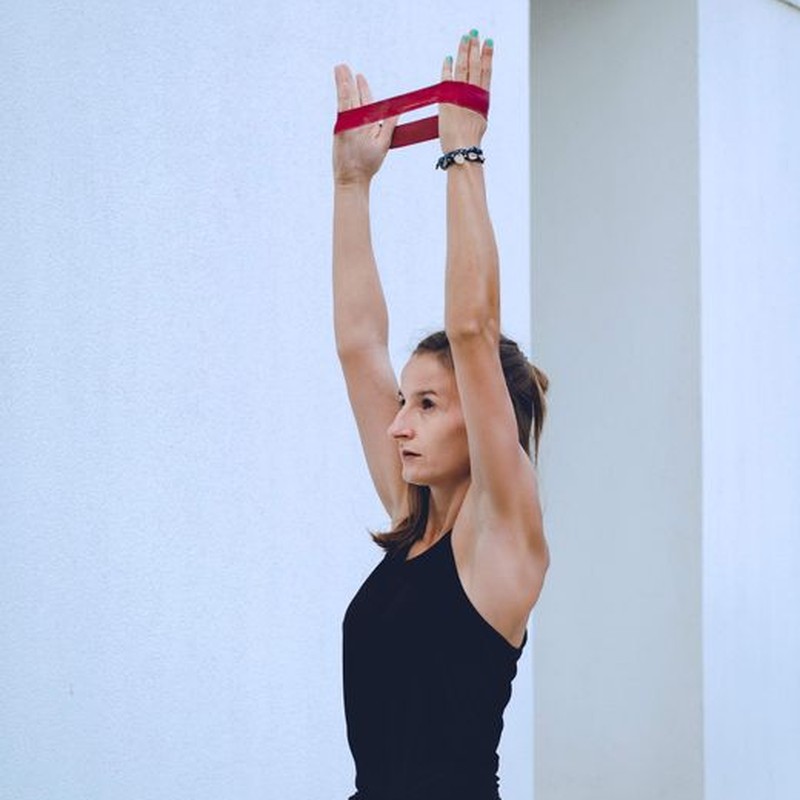
Stand on the center of the band with your feet hip-width apart. Bring the handles up behind your head with your elbows bent. Keep your elbows tight against your ears throughout the movement. Press the handles straight up until your arms are fully extended, squeeze your triceps hard at the top, then lower back behind your head on a slow three-count.
The slow lowering is where the burn really shows up. If your elbows flare outward, the tension shifts to your shoulders and the tricep work disappears. Aim for 3 sets of 12 to 15 reps. If the top of the movement feels too easy, shorten the band by stepping closer to the center.
2. Banded Tricep Kickback
Step on the band with your front foot and hold the handles at your sides. Hinge at the hips until your torso is almost parallel to the floor. Brace your core and keep your back flat. Pin your upper arms to your ribs, then extend your hands straight back until your elbows lock. Squeeze your triceps for a full second before lowering under control.
Don’t let this turn into a full-body swing. The only thing moving should be your forearms. One way I keep it strict: imagine pushing a stubborn shopping cart backward with both hands. The range is short, so use a lighter band and do 3 sets of 15 to 20 reps. You’ll feel it along the back of your arm, close to the elbow.
3. Lying Band Tricep Extension
Lie on the floor with your knees bent and feet flat. Loop the band around your back at shoulder level, bring the ends forward, and grab the handles with your arms bent so your hands sit near your chest. If your band isn’t long enough to wrap around your torso, anchor one end around the leg of a heavy couch and lie facing away from it.
Keep your upper arms vertical and point your elbows at the ceiling. Lower the handles toward your forehead until the band pulls tight, then press them back up. Because the band stays under tension at the bottom, your triceps don’t get a rest. That constant pull is what makes the move so effective.
Watch the band position. I’ve had it ride up toward my neck mid-set, and the tension dropped instantly. Tuck it snug under your shoulder blades before every set. Do 3 sets of 10 to 12 reps with a lighter band than you think you need.
4. Single-Arm Overhead Extension
Anchor the band under your back foot and hold one handle. Press the handle overhead until your arm is straight. Keep your elbow close to your ear and don’t let it drift forward as you lower and press. Only the elbow should bend — your upper arm stays tall.
Finish all your reps on one side before switching. This is where you’ll notice strength gaps. My left side always lags slightly, so I start with the weaker arm to make sure it gets the same honest workload. Do 3 sets of 10 to 12 reps per arm.
If you’re new to band work, a set with multiple strengths makes it easier to build up. The Whatafit Resistance Bands Set includes five levels, so you can use a light band for kickbacks and a heavier one for overhead extensions. For a compact loop-band option, the Fit Simplify Resistance Loop Bands Set works for kickbacks, but I’d stick with a handled band for the three overhead movements.
These four moves cover all three tricep heads from different angles. Slow reps plus constant band tension do the heavy lifting. Turn them into a circuit or straight sets — just don’t cherry-pick the easiest one. If you need a handled band set, check current prices on Amazon for the WODFitters set or the Whatafit set. And leave a comment letting me know which one gave you the biggest burn.
Pushdowns, Presses, and Push-Ups: Tricep Exercises 5–8
The next four exercises build pressing strength and mimic cable-machine work. They also teach you to lock out your arms, which is where the triceps do their main job. One thing I’ve learned from doing these on a living room rug: set the band so there is tension before the first rep. If it sags, you burn the first inches of the movement with no real resistance.
5. Banded Tricep Pushdown
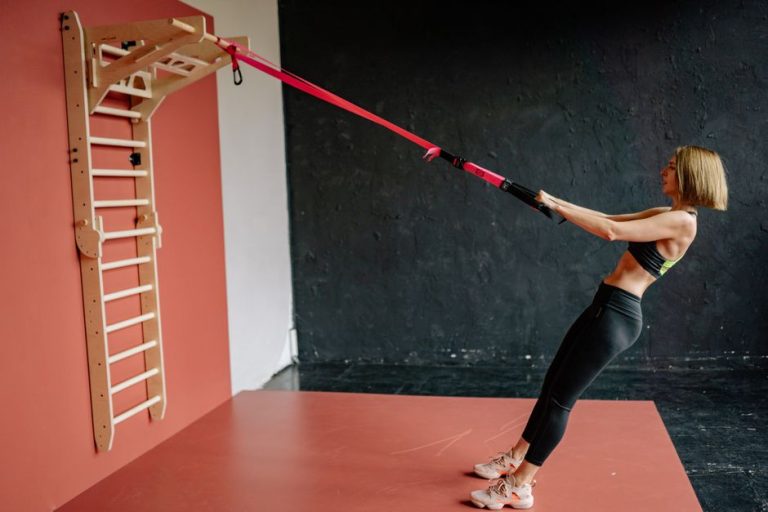
Loop the band around a door anchor at chest height. If you’re using a handled set like the WODFitters Resistance Band Set, attach both handles and walk back until you feel pull. Grip palms-down, stand tall, and tuck your elbows against your ribs. Press your hands down until your arms are straight and the band is taut, then return slowly to chest height.
The most common mistake is letting your elbows drift forward as your hands drop. That pulls your shoulders and chest into the move and takes tension off the triceps. Keep your upper arms still and imagine squeezing a towel between your elbows and sides for the whole set. Also avoid leaning into the door or shrugging as you press.
Use this as a warm-up for the presses below. Pick a band that lets you hit 15 clean reps with the last two still smooth. If you have to fight just to lock out, go lighter.
6. Banded Close-Grip Floor Press
Wrap the band across your upper back, thread the ends under your armpits, and hold both handles. Lie on the floor with knees bent and feet flat. Start with your hands just above your lower chest, elbows tucked at about 45 degrees—not flared out. Press up until your hands meet above your sternum, squeeze your triceps, then lower with control. When your upper arms touch the floor, you’ve hit your natural range of motion; this protects your shoulders better than a bench press without a spotter.
If the band bites into your back, wear a long-sleeve shirt or lay a towel between the band and your skin. A medium-heavy tube from the Whatafit Resistance Bands Set works well for 8–12 reps once you’re comfortable. You want enough load that the last two reps feel serious, but not so much that your form breaks.
7. Band-Resisted Tricep Push-Up
Plain push-ups lose tension at the top, exactly where your triceps need to work hardest. A loop band fixes that. Stretch a loop band like the Fit Simplify Resistance Loop Bands Set across your upper back and hook the ends under your hands. Get into a high plank with your hands under your shoulders or slightly narrower. Lower your chest to the floor, keeping your elbows around 45 degrees from your sides, then push the floor away. Don’t let your hips sag and don’t let your elbows fly out.
The band gets tighter as you straighten your arms, so the lockout at the top is the hardest part. Fit Simplify’s set has five levels, so you can start with the lightest loop and work up. Once you hit 10–12 controlled reps with one band, move to the next color. I keep a loop band on a door handle between sets so it stays flat and doesn’t roll into a twisted mess.
8. Banded Cross-Body Extension
Anchor the band low around a sturdy table leg or a door anchor set near the floor. Stand sideways, hold the handle with the hand farthest from the anchor, and step out until there’s tension. Straighten your arm diagonally across your body, pushing your hand down and toward your opposite thigh. Keep your upper arm still. Pause at full extension, then return slowly.
I put this last because it pumps the triceps without needing a heavy load. You can also do it standing on the middle of a long band. The TheraBand CLX Resistance Band Set is a flat continuous band that gives constant tension, which keeps the triceps firing through the whole range.
Keep your wrist neutral and don’t twist your torso as you reach. If your shoulder starts taking over, move closer to the anchor and slow down. Aim for 2–3 sets of 12–15 per side.
How to Put These Together
For a focused triceps finisher, run the four moves as a circuit: 12 pushdowns, 10 floor presses, 8 banded push-ups, and 12 cross-body extensions per side. Rest 60 seconds and repeat 2–3 times. Use a heavier band for the press and a lighter one for the pushdown until you learn the tension.
Before every set, check that the band is anchored securely and free of frays or twists. The Serious Steel Heavy Resistance Bands Set is a durable choice for pressing moves, and the INNSTAR Resistance Bands Set offers several handled levels for home work. Check current prices on Amazon and leave a comment about which exercise made your triceps feel the most fried.
Your Home Tricep Workout Plan and Common Form Mistakes
You’ve got the eight exercises. Now here’s how to turn them into a full session. This is the structure I use when I train at home — it takes about 25 minutes, hits all three heads of the triceps, and it’s simple enough that you won’t need to think much once you get going.
The Routine: 3 Rounds, 10–15 Reps
Run all 8 exercises as a circuit. Complete 3 rounds total, 10–15 reps per exercise. Move from one exercise to the next quickly — just enough time to reset your band — then rest 60–90 seconds between rounds. Want a tougher session? Cut rest to 45 seconds.
- Rounds: 3
- Reps: 10–15 per exercise
- Rest between exercises: minimal — just setup time
- Rest between rounds: 60–90 seconds (45 if you want a challenge)
I’ve learned to write the circuit down or keep it on my phone. When you’re tired, you’ll forget what comes next — and that’s when exercises get skipped.
Start Light and Progress Intelligently
Start with your lightest band on any new exercise. The first few reps might feel too easy. That’s normal — you’re building the movement pattern and letting your elbows and shoulders adapt to the new angle of tension.
Move up in resistance only when the last 2 reps of each set feel smooth and under control. If you’re fighting to finish rep 12, the band is too heavy. Stay where you are and work on control. The heavier band will still be there next month.
The WODFitters Resistance Band Set has multiple resistance levels, which makes progression easy — you just swap bands between exercises or between weeks. I’ve used mine for a couple of years and the bands still hold tension. The Fit Simplify Resistance Loop Bands Set is lighter and better for warm-ups and mobility work, so I wouldn’t rely on it for heavy tricep training.
The #1 Form Mistake: Letting Your Elbows Drift
The biggest mistake in band tricep work is elbow drift. When your elbows move all over the place — sliding forward during pushdowns, flaring wide during overhead extensions — your shoulders and chest steal the load. Your triceps get less tension, and you end up doing a shoulder workout instead of an arm workout.
Keep your elbows pinned to your sides for pushdowns. For overhead extensions, keep them pointing forward, close to your head. If you feel your elbows wandering mid-set, slow down and reset. Every rep counts.
A trick that works: do a few reps in front of a mirror, or film yourself. I’ve had clients swear their elbows were locked in place — then watch the video and see them slide forward by rep three. One look is usually enough to fix it.
Can’t Feel Your Triceps? Slow Down
If you can’t feel the triceps working, the answer isn’t a heavier band. It’s control.
Slow the lowering portion of each rep to 3 seconds. Pause for 1 second at the bottom. Press up in 2 seconds. That 3-1-2 tempo keeps constant tension on the triceps through the full range of motion. More control beats heavier bands every time.
Cooldown: Take Two Minutes
When you finish the last round, your triceps will be tight. Spend two minutes stretching:
- Overhead tricep stretch: 30 seconds per arm. Reach one arm overhead, bend your elbow so your hand drops behind your head, and gently pull the elbow with your opposite hand.
- Band pull-aparts: 10 slow reps. Hold a light band in front of you at chest height, hands shoulder-width apart, and pull it apart by squeezing your shoulder blades. This opens up your chest and shoulders after all that pressing work.
Your Next Two Weeks
Run this routine for two weeks — three sessions per week, with at least one rest day between sessions. After two weeks, come back and share which exercise burned your triceps the most in the comments. I’m always curious which ones hit hardest for people — it varies a lot.
If you’re still shopping for bands, the Serious Steel Heavy Resistance Bands Set is great once you need more tension. The Whatafit Resistance Bands Set covers a good range for most beginners. The INNSTAR Resistance Bands Set and the TheraBand CLX Resistance Band Set are both dependable. Check their current prices on Amazon — these sets go on sale pretty regularly.