Grip Strength Training at Home: A Beginner Workout With Dumbbells or Towels
Why Grip Strength Is a Longevity Marker (And How to Test Yours)
When I first read that grip strength predicts how long you’ll live, I shrugged it off. Then I pulled the actual papers and stopped shrugging.
The biggest one is the PURE study, published in The Lancet in 2015. Researchers followed roughly 140,000 adults across 17 countries, ages 35 to 70, squeezed a hand dynamometer, wrote down the number, and then waited. Every 5-kilogram (11-pound) drop in grip strength was associated with a 16% higher risk of dying from any cause, a 17% higher risk of cardiovascular death, and a 9% higher risk of stroke. In that same analysis, grip strength beat out systolic blood pressure as a predictor of death from any cause.
A few years later, a UK Biobank analysis of about half a million people, published in the BMJ in 2018, found the same pattern: weaker grip went along with higher rates of all-cause mortality, cardiovascular disease, respiratory disease, and some cancers. Adjusting for age, activity level, and other risk factors barely moved the numbers.
None of this means a strong grip causes a longer life. Grip is a marker, not a lever you can pull for extra years. It just happens to be an unusually honest marker — one that tracks closely with your overall muscle function, nerve signaling, and how much physical reserve you’ve held onto. A weak grip is often the first sign that other muscles are fading too, and that shows up in real life before it shows up in a lab. Jars that won’t open. Grocery bags you have to set down halfway to the car. Grabbing a railing when you trip instead of catching yourself.
That’s what pulled me in. My father started asking me to open pickle jars, and it wasn’t a joke to him. He’d lost something he never thought about losing.
Here’s the encouraging part: grip strength responds to training at any age, and you don’t need a gym membership or a $200 dynamometer. A pair of dumbbells or two hand towels will train all four grip types. I’ve used both setups at home, and the towel version is humbling — my forearms were sore for two days the first time.
Before you train, get a baseline. You need a tennis ball, a racquetball, or a tightly rolled sock.
- Squeeze as hard as you can for 3 seconds. Full effort, no holding back.
- Do it with your right hand, rest a minute, then your left.
- Compare the two sides. A gap bigger than 10% is worth working on.
- Also note your absolute strength. If you can barely dent the ball, start with light loads. If you crush it flat, you have a solid base to build from.
Write both numbers down somewhere you’ll find them again, and retest in six to eight weeks. When I ran this test the first time, my right hand squeezed noticeably harder than my left — a gap I’d never noticed in daily life. That asymmetry became my first goal, and it closed up faster than I expected once I started training both sides deliberately.
Over the next few sections, this tutorial walks you through six beginner exercises that cover the four grip types: crush, pinch, support, and extension. Each one loads a different part of your hands and forearms, and together they make carrying, pulling, and holding onto things noticeably easier.
Run the tennis ball test before you read on. Then drop your numbers in the comments — left hand, right hand, and which side surprised you.
The Four Grip Types You’ll Train (And the Only Gear You Need)
Grip is not one quality. It is four separate jobs your hands do, and each one gets strong in its own way. Most people only train the first, then wonder why their hands still feel shaky carrying grocery bags up the porch steps.
Here is the short version of all four. The next section walks through how to actually load and perform each one.
1. Crush grip: closing your fingers around something
Your handshake grip. Fingers curl, thumb wraps, and the whole hand squeezes inward. Jar lids, leashes, rake handles.
Train it with a rolled towel or a soft rubber ball. Roll a hand towel lengthwise into a rope about an inch and a half thick, and know that a thicker roll is a harder squeeze. When you close your hand, start the squeeze with the pinky and ring finger, then let the index finger and thumb follow. That order keeps the tension in your hand instead of your wrist.
2. Pinch grip: thumb and fingers, no wrapping
Carrying a plate, pulling a baking sheet out of the oven, lifting a book off a high shelf. It is the weakest of the four for most adults and usually the first to fade with age.
The house-friendly tool is a dumbbell plate, a thick hardcover, or a stack of two or three books. Grip the edge, not the cover. I would skip the two-dinner-plate demo that circulates online. Porcelain plus a tile floor is a bad combination, and one slip is a real cut.
3. Support grip: holding a weight for time
Nothing is squeezing here. You are hanging on. This is the grip behind farmer’s carries, deadlifts, and hauling full buckets across the yard.
Dumbbells are the easy option. Full gallon jugs of water weigh roughly 8.3 pounds each, which makes two of them a legitimate training weight.
4. Extension: opening your fingers against resistance
Everything above is a closing motion, and the muscles that open your hand get ignored. A plain rubber band looped around your fingertips covers it. Hair ties and produce bands from the grocery store work fine too.
The gear list, which is shorter than you think
- One pair of dumbbells, 5 to 25 pounds. Buy lighter than you think you need. You are holding them for time, not pressing them overhead.
- Two hand towels. Cut a bath towel in half. Thrift store towels are perfect for this.
- A rubber band. Already in your kitchen drawer.
No dumbbells yet? Two full water jugs, a backpack loaded with books, or a bag of rice all work. Weigh the backpack on your bathroom scale so you know what you are actually carrying around the house.
Disclosure: some links on this site are affiliate links. If you buy through them, we may earn a small commission at no extra cost to you.
If you do buy a pair, check current Amazon prices before you commit, since the same set can swing quite a bit depending on brand and season. A local sporting goods store is worth a stop if you want to feel the handle first.
For the training space itself: about six feet of clear floor, a wall or sturdy chair within arm’s reach for balance, and shoes with a flat sole. Skip thick carpet if you can, because it makes standing carries wobblier than they need to be. That is the entire setup.
One caution worth saying plainly. If you have arthritis, carpal tunnel, or hand pain that wakes you up at night, run this by your doctor or a physical therapist first. Nothing here is dangerous, but all of these movements modify well, and starting lighter costs you nothing.
Step-by-Step: 6 Beginner Grip Exercises for Home
Grip training doesn’t need a fancy gym. A pair of dumbbells or even a couple of hand towels can do the job. I’ve used these six moves with people in their 60s and 70s, and with younger lifters who just want their hands to keep up with their deadlifts. Treat each rep like it matters — no rushing, no bouncing.
Do them in the order below, or pick two or three to tack onto your regular workout. Aim for two or three grip sessions per week, with at least a day between them. Start light. Your hands and forearms will tell you when to add weight.
1. Towel Squeeze
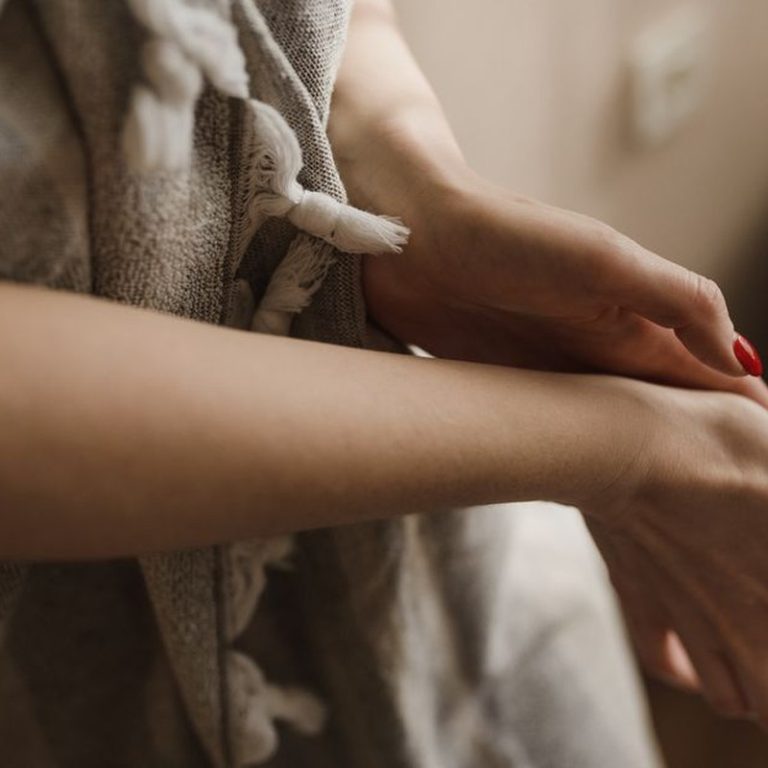
Setup: Roll a hand towel into a tight cylinder. Hold it in one hand.
Form: Squeeze hard for 5 seconds, then release. That’s one rep. Keep your elbow relaxed — imagine you’re trying to wring water out of the towel without moving your wrist much.
Reps/Sets: 3 sets of 5-second squeezes per hand.
The mistake to avoid: squeezing with your arm instead of your fingers. Your elbow should stay relaxed, and you should feel the work in your forearm and hand.
2. Dumbbell Static Hold (Farmer’s Hold)
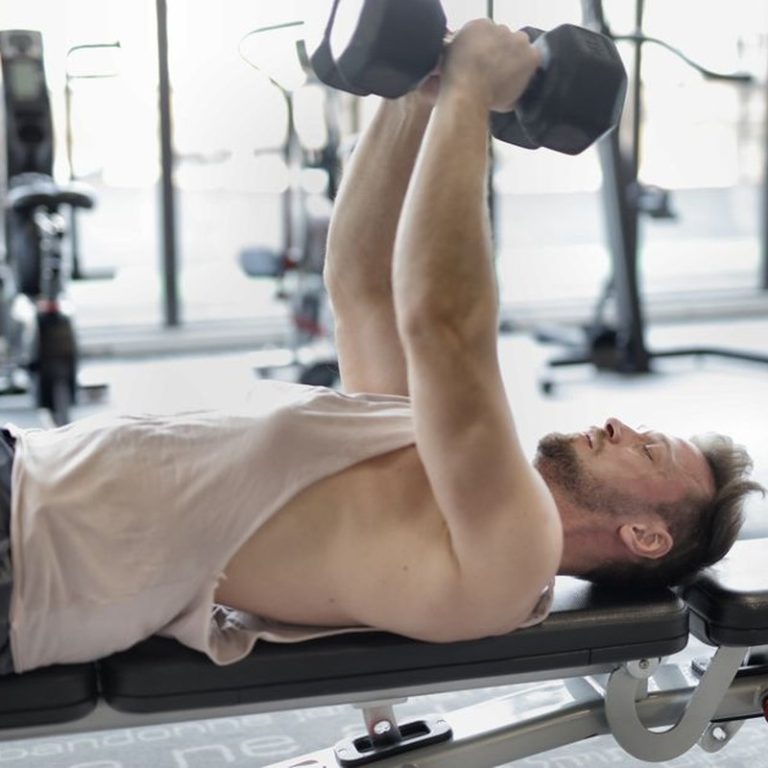
Setup: Stand tall, hold a dumbbell in one hand at your side. Use a weight you can hold for at least 20 seconds.
Form: Let your arm hang straight. Shoulders down and back — don’t let them shrug up toward your ears. Hold for 20–45 seconds. That’s one hold.
Reps/Sets: 2–3 holds per hand.
Common mistake: Shrugging. If your shoulders creep up, the weight is too heavy or you’re fatigued. Put the dumbbell down and rest.
When I first tried this, I lasted 15 seconds with a 20-pound dumbbell. Now I can do 45 with 40 pounds. Start light and build up.
3. Farmer’s Carry
Setup: Hold a dumbbell in each hand, stand tall.
Form: Walk 30–50 feet. Keep ribs stacked over pelvis — don’t lean back. Grip tight, knuckles facing forward. Take small, controlled steps.
Reps/Sets: 2–3 trips.
Leaning back or letting the weights swing is the usual mistake. If you feel your lower back arching, lighten the load.
I like to set a timer for 30 seconds and see how far I get. It’s a great finisher for a leg day.
4. Wrist Curl
Setup: Sit on a bench or chair. Rest your forearm on your thigh, palm up, holding a dumbbell.
Form: Curl the dumbbell up by bending only your wrist, then lower slowly. No rushing, no bouncing.
Reps/Sets: 2 sets of 12 reps.
Common mistake: Using too much weight and swinging the arm. Use light weight — 5 to 10 pounds is plenty for most beginners.
I’ve seen people try to use 25 pounds right away and end up with sore elbows. Don’t be that person.
5. Reverse Wrist Curl
Setup: Same as wrist curl, but palm down.
Form: Lift the dumbbell up by extending your wrist. This trains the extensors, which are usually weaker.
Reps/Sets: 2 sets of 12 reps.
Going too heavy is the mistake here. Start with 2–5 pounds. These burn in a good way. I do them right after regular wrist curls.
6. Plate Pinch or Towel Pinch
Setup: Pinch two towels together (folded) or a dumbbell plate between your thumb and fingers.
Form: Hold for 10–20 seconds. If it slips, use a lighter plate or fewer towels.
Reps/Sets: 2–3 holds per hand.
Common mistake: Using a plate that’s too heavy and dropping it on your foot. Safety first — start light.
I use a 10-pound plate and it’s plenty for a beginner. You can also pinch the smooth side of two 5-pound plates together.
That’s the full workout. Do it two or three times a week, and you’ll notice your grip feeling more solid in everyday tasks — carrying groceries, opening jars, holding onto a leash. If you need dumbbells, check current prices on Amazon; a simple set of hex dumbbells will last you years. And if you try these, drop a comment below and tell me which one surprised you the most.
Common Mistakes and Safety Fixes for Older Joints
Grip work is simple, but simple does not mean forgiving. The hands and forearms take a lot of daily abuse before you ever pick up a dumbbell. Add a few decades, some desk work, and a stubborn streak, and the same exercises that build strength can leave you sore for a week. Here are the errors I see most in beginners over 50, and how to fix them without turning your training into a medical appointment.
Heavy Weight, Slow Tendons
Your muscles can get stronger in two or three weeks. Tendons and ligaments in the fingers and wrist need months. That mismatch is why so many people jump from a 20-pound dumbbell to a 35 in one session and then wonder why their hands ache for five days.
Pick a weight you can hold for a full 30 seconds without your form falling apart. Stay there for two weeks before adding anything. When you progress, add 2 to 5 pounds. Not 15.
Broken form shows up in small ways: your fingers start to uncurl, the dumbbell slides toward your fingertips, your wrist bends forward or back, your shoulder climbs toward your ear. If you finish a hold and immediately shake your hand out for ten seconds, the weight was too heavy. Drop 5 pounds and try again.
Using towels? The same rule applies. A thinner towel or a harder wring is the equivalent of adding weight. Add a fold before you add a rep.
In my coaching, I have watched beginners stall for three months because they refused to spend two weeks at a lighter load. That trade is never worth it.
Pain That Pinches vs. Pain That Burns
A dull, warm ache in the forearm during a hold is normal. It feels like tired muscle, and it fades within an hour or so. That is training.
A sharp, pinching, or shooting sensation is not. Neither is pain that travels into the hand, up past the elbow, or wakes you up at night. When that happens, stop the set. Do not try to warm it up and push through.
Here is how I back off without losing progress:
- Cut your working weight by 30 to 50 percent for a week. If the pain disappears at the lighter load, you found your current ceiling.
- Shorten the hold to 10 or 15 seconds. Do more sets of fewer seconds instead of one long grind.
- Reduce range of motion. Hold the dumbbell higher, closer to your waist, so your wrist stays neutral. Skip full dead hangs for now.
- Switch to towel squeezes and finger extensions for a week. They keep blood moving through the forearm without loading the irritated joint.
Most beginners who do this are back to their normal working weight in two or three weeks. The ones who push through are usually still complaining about it two months later.
The Half of Grip Training You Are Probably Skipping
Every exercise in this program asks your fingers to close. Almost nothing asks them to open. That imbalance makes the flexors on the palm side of your forearm strong and tight while the extensors on the back of the arm stay weak. In my experience, it is a common source of elbow tenderness in lifters and in people who type all day.
The fix costs about five dollars. Get light rubber bands and do finger extensions daily:
- Loop the band around all four fingertips and your thumb, so your hand sits inside the loop.
- Spread your fingers wide against the band. Go slow, about two seconds out.
- Return to a relaxed hand and repeat. Aim for 20 to 30 reps per hand.
- Do it once a day, ideally after your grip session or at your desk in the afternoon.
I keep a band in my car and do a set at red lights. That habit cleared up an elbow ache I had dealt with for most of a year. That is one person’s experience, not a research study, but it is cheap enough to test on yourself.
If you want a band set rather than a junk-drawer special, check current prices on Amazon. Anything labeled light or medium resistance works.
Breathing: The Part Nobody Films
Beginners hold their breath during holds without noticing. The weight goes up, the jaw clenches, and 20 seconds pass with no air moving. That spikes blood pressure quickly, and it hits harder as you get older, especially if you take medication for hypertension. It also makes the hold feel harder because your muscles are not getting oxygen.
Breathe steadily. Exhale on the squeeze or lift, inhale on the release. During a timed hold, count your breaths. Four or five calm breaths across 30 seconds is about right. If you cannot talk while you hold, the load is too heavy.
Before Your First Session
The medical clearance list lives at the end of Section 2. If you have a joint condition, nerve issue, or recent hand surgery, go back and read it before your first set. A physical therapist can tell you in five minutes which grip positions are safe for your joints and which ones will flare you up. That is worth more than any online program.
A few more guardrails that apply to everyone:
- Do not schedule hard grip work the day after a heavy pulling session. Give your hands and forearms at least 48 hours between tough efforts.
- Stop any exercise that causes numbness or tingling in the fingers. That is a nerve signal, not a muscle one.
- Warm up with 30 seconds of easy finger extensions and slow wrist circles before your first hold.
- If something hurts for more than a week, cut your volume in half and reassess. Do not quit outright.
Grip progress is quiet. You will not see it week to week. Then one morning you carry every grocery bag in one trip, and you understand why you were patient.
If you try this plan, share your experience in the comments. I read them, and I answer the ones about form first.
Your Weekly Grip Routine (Plus How to Progress)
Two grip sessions per week is the baseline for beginners. Three is the ceiling, and only if you’re recovering well between them. The scheduling rule matters more than the number: never place two hard grip days back to back, and leave at least 48 hours between sessions. Monday and Thursday works. So does Tuesday and Friday. If you want a third day, run Tuesday, Thursday, Saturday, so each session sits a full 48 hours behind the last one.
Tendons and ligaments in the hands and forearms receive less blood flow than muscle does, which is why they complain when you rush them. A little stiffness the morning after training is normal. Soreness that hangs around past a full day means you skip the next session instead of pushing through it. Nothing you do in one extra workout will outpace what a strained wrist costs you in time off.
The Sample Beginner Session
You need a dumbbell or two, a hand towel, and a rubber band. Rest 45 to 60 seconds between sets of the squeezing, curling, and extension work. Carries get 60 to 90 seconds, because your grip is the limiting factor and it needs the extra breath. With that rest built in, the full session takes about 20 to 25 minutes from warm-up to last set, so plan for a real block of time rather than squeezing it in between other chores.
- Towel squeeze: 3 sets of 5 seconds per hand. Fold a hand towel into a thick pad, squeeze it as hard as you can like you’re wringing water out of it, then release slowly. That’s one set.
- Farmer’s carry: 3 sets of 40 feet. A dumbbell in each hand, or two loaded grocery bags if that’s what you have. Stand tall, shoulders back, ribs down, and take short, quick steps. Don’t let the weights swing into your legs.
- Wrist curls: 2 sets of 12 reps. Sit with your forearms resting on your thighs, palms up. Let the dumbbells roll toward your fingers, then curl the wrists up and lower with control.
- Reverse wrist curls: 2 sets of 12 reps. Same setup, palms facing down. Go lighter here. Your wrist extensors are almost always the weaker half of the pair.
- Finger extensions: 2 sets of 15 reps. Loop a rubber band around your fingers and thumb, open your hand against the band, then close slowly. This balances out all the squeezing.
If that volume leaves your hands trembling for an hour afterward, cut to two sets on the towel squeeze and the carries. Building up slowly beats starting heavy and missing two weeks.
Progression: Change One Variable at a Time
Every one to two weeks, check whether you finished every set and rep with clean form and no joint pain. If you did, pick exactly one of these and apply it:
- Add 5 seconds to each towel squeeze hold.
- Add 5 feet to each farmer’s carry.
- Add 2 to 5 pounds to wrist curls or reverse wrist curls.
Do not add weight and time in the same week. That combination is how beginners end up with a sore medial elbow that takes a month to settle down. Your hands need one clear signal to adapt to, not two at once. When you do add load, keep the reps and seconds where they are for a full cycle before touching anything else.
A training log makes this manageable. I keep a cheap notebook on the kitchen counter and write down the date, exercise, weight, sets, reps, seconds, or distance, nothing fancy. It’s the only reason I can tell you my carries moved from 40 feet to 70 feet over two months. A notes app on your phone works just as well if you’d rather not keep paper around.
Missed reps or grip giving out early? Repeat the same numbers next session and try again. Wrists or elbows feeling cranky? Halve the volume for a week and see how they respond. Tendons reward patience and punish force, and they don’t care how motivated you feel on a given morning.
Every four to six weeks, take a deload week. Do one set of each exercise at the same weights, then move on with your day. That is not losing progress. It’s how you’re still doing this in six months instead of nursing an injury at week five.
Carry It Into Daily Life
Grip training doesn’t stop when the dumbbells hit the floor. Carry groceries with a firm grip instead of cradling them against your chest. Open jars by hand before handing them to someone else. Rake leaves, pull weeds, haul laundry baskets, shift firewood. These chores load the same patterns you’re training, and they’re a built-in reminder of why any of this matters: independence, plain and simple.
One reader told me she started carrying a bag of groceries in each hand from the car, and within a month her farmer’s carry dumbbells felt noticeably lighter. That’s the carryover you’re after, and it happens for free.
Gear and Your Next Step
Towels and a rubber band will carry you a long way, so don’t feel rushed to buy anything. When you’re ready to add load, adjustable dumbbells give you the most room to keep progressing without a rack full of fixed weights. A grip strengthener is handy for travel days, and a pack of rubber bands keeps finger extensions simple.
Disclosure: this post contains affiliate links. If you buy through them, I may earn a small commission at no extra cost to you.
Ready to gear up? Check current prices on Amazon for adjustable dumbbells, grip strengtheners, and rubber bands.
When you’ve run the session once or twice, drop a comment with the exercise that felt hardest for you. The towel squeeze catches most people off guard, but the carries are usually the humbling one.