How to Bench Press at Home Without a Spotter: Safety Setup, Form, and Fail-Safes
Full disclosure: Some links in this article are affiliate links. We may earn a small commission at no extra cost to you if you make a purchase through them. Our recommendations are based on what real users report, not on commission size.
Set Up Your Home Bench for Solo Lifting
Benching alone at home changes the math. In a gym, a missed rep means a quick tap on the shoulder. At home, that missed rep can pin you under the bar. I spent a few years lifting by myself in the garage, and my closest call came from setting the safety pins too low. This is the setup that keeps that from happening.
Bench inside a rack or pair it with squat stands that have safeties
A power rack is the easiest answer. Put the bench inside the rack, with the J-hooks on the front posts and the safety pins on the side posts. If you’re starting with squat stands, look for adjustable safety arms that mount to the stands. Some stands even come with spotter arms made for benching. Whatever you use, the goal is the same: you want a metal shelf below the bar that can catch it if your arms fail.
Set the safety pins by the touch point, not by guessing
This is where most solo lifters get into trouble. The old advice was to set the pins at the height of your chest when arched. That’s a rough starting point, but it’s not precise enough. The measurement that matters is your chest touch point—the exact spot where the bar lands on your chest during a normal rep.
Lie on the bench, set your arch (shoulder blades back, chest up), and unrack the empty bar. Lower it slowly until it just touches your chest. That is your touch point. Now set the pins so they’re about half an inch to an inch below the bar in this position. This keeps the bar clear of your neck, because your chest is the highest point of your arch.
That small gap is what gives you both full range of motion and crash protection. On a normal rep, the bar touches your chest and never clanks into the pins. If your arms give out, the bar has less than an inch to fall before the pins catch it. That’s the difference between a failed rep and an emergency-room visit.
Too many people set the pins either right at chest height or far too low. At chest height, the pins interfere with the bench’s arc and you end up bouncing the bar with your sternum. Far too low, and a missed rep travels a long way before stopping. A low safety is no better than no safety.
Check the J-hooks and collars before you load the bar
J-hooks get no respect. If the bar is sitting unevenly in them, it can slide as soon as you unrack it. Before adding any weights, set the empty bar in the J-hooks and check the knurling rings. The rings on each side should sit the same distance above each hook. If not, move the hooks up or down before you get under the bar.
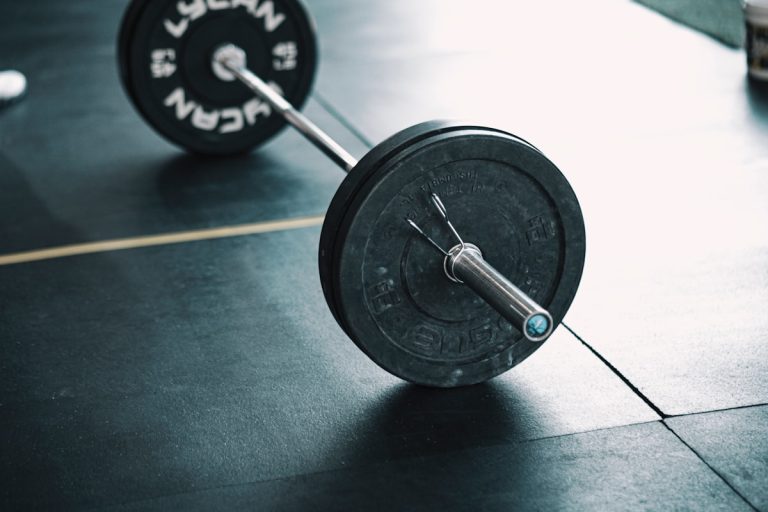
Then lock the collars on both ends. I used to skip collars at home thinking I could ditch the plates in an emergency. That’s backwards. A loaded bar with no collars can shift, jam against the upright, and fall sideways as you rack it. Locked collars keep the plates in place so the bar rests exactly where it should in the hooks.
No rack? Do not bench in the center of a room
A bench alone is not a safe setup. If you don’t have a rack or stands, use a rack-mounted safety attachment or a bench with built-in safety catches. These exist and they work. I tried a bench with built-in catches for a year in a small apartment. It took up almost no extra space and let me hit heavy singles with nobody around. Never rely on a friend to jump in at the last second. The person standing next to you in your garage is often too far away, too distracted, or too weak to save a bar that’s already on your ribs.
Test the safeties with an empty bar before every session
This takes ten seconds. Unrack the empty bar and lower it to where your touch point would be. Do it with your arch set. Feel the bar miss the pins by that half-inch gap. Then press it up and rack it. That quick rehearsal tells you the pins are in the right spot before you commit to a heavy set.
Know how to escape when the bar is on the pins
If you do fail and the bar drops onto the safeties, don’t panic. Keep your hands on the bar so it can’t roll, bend your knees, and plant your feet. Rock your hips to one side, slide your shoulders toward the other side, and shimmy out from under the bar. The bar stays on the pins while you move. You do not need to dump one side. Letting the plates slide off is how bars get bent and floors get wrecked.
Most safety gear for this setup is on Amazon, so check current prices there before buying. And if you already have a home bench setup you trust, share it in the comments. Your arrangement might be the one a stranger needs tomorrow.
Grip, Arch, and Body Position Before the First Rep
Before you load the bar, fix your setup. The bench press is more than pushing a bar off your chest. A sloppy start leaves your shoulders in a bad spot and turns a good lift into a painful one.
I learned this in my own garage. I used to jump straight into pressing, and within a few weeks my front delts were sore and my chest workouts went nowhere. So take the time to set this up with an empty bar. It will feel boring, but it works.
1. Set Your Grip
Wrap your thumbs around the bar. Skip the thumbless grip when you’re lifting alone at home. Set your hands about shoulder-width plus 2 to 4 inches. That sounds wider than most new lifters expect, and that’s normal. At the bottom of the press, your forearms should point straight up. If your grip is too narrow, your elbows end up behind your wrists and the bar feels shaky. Too wide, and you lose power while the front of your shoulder takes abuse.
2. Plant Your Feet and Build the Arch
Get your feet flat on the floor. Slide your heels back until they sit directly under your knees. If your bench is tall and your feet barely touch, put a plate under each foot so you can drive through the floor without losing contact.
Squeeze your glutes and pull your shoulder blades back and down toward your back pockets. That does two things: it creates a slight arch in your lower back and locks your upper back into a stable shelf for the bar. The arch comes from those two actions, not from pushing your lower back up like a bridge. Keep your butt on the bench and your ribs down.
Check your foot pressure before every set. You want your whole foot planted, with a little more pressure through your heels. Test it by wiggling your toes. If they move easily, your feet are doing something.
3. Stack Your Wrists and Set Your Elbows
Your wrists should be straight at the start. Look down: the bar should sit over the base of your palm, in line with your forearm bones. If your wrist bends backward, the bar rolls too far back and the load dumps into your wrists. Straight wrists keep the force moving through your arms and into your chest.
Before unracking, tuck your elbows so your upper arms sit at about a 45-degree angle to your torso. Don’t let them flare out to 90 degrees. That flared position is a fast track to shoulder pain. As you press, you can fall in the 45- to 75-degree range; just keep your elbows out of the default 90-degree line.
4. Breathe, Brace, and Unrack
Take a big belly breath before you touch the bar. Brace your core as if you’re about to take a body shot. Expanding your abs against your lifting belt or your waistline holds your ribs and pelvis together, which gives you a stronger pressing base.
Pull the bar out of the hooks with your lats tight and your elbows tucked. Don’t push it straight up. Once it clears the hooks, bring it over your lower chest and let it settle for a second. Recheck yourself: feet planted, glutes tight, shoulder blades pinned, wrists straight, elbows tucked, breath held.
If anything feels off, re-rack and adjust. One clean setup rep is worth more than five sloppy ones.
Take this setup on your next chest day. If your home rack doesn’t have safety arms yet, check current prices on Amazon before you go heavy, and leave a comment with your setup questions. A boring setup beats a scary lift every time.
Lower the Bar With Control and Tuck Your Elbows
Lowering the bar is where most solo lifters get into trouble. It feels like the easy part because the weight is moving down, but it’s when you discover whether your bar path is actually stable. Without a spotter, you don’t get a second chance to fix a wobble or redirect a bad descent. Every rep has to look the same.
Your first fix: move the bar in a slight diagonal line from over your shoulders down to your lower chest or sternum. It should not drop straight down toward your neck, and it shouldn’t land near your armpits. If your hands are just outside shoulder width, think about bringing the bar to the spot where a shirt button would sit — around the nipple line. For most lifters, that is your lower chest and sternum. Same target, just a more concrete picture.
Elbow Angle: 45 to 75 Degrees
Elbows are the second thing to check. Tuck them at about a 45- to 75-degree angle from your torso. You don’t want them pinned all the way into your ribs like a close-grip triceps press, and you definitely don’t want them flared out so your upper arms are level with your shoulders. There’s a middle window that feels strong and doesn’t pinch the front of your shoulder.
A 60-degree angle is a reliable starting point with a moderate grip. Keep your elbows under the bar as it comes down, rather than letting them drift behind it. When I train at home alone, I set up a mirror to the side and do a few empty-bar reps just to check that angle. It’s easy to think you’re tucked when you’re actually flared, especially when the weight gets heavy.
Take About Two Seconds on the Way Down
The descent should be controlled, not rushed. Aim for about two seconds from the top to your chest. That might feel slow at first, but it’s your safety window. When you lower slowly, you have time to notice that the bar is drifting, that your wrist is bending back, or that you’ve lost tightness in your shoulders. On a fast rep, those problems show up in one split second at the bottom, and then you’re pinned.
Two seconds also prevents a bouncy rebound. A bench press isn’t a bounce. Whether you’re doing touch-and-go reps or pausing on your chest, you want the bar to settle, not slam. If you let gravity do all the work, the bar can hit your ribs and shift your body position right before you push — that’s a terrible way to find out you had no control.
Keep Your Ribs Down and Glutes on the Bench
The bottom of the movement is where your body wants to take shortcuts. The most common one: overextending. You might push your lower back up, lift your glutes off the bench, or let your ribs flare toward the ceiling to shorten the range of motion. That might feel like you’re handling the weight more easily, but it turns the movement into a partial press and can strain your spine under load.
Keep your feet planted and your glutes in contact with the bench. Your shoulder blades should stay pinched together, and your ribs should stay down. A small arch in your lower back is fine if it’s natural, but don’t turn it into a bridge. Think about pressing your lower back slightly toward the bench as you descend, or pulling your ribs down as you breathe in. This keeps your shoulders stable and your torso solid for the press.
Breathing Pattern for a Safer Set
Take a deep breath at the top, before you start the descent. Hold that brace in your core and upper body for the entire lowering phase. At the bottom, do not exhale. Press the bar up, then blow out after you pass the sticking point or when the rep is done. That keeps your torso tight and prevents you from losing position halfway down.
If you let the air out at the bottom, your shoulders and upper back tend to soften right when the bar is resting on your chest. That’s not the moment you want to lose tension. With a heavy weight, even a small relaxation can make the bar suddenly feel twice as heavy. A controlled descent with a held brace is what gives you time to recognize trouble and bail onto safety arms if you need to.
Spend a few warm-up sets doing nothing but working that two-second descent and elbow angle with a light bar. Don’t start loading up until the path feels boringly consistent. The safer you are on the way down, the stronger the press becomes. And if you have a home-bench setup that helps you stay disciplined on the way down, I’d like to hear it — drop a note in the comments.
Press Up With a Smooth Bar Path and Full Lockout
The driving phase is where the bench press gets decided. You’ve already set the bar, pinned your shoulder blades, and brought the bar down to the same spot on your chest. Now you need to push it back up in one controlled line. That line isn’t straight up. It moves up and slightly back so the bar finishes over your shoulder joint, not over your collarbone or face.
Here’s the cue that fixed my home bench press: drive the bar up and slightly back toward your face as you press. Aim for the top of the rack, not the ceiling directly above your chest. The first time I trained alone, I pressed in a straight vertical line because it felt stronger off the chest. It wasn’t. The bar stalled in the middle, my elbows flared, and lockout turned into a grind. Once I started pressing toward a point behind my head, the bar path smoothed out and my shoulders stayed quiet.
- Push the bar up and slightly back toward your face so it finishes over your shoulder joint.
- Keep your wrists stacked over your elbows from bottom to top.
- Visualize making a small backward arc, not a straight vertical press.
- Touch the same chest spot every rep so your path doesn’t drift.
Breathing during the press matters more than most beginners think. Take a big brace before the bar leaves the rack, hold that air through the lowering phase, and keep holding it through the first part of the press. Exhale after you pass the hardest part of the lift, usually halfway up. That doesn’t mean let all your bracing go. Keep your ribs down and your torso tight as you let the air out. If you blow out at the bottom, your bracing disappears and the bar suddenly feels twice as heavy. I time my exhale with the spot where the bar starts moving again on its own, and that keeps my whole trunk solid.
Lockout is not a slam. Lock out with your elbows straight but don’t hyperextend or snap them, squeeze your glutes, and keep your shoulder blades pinned to the bench. Your upper back should stay where it was at the start. If you have to shrug your shoulders to finish, the weight is too heavy or your touch point is off. Stop at full elbow extension, then lower under control. Do not bounce the bar off your chest, and do not drop it onto the safety arms. Touch the chest, press, and repeat.
Without a spotter, set the safety arms just below your chest at your most comfortable touch point. They’re a fail-safe, not a depth marker. If you’re pressing with proper range, the bar should never touch them on a normal rep. If you hear clanking on every set, the safeties are set too high or you’re cutting your range short. To keep your depth consistent, focus on where the bar contacts your chest each rep. The touch point should feel the same every time. You can also film a set or angle a mirror to check.
Consistency will make this safer. Touch the same point, press on the same path, and lock out in the same place every time. The more you repeat that pattern, the less you need to think about setup in a heavy set.
Solo Reps: Emergency Fail-Safes, Alternatives, and When Not to Try
Training alone changes the math on every set. With a spotter, you can push one more rep because someone else can grab the bar. Without one, that same rep can end with your wrists, shoulders, or ribs paying for it. This section is about the moves you make after a rep stops moving. You need a plan for that moment before you load the first heavy plate.
The roll of shame is an escape route, not a technique
The roll of shame gets a bad reputation, and some of that is earned. When a barbell is stuck on your chest and no one is coming, though, it’s the most reliable way out. You lower the bar to your stomach, roll it down to your hips, sit up, and stand. It feels clumsy. It looks nothing like a coached deadlift. It also beats dropping the bar onto your neck or arching wildly to get it back on the hooks.
This escape has a weight limit. The roll is for light to moderate loads – the kind you can handle for multiple reps when you’re fresh, not a number you’re grinding out for a one-rep max. And if safety arms or pins are set correctly, you shouldn’t roll at all. Rest the bar on the pins and slide out from under it.
Set safety pins so the bar touches them just before it reaches your chest in the lowered position. Then a failed rep is simple: lower the bar with control, let the pins take the load, take a breath, and slide your torso out from under the rack. The roll of shame is backup when there are no pins or when the pins are in the wrong spot.
If you do need to roll, here is the sequence I use at home:
- Steer the bar to your lower ribs or upper stomach, not your sternum. Do not let it bounce off your ribcage.
- Pull your chin back so the bar doesn’t drift toward your throat. Keep your feet flat on the floor.
- Take one breath once the bar is stable on your torso, brace hard, and start the bar moving toward your hips. As your hips lift and you begin to sit up, exhale forcefully. Do not hold your breath through the whole roll.
- Once the bar reaches your hip crease, let that momentum carry you into a seated position, then stand up and walk the bar back to the rack or set it on the floor.
That exhale matters. In your normal bench press, you hold your brace to protect your spine. But an emergency roll is a repositioning move, not a press. Breathe out as you sit up so you don’t brace against a moving load and freeze your ribcage.
Rehearse a failed rep before you need it
The first time anyone rolls a barbell down their body, it feels wrong. That’s why you should rehearse it before you need it. I set up my home rack, grabbed an empty bar, and did the full sequence until the bar found its natural path from my stomach to my hips. Then I added a 10-pound plate on each side and did it again. It took one session to feel automatic.
Do this on a fresh day, not after a hard pressing workout. Put the safeties low or out of the way, load just an empty bar or a light bar, and walk through each step slowly. When a real set fails and your arms are smoked, your body will know the pattern.
If you don’t have safety arms, bench with dumbbells
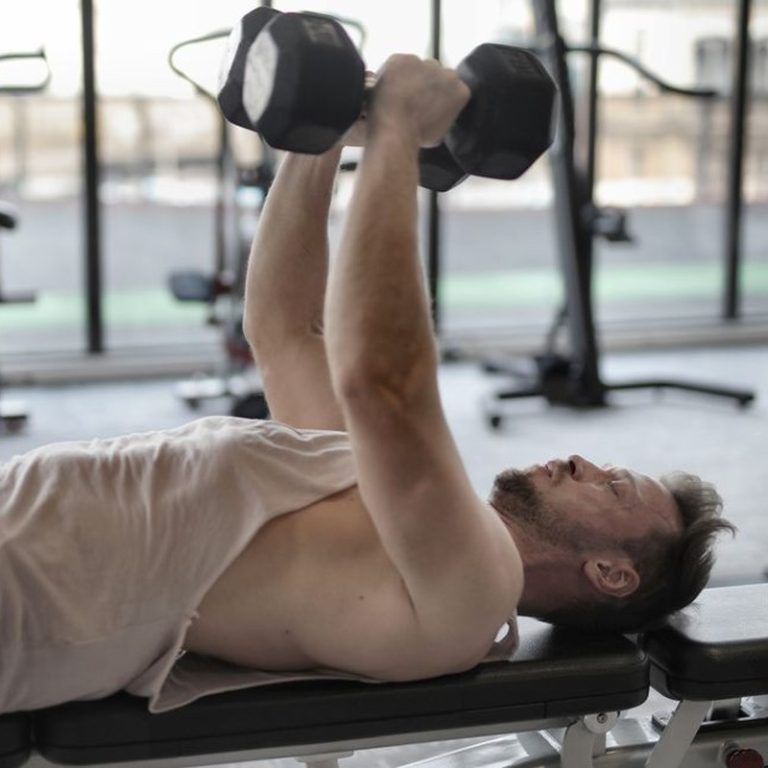
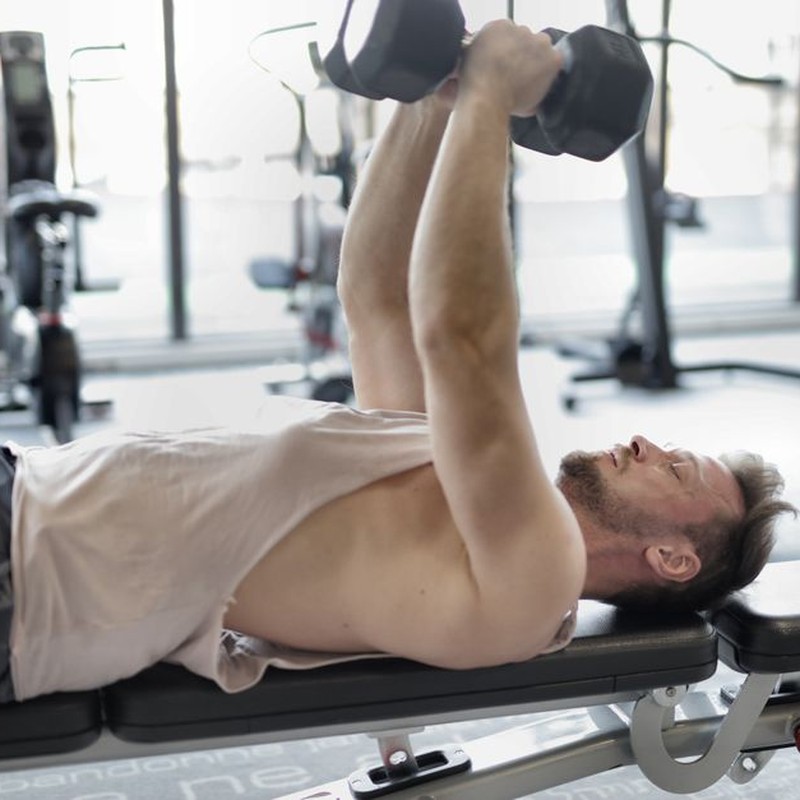
No rack, no safety arms, no spotter? For pressing movements, dumbbells are your best friend. Grab a pair you can handle and press from a flat bench. When you hit failure, you don’t try to catch a falling barbell. You rotate your wrists so the dumbbell heads are in your palms, pull them down to your thighs, then sit up and lower them to the floor.
With heavier dumbbells, you can dump them to the sides instead. Keep your feet wide, make sure the floor is clear, and let the weights fall away from your body. One side might come down before the other; that’s fine. You are never trapped under a single connected bar.
Use a pin press for heavy short-range work
If you want to overload the press without a spotter, set safety pins inside a power rack or squat stands so the bar rests one to two inches above your chest in the lowered position. Load the bar, lie down, and press each rep from a dead stop. That is a pin press, and it lets you handle heavier weights through a shorter range with pins right there to catch a miss.
Start with a load you can lock out, because the dead stop makes the first push harder than a normal bench with a bounce. A board press can do similar work, but it usually needs a partner to stack and remove the boards. Alone, pins are simpler and safer.
When not to try
Some days, the right call is to lower the weight or skip the heavy singles entirely. If you didn’t sleep, feel sick, or have a shoulder that’s been nagging you all week, that is enough of a reason. And don’t attempt a new one-rep max without safety arms or a spotter. The roll of shame only works when you keep control of the bar. If you lose control at the top, no escape technique will keep a heavy barbell off your face.
Also avoid walking a loaded bar out of a narrow bench on your own. If you lose balance during the walkout, you are relying on your arms to steer the bar back onto hooks that may not line up. That walkout is often more dangerous than the press.
If you have a shoulder or chest injury history, pick dumbbells or pin presses first. Build pressure slowly with lighter loads. A failed barbell rep happens in an instant, and your job is to make sure that instant doesn’t cost you months of recovery.
Before your next home bench day, spend five minutes checking your gear. Make sure safety pins lock in place, the bench doesn’t wobble, and your dumbbells are within reach. If you’re missing safety arms or a rack, check current prices on Amazon for spotter stands, a power rack with safeties, or a sturdier bench. Then leave a comment about your solo bench plan: what do you do when a rep starts to fail, and have you ever had to bail? Let other home lifters learn from your setup.
Medical & Editorial Review: This article was reviewed by Liam Smith, founder of Apexfito, for accuracy and safety. Content is for educational purposes and is not a substitute for professional medical advice. Consult your physician before starting any exercise or nutrition program.