Beginner Exercise Form: 6 Fundamentals to Master Before Adding Weight

Why Form Comes First for a Beginner
If you’re brand new to lifting, the most important piece of equipment you own isn’t a barbell or a pair of dumbbells — it’s your body. Before you worry about how much weight you can move, you need to learn how to move well. Here’s why that matters more than anything else at this stage.
When you perform an exercise with poor positioning, your joints and spine take the brunt of the force. That’s not a huge deal when the only load is your own bodyweight. But once you start adding weight, even modest amounts, those forces multiply. I’ve seen plenty of twenty-something beginners develop achy knees and lower backs not because they trained hard, but because they trained with sloppy form from day one.
Good positioning also makes sure the right muscles actually do the work. If your knees cave in on a squat, your quads and glutes aren’t doing their fair share. The load shifts to your knees and connective tissue instead. That means every rep is less effective, and you’re building a movement pattern that will get riskier as the weight goes up.
Think about this: your body learns from repetition. Every squat, every push-up, every deadlift pattern you practice is a message to your brain about how to coordinate and brace. If you repeat a bad pattern, you’re not just missing gains. You’re training your nervous system to repeat that same bad pattern. And it doesn’t stay at the same weight. It follows you up.
This is exactly why skipping form to lift heavier is how beginners stall early or get sidelined with pain. I’ve coached people who added fifty pounds to their squat in a few months, only to lose weeks of training because their lower back gave out. That clean run on the bar doesn’t mean much when it costs you your ability to train at all.
The fix is simple: learn the six foundational movement patterns before you add real load. These are the building blocks of almost every exercise you’ll ever do:
- Squat
- Hip hinge
- Push
- Pull
- Carry
- Core bracing
Once you understand those patterns, you’ll be able to approach almost any workout with confidence. In the sections below, I’ll walk through each one with a simple setup, the most common mistakes, and a quick cue to remember. You’ll also get a 15-minute form-check routine you can run before you touch a single weight.
If you’re eager to jump straight into training, that’s great. You can look at our beginner workout plans and the specific exercise form guides for every movement we’ll cover. But first, lock in the fundamentals first; they’ll make everything else easier.
The 6 Foundational Movement Patterns Every Beginner Needs
Before you grab a heavier dumbbell, give yourself a few sessions to learn how your body moves without load. These six patterns are the building blocks of nearly every exercise you’ll meet. I’ve coached people who couldn’t do one strict push-up, and they still benefited from practicing the push pattern on a countertop. Here’s the simple version of each movement, plus the mistake I see most and a cue that actually works.
1. Squat: Sit Down and Back
Setup: Stand with your feet shoulder-width apart, toes turned out slightly. Hang your arms at your sides or hold them out in front.
Execution: Hinge at your hips and knees at the same time, then sit your hips down and back like a chair is behind you. Lower until your thighs are about parallel to the floor, or as low as you can control. Push through your whole foot to stand.
Common mistake: Your heels pop off the floor, or your knees cave inward. Both usually mean your ankles and hips aren’t sharing the workload.
Cue: “Spread the floor with your feet and push the ground away.” This keeps your arches active and your knees tracking over your toes.
2. Hip Hinge: Push Your Pockets Back
Setup: Stand tall with soft knees, feet hip-width apart, and your back flat.
Execution: Push your hips back as if you’re closing a car door with your rear. Slide them back until you feel a stretch in your hamstrings, then return by squeezing your glutes. Your back should stay flat the whole way.
Common mistake: Rounding the lower back to go deeper, or bending your knees so much it turns into a squat.
Cue: “Push your pockets toward the wall behind you.” That mental image keeps the movement in your hips, not your spine.
3. Push: Incline Push-Up
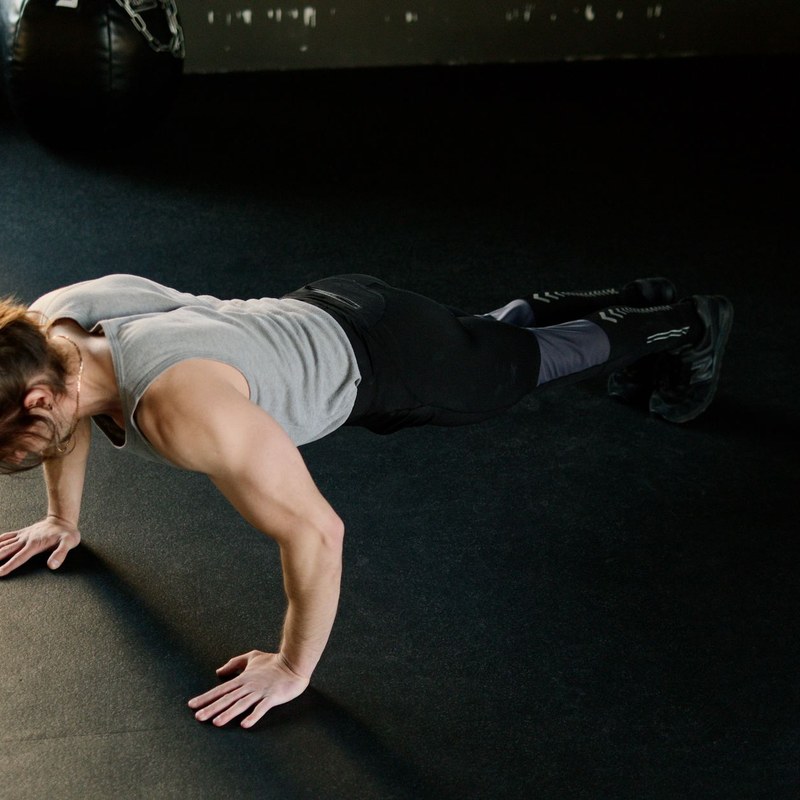
Setup: Place your hands on a counter, sturdy table, or bench. Walk your feet back so your body forms a straight line from head to heels.
Execution: Lower your chest toward the surface with your elbows at about 45 degrees from your torso, then press back up until your arms are straight.
Common mistake: Letting your hips sag toward the floor, or flaring your elbows out to 90 degrees. That position taxes your shoulders instead of your chest.
Cue: “Keep your ribs down and press the world away from you.” You’ll feel your chest and triceps do the work.
4. Pull: Table Bodyweight Row
Setup: Sit under a sturdy table and grab the edge with both hands. Walk your feet forward until your body is leaning back in a straight line.
Execution: Pull your chest toward your hands while squeezing your shoulder blades together. Lower yourself slowly back to the start.
Common mistake: Shrugging your shoulders up to your ears, or swinging your hips to build momentum.
Cue: “Lead with your armpits, not your biceps.” Your lats and upper back should start the pull, not your arms.
5. Carry: Farmer Carry or Suitcase Hold
Setup: Stand tall with a neutral spine and your core tight. Hold a weight at each side, or a single weight in one hand for a suitcase hold.
Execution: Walk slowly with small steps, keeping your shoulders level and your ribs down. If you’re holding one weight, fight the temptation to lean to the opposite side.
Common mistake: Leaning to one side or holding your breath. Both switch off your core stabilizers.
Cue: “Stay tall like you’re balancing a glass of water on your head.” That makes your torso lock in without you overthinking it.
6. Core Bracing: Dead Bug or High Plank
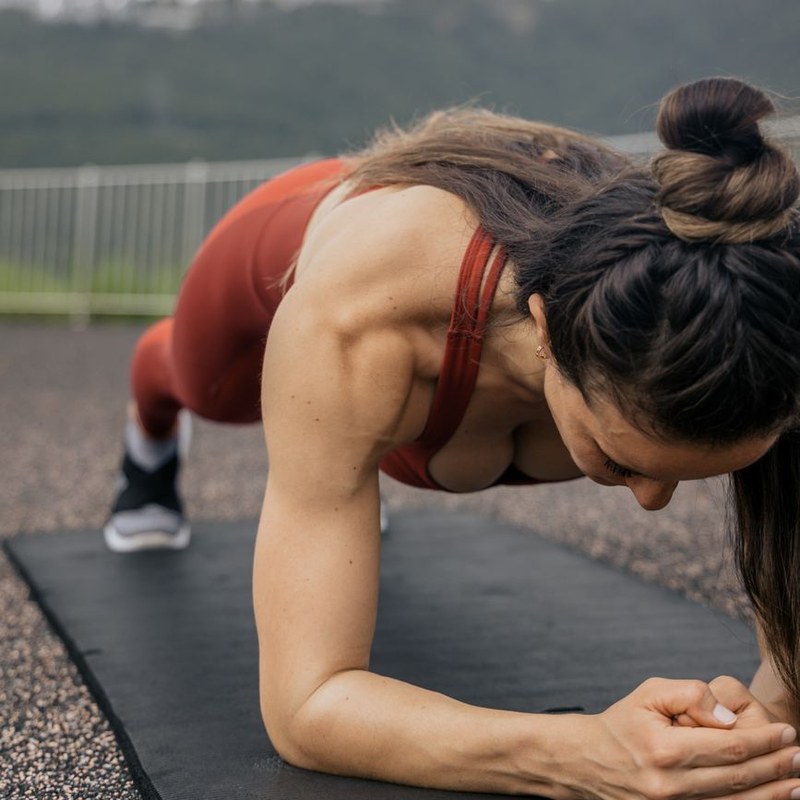
Setup: Lie on your back in a dead bug position with arms up and knees bent at 90 degrees, or set up in a high plank with hands under shoulders.
Execution: Draw your ribs down toward your pelvis and tighten your abs as if you expect a light punch. Keep that brace while you move your limbs (dead bug) or hold a steady plank.
Common mistake: Holding your breath, or letting your lower back arch. Both mean your core isn’t actually working.
Cue: “Brace like a soda can that’s about to be squeezed.” The can doesn’t collapse. It stays firm from top to bottom.
3 Rep-Quality Checks Before You Add Weight
You don’t need to overthink progression. Run through these questions on your last set of each movement:
- Could you keep your ribs down and your lower back neutral?
- Did your knees track over your toes without caving?
- Could you breathe steady and complete all reps without rushing?
If you said yes to all three, you’re ready to add weight next time. If not, stay at bodyweight and clean up the pattern.
Your 15-Minute Form-Check Routine
Set a timer and move through each pattern for two minutes, resting 30 seconds between movements. This isn’t a workout. It’s a diagnostic.
- 2 minutes: Squat (slow 5-rep sets, pausing at the bottom)
- 2 minutes: Hip Hinge (5 reps with a dowel or broomstick on your back)
- 2 minutes: Incline Push-Up (5-8 slow reps)
- 2 minutes: Table Row (5-8 reps, holding the top for one second)
- 2 minutes: Suitcase Hold or Farmer Carry (20-second holds)
- 2 minutes: Dead Bug or High Plank (20-second brace)
- 2 minutes: Rest
Do this twice a week for a couple weeks. You’ll start to feel which side is tighter or weaker, and that tells you what to work on next.
Once these patterns feel natural, grab a simple beginner workout plan and check our detailed form guides for the squat, hip hinge, push-up, and carry. You’ll build the skill before you build the load.
The 3 Most Common Beginner Form Mistakes and How to Fix Them
Over the years, I’ve watched plenty of beginners walk into a gym for the first time. Most of them make the same three mistakes, regardless of their age, fitness level, or how many YouTube videos they’ve watched. The good part? Each one has a simple fix that will speed up your progress and keep you out of pain.
Mistake 1: A Rounded Lower Back
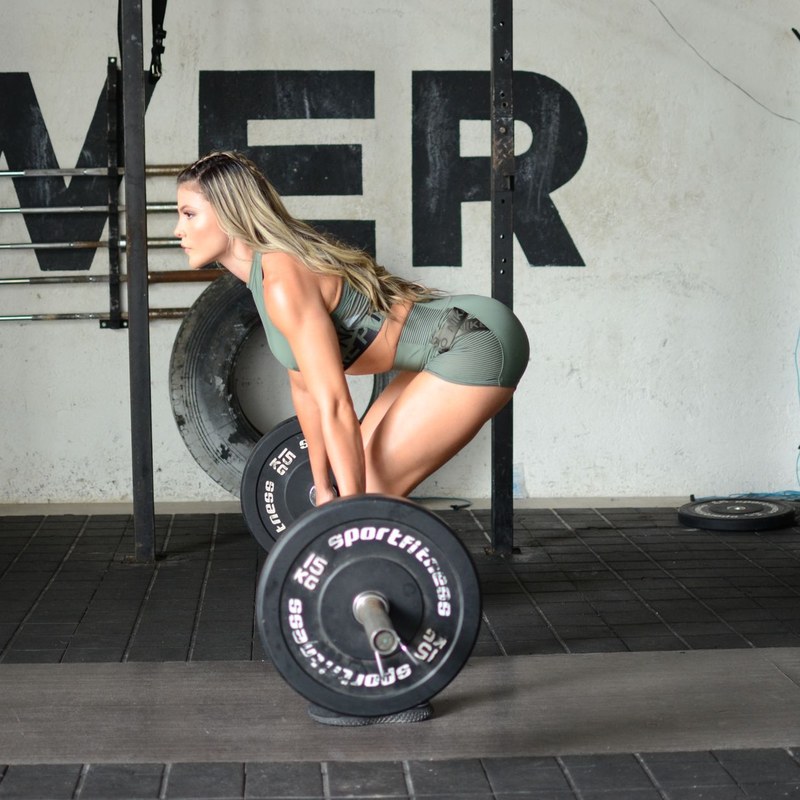
Your lower back shouldn’t look like a hammock when you squat or hinge. A rounded spine puts uneven pressure on your discs, and that’s how you end up with that dull ache the next morning. The fix starts with bracing your core like someone’s about to tickle you. Tighten your belly without sucking in. Then keep your chest tall. If you’re too bent over, you’re folding at the hips, not rounding your back.
A quick mirror check works, but a side-angle video is better. Set your phone on a bench, film a side view of your squat or deadlift, and look at your back. If it curves instead of staying flat, reset and try again.
Mistake 2: Knees Caving In
This one shows up in squats, lunges, and any single-leg move. Your knees should track over your toes, not collapse toward each other. Weak glutes are part of it, but the main issue is a lack of awareness. Fix it by actively forcing your knees outward, as if you’re spreading the floor with your feet. Slow down each rep so you feel your glutes fire before you come back up. Keep your weight in your whole foot, not just your toes.
Mistake 3: Rushing Your Reps
When you’re new, it’s tempting to crank out reps as fast as possible. But momentum hides sloppy form. Try this instead: take a full 3-second descent in your squat or push-up, pause for 1 second at the bottom, then push back up under control. It feels weird at first, but it corrects almost every other form issue. Slower reps force your core to work and your joints to stay stacked.
My advice? Film a side view every few sessions. Seeing your body is faster than guessing.
The Six Movements You’ll Practice for Life
Before you can fix mistakes, you need a map of the foundational patterns. Here are the six movements that make up nearly every resistance workout, with setup, execution, the most common mistake, and a cue that works.
Squat
Setup: Feet shoulder-width, toes slightly out. Execution: Sit your hips back and down, as if reaching for a chair. Mistake: Knees caving inward or heels lifting. Cue: Spread the floor with your feet.
Hip Hinge
Setup: Feet hip-width, knees soft. Execution: Push your hips back while keeping your back flat and chest proud. Mistake: Rounding the lower back. Cue: Proud chest, neutral spine.
Push
Setup: Hands under shoulders in a plank or against a wall. Execution: Lower your chest to the surface, elbows at about 45 degrees. Mistake: Flaring elbows straight out. Cue: Tuck your elbows toward your ribs.
Pull
Setup: Grab a band or bar with palms facing forward. Execution: Pull toward your ribs while keeping your torso tall. Mistake: Shrugging your shoulders. Cue: Slide your shoulder blades down and back.
Carry
Setup: Hold a weight in one or both hands at chest height. Execution: Walk tall with your ribs stacked over your hips. Mistake: Leaning to one side. Cue: Squeeze your glutes and ribs down.
Core Bracing
Setup: Stand tall or get on all fours. Execution: Tighten your abs as if expecting a light punch to the stomach. Mistake: Holding your breath for the whole rep. Cue: Exhale on the effort, inhale on the release.
Three Rep-Quality Checks Before Adding Weight
Before you touch a heavier dumbbell, run these three checks on every set:
- Your spine stays neutral from the first rep to the last.
- Your knees track over your toes, not collapsing inward.
- Your tempo stays controlled, with no swinging or bouncing.
If you pass all three for every rep, you’re ready to add weight. If you’re guessing, record yourself and look back.
Your 15-Minute Form-Check Routine
You don’t need a trainer to spot problems. Spend 15 minutes a couple times a week on this drill. Start with a 5-minute warm-up of easy marching. Then do the following.
- Minutes 0–5: Squat to a chair or box. Three sets of five reps. Film a side view and check your back and knees.
- Minutes 5–10: Hip hinge with a dowel or broomstick against your back. Three sets of five reps. Make sure your back touches the stick the whole time.
- Minutes 10–12: Core brace from all fours. Three sets of 20-second holds.
- Minutes 12–15: Carry a light weight (or a full water bottle) in each hand. Walk slowly for 30 seconds, rest, repeat three times. Keep your shoulders even.
That’s it. It’s boring, but boring works.
For a deeper breakdown, check our squat form guide and hip hinge form guide. You’ll find the same cues with pictures and common variations.
Once you’ve run through this routine a few times, you’re ready to start a simple beginner workout plan. Peek at our beginner workout plans so you can put these movements together in an easy-to-follow schedule.
The 3 Rep-Quality Checklist: When You’re Ready to Add Weight
Before you reach for a heavier dumbbell, you need a standard. Not a feeling—a checklist you can run through on every set. I’ve watched plenty of beginners insist they’re ready to add weight, only to have their knees cave in on rep six. The problem isn’t strength. It’s rep quality.
Here are the three checks that matter. Run them on every working set, especially before you load up.
Check 1: Full Control
At the bottom of a squat or hinge, you should be able to pause for one full second. No shaking, no sinking, no breath-holding. If you can’t hold that position, the weight is too heavy, or the technique isn’t there yet. This pause is your best friend because it removes momentum. When you can pause, you’re in charge.
Check 2: No Pain
Muscle burn is expected. Joint pain is not. If you feel a sharp pinch in your knee, hip, or lower back, that’s a red flag. Stop, drop the load, and fix the movement. Pain isn’t a badge of honor. It’s information. Heed it.
Check 3: Consistent Form
Film your last three reps or watch yourself in a mirror. Do reps 8, 9, and 10 look exactly like reps 1, 2, and 3? Or are they quicker, sloppier, with your hips drifting sideways? Consistency is the real sign of strength. If your form degrades, you’re not building strength. You’re practicing bad habits.
If any check fails, stay at the same load or back off for one week. Clean technique is the strength you’re actually building. The weight is just a tool.
Here’s how to put those checks to work. This 15-minute form-check routine runs through the six foundational patterns. For each one, do 5 slow reps, pausing at the hardest point. Apply the three checks. If a pattern fails, don’t move on until you know why.
The 15-Minute Form-Check Routine
- Squat. Setup: Feet shoulder-width apart, toes turned out slightly. Execution: Sit back and down like you’re reaching a chair. Keep your chest up and heels planted. Common mistake: Knees caving in or heels lifting. Cue: “Push the floor away with your feet.” For more help, see our squat form guide.
- Hip Hinge. Setup: Feet hip-width apart, knees soft, hands on front of your thighs. Execution: Push your hips back while keeping your spine neutral. Lower your torso until it’s about parallel to the floor, or as far as you can without rounding. Common mistake: Rounding your lower back. Cue: “Hide your hips behind you.” The hip hinge guide breaks down the setup in more detail.
- Push-Up. Setup: Hands slightly wider than shoulders, body in a straight line from head to heels. Execution: Lower your chest to the floor, elbows at about 45 degrees, then press back up. Common mistake: Sagging hips or flaring elbows. Cue: “Squeeze your glutes to keep that plank tight.”
- Bodyweight Row. Setup: Lie under a sturdy table and grip the edge with arms straight. Body straight, heels on the floor. Execution: Pull your chest to the table, squeezing your shoulder blades, then lower with control. Common mistake: Arching your lower back. Cue: “Lead with your chest, not your chin.”
- Carry. Setup: Grab a heavy object, like a loaded backpack or a gallon jug, in one hand. Execution: Stand tall, brace your core, and walk 30 steps with even shoulders. Switch hands and repeat. Common mistake: Leaning to the side. Cue: “Keep your ribs down and shoulders level.”
- Core Bracing. Setup: Lie on your back with arms at your sides and legs in a tabletop position. Execution: Press your lower back into the floor and hold. That’s the brace you need for every lift. Common mistake: Holding your breath. Cue: “Breathe into your ribs, not your belly.”
Spend about two minutes on each pattern. That gives you time to set up, do five slow reps, and review. For most beginners, that works out to about 15 minutes. If you’re faster, good. Just don’t rush the reps.
Once a pattern passes all three checks for five clean reps, you’re ready to add weight to that movement. Not before. And when you do add weight, keep the same standard. The first rep with a loaded bar should look exactly like the last rep of that bodyweight check.
If you’re still stuck on any of these patterns, start with our beginner workout plans to see how the fundamentals fit together, and use the form guides above whenever you need a refresher.

A 15-Minute Form-Check Routine for Beginners
Fifteen minutes sounds too short to teach your body six movement patterns. It isn’t. I used this routine with a friend who had zero training experience. By the time we reached the carry, she said, “Oh, I get it now.” That’s what we’re after: enough reps to feel each pattern before you add load.
Set a timer for 15 minutes. Spend two minutes on each pattern below, and start with core bracing to wake up your trunk. For the first 60 seconds of each block, do slow practice reps: take three seconds to lower, pause for one second, then return to the start. For the next 60 seconds, keep a normal speed. Rest 30 seconds between patterns. Total volume is deliberately light. This is practice, not a workout.
1. Core Bracing
Setup: Lie on your back with knees bent, or stand tall. Execution: Breathe into your belly, then tighten your abs as if someone were about to poke you low on the ribcage. Hold for 5 seconds and repeat for 8 reps. Common mistake: sucking your stomach in instead of bracing. Cue: “Brace like you’re about to be hugged hard.”
2. Bodyweight Squat
Setup: Feet shoulder-width apart, toes turned out slightly. Execution: Reach your arms forward, sit your hips down and back, then push the floor away to stand. Common mistake: letting your knees cave inward. Cue: “Spread the floor apart with your feet.”
For the full set of coaching points, check Apexfito’s bodyweight squat form guide.
3. Hip Hinge
Setup: Feet hip-width apart, knees soft. Execution: Push your hips straight back while keeping your spine tall, then squeeze your glutes to return. Common mistake: dropping into a squat instead of hinging. Cue: “Close the car door with your hips.”
If this feels confusing, Apexfito’s hip hinge form guide breaks it down with photos.
4. Push
Setup: Hands on a counter or wall for an incline, body in a straight line. Execution: Lower your chest to the surface, keeping elbows near 45 degrees, then press away. Common mistake: letting your hips poke up. Cue: “Stay one straight line from head to heels.”
Need a regression or a harder version? Use Apexfito’s push-up form guide.
5. Pull
Setup: Use a light resistance band anchored around a door, or rest one hand on a bench with a dumbbell in the other. Execution: Pull your elbow back while keeping your torso still, then lower with control. Common mistake: shrugging your shoulder up to your ear. Cue: “Slide your shoulder blade down first.”
See Apexfito’s row form guide for common setups and corrections.
6. Carry
Setup: Hold a weight in one hand, like a loaded backpack or a big water bottle. Execution: Stand tall, walk 30 feet, turn, walk back, then switch arms. Common mistake: leaning away from the weight. Cue: “Keep the top of your head reaching up.”
Apexfito’s farmer’s carry form guide covers more carry variations and load options.
After the final carry, finish with a one-minute walk around the room and take a few deep breaths. That counts as the cooldown. Then look back at your reps. Did your chest stay open during the push-up? Did your lower back stay neutral on the hinge? Those answers tell you what to practice again tomorrow.
Before you add weight, run every rep through this three-point checklist:
- Same shape every rep: Rep one looks like rep five and rep ten. No wobble, no change in depth.
- You can breathe and brace: If you’re holding your breath to stay upright, your load is too heavy.
- No pain or compensation: No sharp pulling, no arched lower back, no knees caving.
If all three pass, add small load, one to five pounds at a time. If any point fails, spend another session on that pattern.
This routine gives you the roadmap. For the full program, head to Apexfito’s simple beginner workout plans and the individual form guides above on every movement.
Medical & Editorial Review: This article was reviewed by Liam Smith, founder of Apexfito, for accuracy and safety. Content is for educational purposes and is not a substitute for professional medical advice. Consult your physician before starting any exercise or nutrition program.