How to Do a Perfect Push-Up: Common Mistakes and Fixes
By Liam Smith — Fitness enthusiast and founder of Apexfito. I test gear at home and share what actually works.
Why Push-Up Form Matters More Than You Think
I see it almost every day at the gym: someone drops to the floor and cranks out push-ups that look more like a wavy noodle than a strength move. They think they’re building chest and arms, but after a few weeks, they’re nursing sore shoulders or achy wrists. That’s the real cost of bad form—it doesn’t just limit your results, it sets you up for injury. Harvard Health notes that keep your back straight and lower your hips until your thighs are parallel to the floor.
Here’s what most people miss: push-ups aren’t just a chest exercise. Done right, they work your shoulders, triceps, and core all at once. Your entire upper body gets stronger, and your midsection stays tight like a plank. But if your hips sag, your elbows flare out, or you rush through each rep, you’re missing that full-body benefit—and loading your joints in ways they weren’t designed to handle.
Over time, poor form can lead to:
- Shoulder impingement from flared elbows and unstable shoulder blades
- Lower back strain from a sagging core and hyperextended spine
- Wrist pain from too much pressure through a bent or misaligned wrist
That’s why this tutorial breaks the push-up into simple, repeatable steps. We’ll cover exactly how to set up, lower yourself with control, press back up, and when to breathe. Then we’ll fix the most common mistakes I see every day—so you can build strength without pain.

Setting Up Your Body for a Strong Push-Up
Before you drop down for a single rep, lock in your starting position. Think of this as building a solid foundation — if your setup is off, everything that follows will be shaky. I’ve seen plenty of people jump into push-ups with their hips sagging or their hands too wide, and it almost always leads to shoulder pain or a weak rep.
Start in a high plank position. Place your hands on the floor slightly wider than shoulder-width apart. Your fingers should point forward or just slightly outward — wherever feels natural for your wrists. Imagine you’re about to push the floor away from you. That mental cue helps keep your shoulders stacked directly over your wrists.
Now check your body line. From your head to your heels, you want a straight line. No sagging in the middle, no butt piking up toward the ceiling. If you’re not sure, have someone take a quick video or look in a mirror. I’ve had clients who swore they were straight, only to see their hips drop an inch or two. It’s common, and it’s fixable.
Engage your core like someone’s about to punch your stomach — brace hard. Squeeze your glutes to lock your hips in place. This isn’t just about looking tight; it protects your lower back and transfers power through your whole body. Imagine you’re holding a plank on an unstable surface. That tension keeps everything connected.
Finally, set your neck. Look at a spot on the floor about 12 inches in front of your hands. Not straight down (that cranks your neck), not up at the ceiling (that strains it). Neutral spine from top to bottom. Once you’ve got all this dialed in, you’re ready to lower into your first rep with control.

The Lowering Phase: Control Is Everything
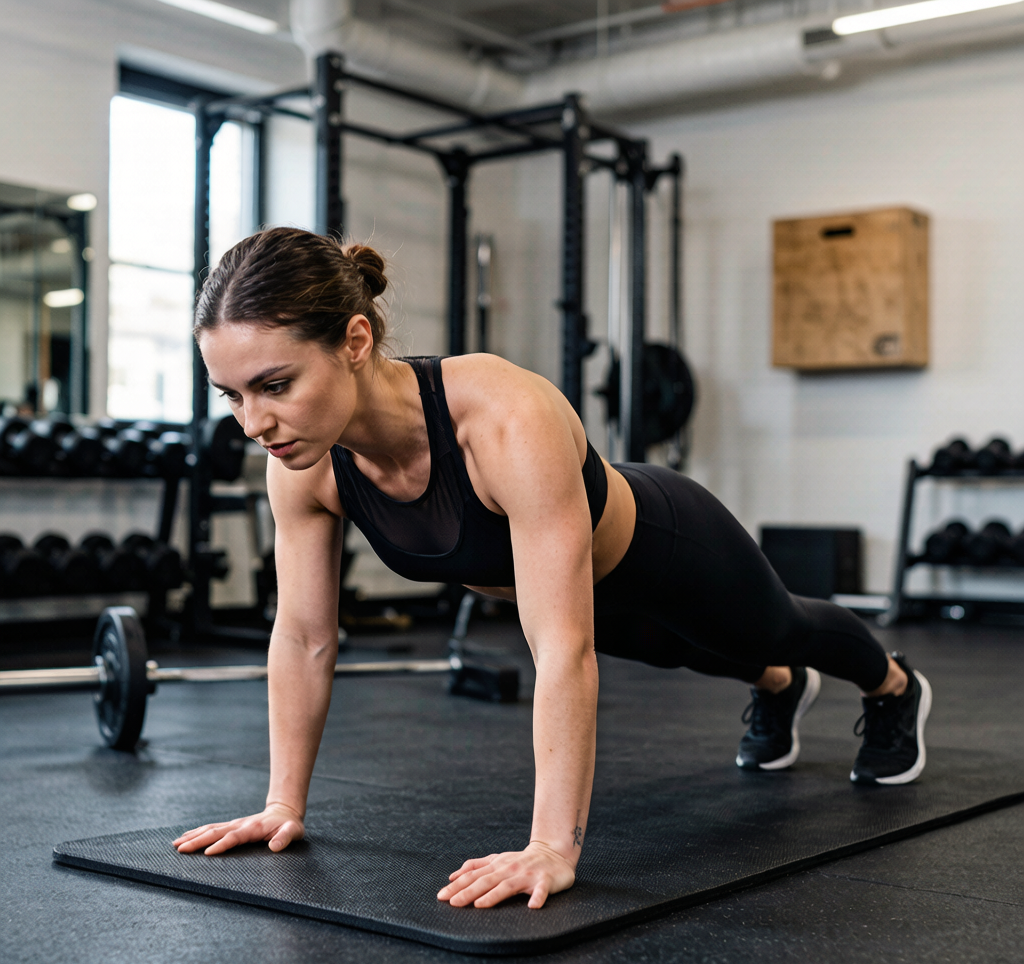
Most people rush the lowering phase. They drop like a stone, bounce off the floor, and hope for the best. That’s a missed opportunity. The eccentric (lowering) part of the push-up is where you build real strength and muscle control. Slow it down, and you’ll get more out of each rep.
Here’s how to do it right.
Breathing and Body Position
Inhale as you lower your chest toward the floor. Lead with your chest—not your chin or forehead. Imagine you’re holding a tennis ball between your chin and chest. That keeps your neck neutral and your spine aligned. If you lead with your head, you’ll strain your neck and lose the straight line.
Keep your elbows at roughly a 45-degree angle from your body. I see guys in the gym flare their elbows out to 90 degrees, and it’s a fast track to shoulder pain. A 45-degree angle protects your shoulder joint while still engaging your chest and triceps effectively.
How Low Should You Go?
Lower yourself until your chest is about an inch from the floor. If you can’t get that low with good form, don’t force it. Go as far as you can while keeping your body in a straight line. No bouncing at the bottom. Bouncing uses momentum, not muscle, and it can strain your shoulders and wrists.
I’ve coached beginners who could only lower themselves halfway at first. That’s fine. Over a few weeks, they gained the control to go deeper. Progress comes from consistency, not ego.
Common Mistakes to Avoid
The biggest error I see: dropping your hips or letting your lower back arch. That breaks the straight line from your head to your heels. It shifts tension away from your chest and onto your lower back, which isn’t the goal.
If you feel your hips sagging, try bracing your core like you’re about to take a punch. Squeeze your glutes, too. That locks your pelvis in place and keeps your body rigid.
Practical Tips for Better Control
- Count to three as you lower yourself. This forces you to slow down and feel each inch of the movement.
- Pause for a second at the bottom. This eliminates momentum and builds stability.
- If you can’t control the descent, switch to an incline push-up (hands on a bench or step). That reduces the load and lets you practice the eccentric with good form.
I tried this with a client who could only do five push-ups with poor form. After two weeks of focusing on a slow, controlled lowering phase, he hit ten clean reps. Control isn’t just about safety—it’s the secret to getting stronger.
Now that you know how to lower properly, you’re ready to push back up with power. But that’s for the next section. For now, practice the descent. Your chest and shoulders will thank you.
Check current prices on Amazon for push-up bars or mats if you want to make your practice more comfortable. And share your experience in the comments—how slow can you go?
The Pressing Phase: Drive Through the Floor

Now for the part where you actually get back up. The pressing phase is where you generate power, but it’s also where most people rush and lose their form. Let’s slow it down.
As you push up, exhale forcefully to engage your core and keep your body tight. Press through the base of your palms and your fingertips. Here’s a cue that clicked for me: imagine you’re trying to spread the floor apart with your hands. That external rotation fires up your chest and shoulders, making the press feel more stable and powerful.
Push until your arms are fully extended, but don’t lock your elbows. Locking out puts all the weight on your joint rather than your muscles, and over time that can lead to elbow pain or injury. Stop just short of full lockout, with a slight bend remaining. Your triceps and chest will thank you.
A common mistake I see — and used to make myself — is letting the shoulders creep up toward the ears at the top. That shrug kills your shoulder stability and takes tension off your chest. Instead, keep your shoulder blades pulled back and down, like you’re holding a pencil between them. This position stays active throughout the entire press, not just at the bottom.
If you start shaking halfway up or feel your hips sagging, that’s your signal. Stop there. You’ve hit your limit for that set. There’s no shame in dropping to your knees or taking a break. Pushing through bad form only reinforces bad habits.
One last tip: think about driving the floor away from you, not pushing your body up. That small mental shift keeps your whole body engaged and prevents you from arching your back. Try it on your next set and see if it feels different.
Have you tried this cue? Let me know in the comments how it works for you.
5 Common Push-Up Mistakes and How to Fix Them
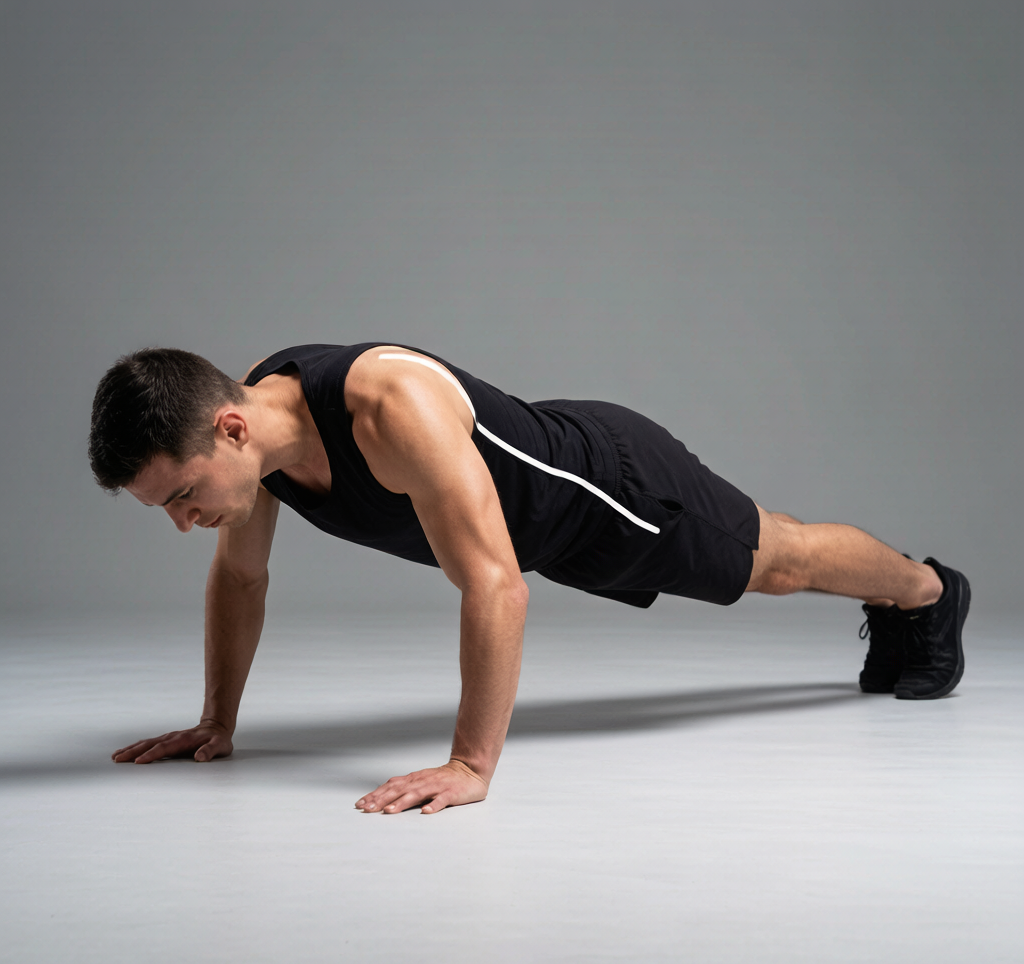
Even a simple push-up can go wrong fast. I’ve watched gym buddies and total beginners alike make the same errors over and over. But each mistake has a simple fix. Here are the five most common push-up mistakes and exactly how to correct them.
Mistake 1: Flaring Your Elbows
This is the #1 error I see. When your elbows point straight out to the sides, like a T, you put huge stress on your shoulder joints. It also shifts the work away from your chest and triceps.
The Fix: Keep your elbows at a 45-degree angle to your torso. Imagine you’re squeezing a beach ball between your arms. This protects your shoulders and engages your chest and triceps properly. I tell my clients to think of their arms like an arrow, not a T.
Mistake 2: Sagging Hips
A droopy midsection turns your push-up into a back-arching disaster. Your lower back takes the strain, and your core gets a free ride. This is often a sign of weak abs or forgetting to brace.
The Fix: Before every rep, squeeze your glutes and brace your core like someone’s about to punch you in the stomach. Your body should form a straight line from your head to your heels. I like to cue: ”Tighten your butt, hollow your belly.”
Mistake 3: Dropping Your Head
Looking down at the floor or craning your neck forward throws your whole spine out of alignment. It can also lead to neck pain after a few sets.
The Fix: Keep your neck neutral. Your eyes should be fixed on a spot on the floor about 12 inches in front of your hands. Imagine you’re holding a tennis ball under your chin. This keeps your head in line with your spine.
Mistake 4: Going Too Fast
Rushing through reps is the fastest way to lose control and cheat your muscles. I used to do this myself until I realized I was just bouncing off the floor.
The Fix: Slow down. Take a full 2 seconds to lower your chest toward the floor, pause briefly, then take 1 second to press back up. This controlled tempo builds more strength and keeps your form tight. Think of it as a slow, deliberate movement, not a race.
Mistake 5: Not Going Deep Enough
Half-reps are better than nothing, but they won’t build full-range strength. If you only lower an inch or two, you’re missing the most effective part of the exercise.
The Fix: Aim to lower your chest until it’s about an inch from the floor. If you can’t do that without losing form, switch to incline push-ups using a bench, table, or even a sturdy chair. That way you build strength at the proper depth. Over time, you can gradually lower the incline until you’re on the floor.
Once you’ve cleaned up these five mistakes, your push-ups will feel stronger and safer. Give them a try and see the difference.
Have you tried this exercise? What form cues helped you the most? Drop your experience in the comments below—I read every response and update articles based on real feedback.
Medical & Editorial Review: This article was reviewed by Liam Smith, founder of Apexfito, for accuracy and safety. Content is for educational purposes and is not a substitute for professional medical advice. Consult your physician before starting any exercise or nutrition program.
Related: Pull Up Form Guide