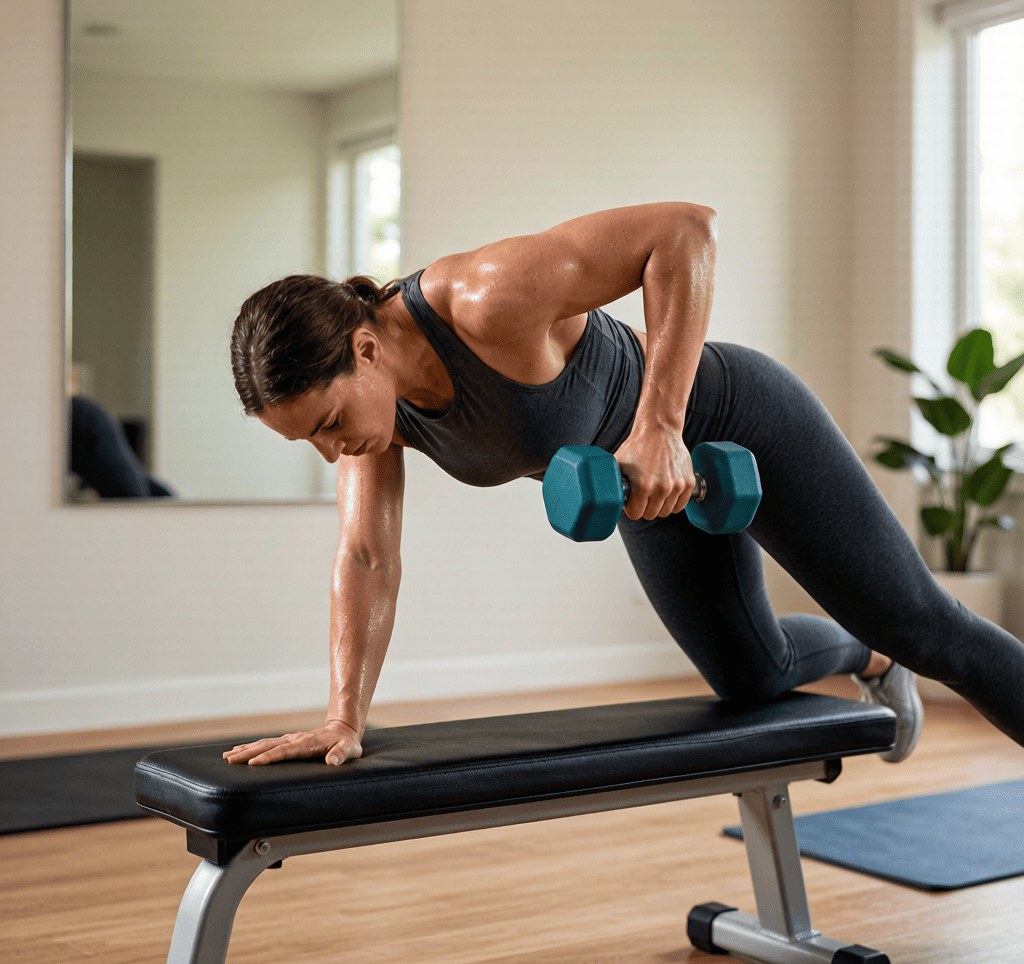
How to Do a Proper Dumbbell Row: Build a Stronger Back
By Liam Smith — Fitness enthusiast and founder of Apexfito. I test gear at home and share what actually works.
Why the Dumbbell Row Belongs in Your Home Workout
If you’re building a home gym on a budget, the dumbbell row is one of the smartest exercises you can add. It targets your lats, rhomboids, traps, and rear delts—all the muscles that improve posture and pulling strength. This move consistently delivers results without needing a rack or barbell. Harvard Health notes that keep your back straight and lower your hips until your thighs are parallel to the floor.
You only need one dumbbell and a bench (or even a sturdy chair). That makes it perfect for small spaces. I’ve done these in a cramped apartment corner with a folding bench, and it worked just as well as any gym setup.
The single-arm version is especially useful. It lets you correct left-right strength imbalances—something barbell rows can’t do. You also get a fuller range of motion, which means more muscle activation. A 2014 study in the Journal of Strength and Conditioning Research found that unilateral rows produce higher muscle activation in the lats compared to bilateral variations.
Here’s what you’ll hit with each rep:
- Lats: The prime movers for pulling your arm back and down.
- Rhomboids and traps: They retract your shoulder blade, keeping your shoulders healthy.
- Rear delts: Often neglected, but crucial for balanced shoulder development.
For home exercisers, this exercise is a no-brainer. You don’t need a spotter, you can adjust the weight easily, and it’s safe to push hard without worrying about form breakdown. I’ve seen friends start with just 20 pounds and progress to 50 within a few months, all from their living room.

Setting Up for Success: Equipment and Starting Position
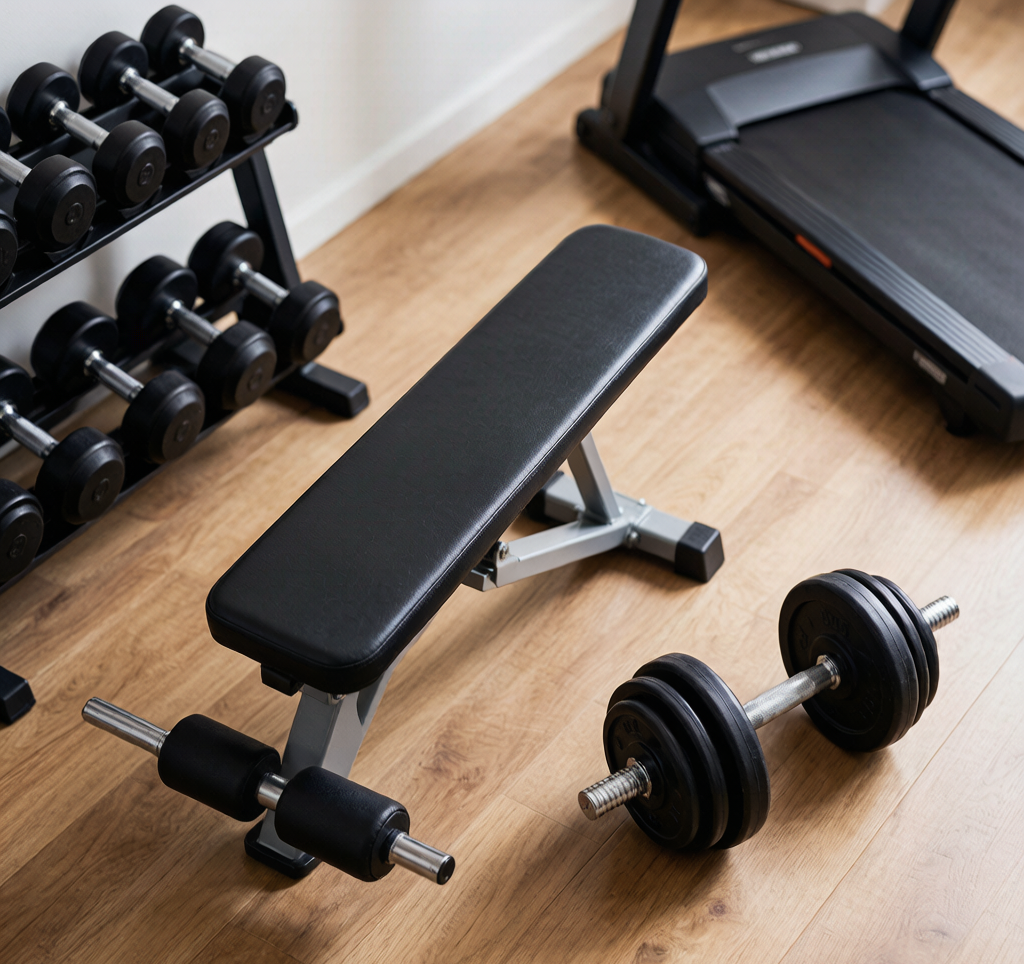
Before you lift a single pound, getting your setup right makes the difference between a back-building row and a wasted effort. I’ve seen too many people rush into this and end up with a sore lower back instead of stronger lats. Here’s exactly how to set up so every rep counts.
Choose Your Bench
You need a flat bench set to about hip height. If you’re using an adjustable bench, set it flat—not inclined. No bench? No problem. A sturdy chair, a couch arm, or even a solid coffee table works. I’ve used the arm of my sofa for months and it did the job fine. Just make sure whatever you use won’t slide. Put a yoga mat or a towel under it if needed.
Foot and Knee Placement
Place your left knee and left hand on the bench. Your right foot goes flat on the floor, slightly outside your right hip. This stance gives you a stable base. Your torso should be nearly parallel to the ground—think of a tabletop position. If your back is rounded or your hips are too high, you’ll lose tension in your lats.
Grip and Arm Position
Grab the dumbbell with your right hand using a neutral grip—palm facing in toward your body. Let your arm hang straight down from your shoulder. Keep your neck neutral: look at the bench or the floor, not up at the ceiling. A neutral spine protects your neck and keeps the focus on your back muscles.
Breathe and Brace Before You Pull
Before you start the row, take a deep breath into your belly and brace your core like someone’s about to punch you in the stomach. Hold that tension. This locks your spine in place and prevents your lower back from taking over. Exhale as you pull the dumbbell up, then reset your breath at the bottom. I used to skip this step and wondered why my lower back ached after a few sets. Once I started bracing before every rep, the difference was night and day.
I’ve found that taking an extra 10 seconds to check my setup—bench height, foot placement, grip, and a solid breath—saves me from wasted reps. Once you’re set, you’re ready to row with purpose.
The Perfect Dumbbell Row: Step-by-Step Form Cues
Let’s break down the dumbbell row into a sequence you can follow at home. I’ve coached dozens of beginners through this, and the biggest mistake is rushing. Slow down, and focus on each cue.
Step 1: Set Your Stance
Place one knee and the same-side hand on a bench, chair, or even your couch. Your back should be flat—like a tabletop. The other foot stays planted on the floor, slightly wider than hip-width. Keep your neck neutral; look at the floor about a foot in front of you, not up or down.
Step 2: Grip the Dumbbell
Grab the dumbbell with your free hand using a neutral grip (palm facing your body). Let your arm hang straight down from your shoulder. Your shoulder blade should feel relaxed and slightly forward. This is your starting position.
Step 3: Initiate with Your Back
Here’s the key: don’t start by bending your elbow. Instead, squeeze your shoulder blade back toward your spine. Imagine pinching a pencil between your shoulder blades. This retraction should happen before your arm even moves. I tell my clients to think of the row as a back movement that happens to involve the arm, not an arm movement that happens to involve the back. Exhale as you pull the dumbbell up.
Step 4: Pull the Dumbbell
Once your shoulder blade is set, pull the dumbbell toward your hip. Keep your elbow close to your body—don’t let it flare out to the side. Your upper arm should travel past your torso at the top of the movement. Aim to bring the dumbbell to the side of your ribcage, not your armpit. Pause for a second and squeeze your back muscles hard.
Step 5: Control the Lowering
Lower the dumbbell under control until your arm is fully extended and your shoulder blade is slightly protracted (stretched forward). Don’t just drop the weight. The negative portion is where you build strength and control. Take about 2 seconds to lower it. Inhale as you lower the dumbbell.
Common Mistakes to Avoid
- Using momentum: If you’re swinging your torso, the weight is too heavy. Drop down 5 or 10 pounds.
- Rounding your lower back: Keep that spine neutral. If you see your back curving, reset your stance.
- Pulling too high: The dumbbell should go toward your hip, not your chest. Pulling too high shifts the work to your rear delts and traps.
Pro Tip for Home Gym Goers
If you don’t have a bench, use a sturdy chair or even a stack of books. I’ve used a dining chair with a cushion on it—works fine. Just make sure it doesn’t slide. Place a yoga mat or towel under the chair leg for grip.
Once you’ve mastered the form, try this: do 3 sets of 8-12 reps per side. Focus on the squeeze at the top and the slow negative. You’ll feel your lats and rhomboids working hard.

Common Mistakes That Slow Your Progress (and How to Fix Them)
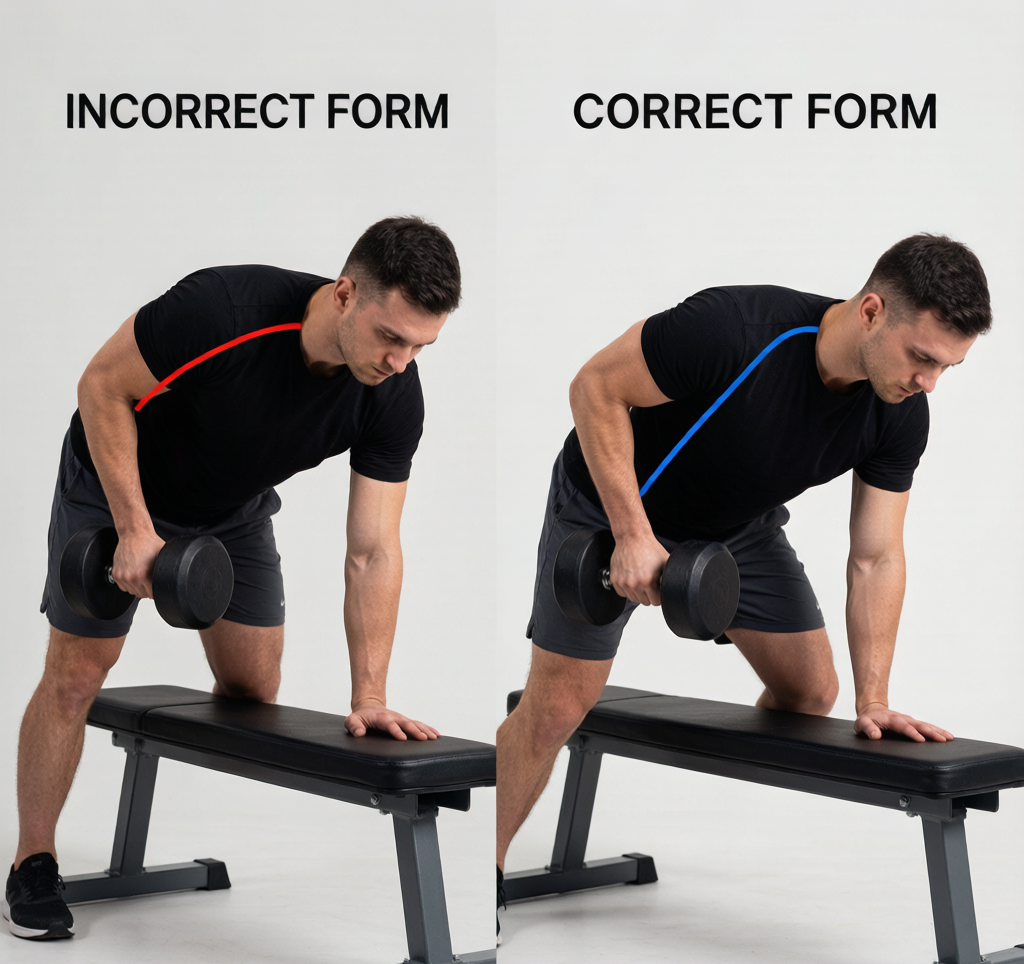
You’ve got the dumbbell, you’ve got the bench, and you’re ready to row your way to a stronger back. But before you crank out rep after rep, let’s talk about the mistakes that can quietly sabotage your progress—and your safety. I’ve seen these errors in my own garage gym and in countless client videos. Here’s how to spot and fix them.
Mistake #1: Rotating Your Torso as You Pull
This is the most common error I catch. You’re in a bent-over position, and as you pull the dumbbell up, your whole upper body twists toward the working side. Your shoulders are no longer square to the bench. You’re using momentum, not muscle. The fix starts with your core. Before you even pull, brace your abs like someone’s about to punch you in the gut. That tension locks your torso in place. Then, keep your shoulders parallel to the floor. Imagine a laser pointer on each shoulder blade—they should stay pointing straight down. If you feel your torso rotating, drop the weight and focus on keeping your hips and shoulders locked. Breathe out as you pull, and breathe in as you lower. That breathing rhythm helps you stay braced.
Mistake #2: Using Too Much Biceps Instead of Your Back
You feel the burn in your biceps, not your lats. Sound familiar? That’s because you’re curling the weight up with your arm, rather than driving through your elbow. Your arm is just a hook—the real work comes from pulling your elbow back and squeezing your shoulder blade. Try this: before you pull, think about sliding your shoulder blade toward your spine. Then, without moving your upper arm, initiate the pull by driving your elbow straight back. Your hand should follow like it’s attached to a string. If you’re still feeling it in your biceps, imagine you’re trying to crush a tennis ball between your shoulder blade and your spine. That mental cue works wonders.
Mistake #3: Rounding Your Lower Back
This one is a back injury waiting to happen. When you round your lower back, you put your spine in a vulnerable position. The fix is all in your setup. Hinge at your hips, not your waist. Push your butt back like you’re closing a car door with your rear. Keep your spine neutral by bracing your abs and looking at a spot on the floor about a foot in front of you—not straight ahead. I like to have people practice the hinge without a weight first. Stand with your feet hip-width apart, hands on your thighs, and slide your hands down your legs as you push your hips back. Your back should stay flat. Once you feel that position, add the dumbbell. If you can’t maintain a neutral spine with the weight, go lighter. Your back will thank you.
Quick Fix Checklist
- Torso twisting? Brace your abs and keep shoulders square.
- Biceps taking over? Drive your elbow back, not your hand.
- Lower back rounding? Hinge at the hips, not the waist.
These corrections will turn your dumbbell row from a so-so movement into a back-building powerhouse. Try them on your next set—you’ll feel the difference immediately. And if you’re still struggling, drop the weight and focus on form. Your gains will follow.
Sample Dumbbell Row Workout and Progression Tips
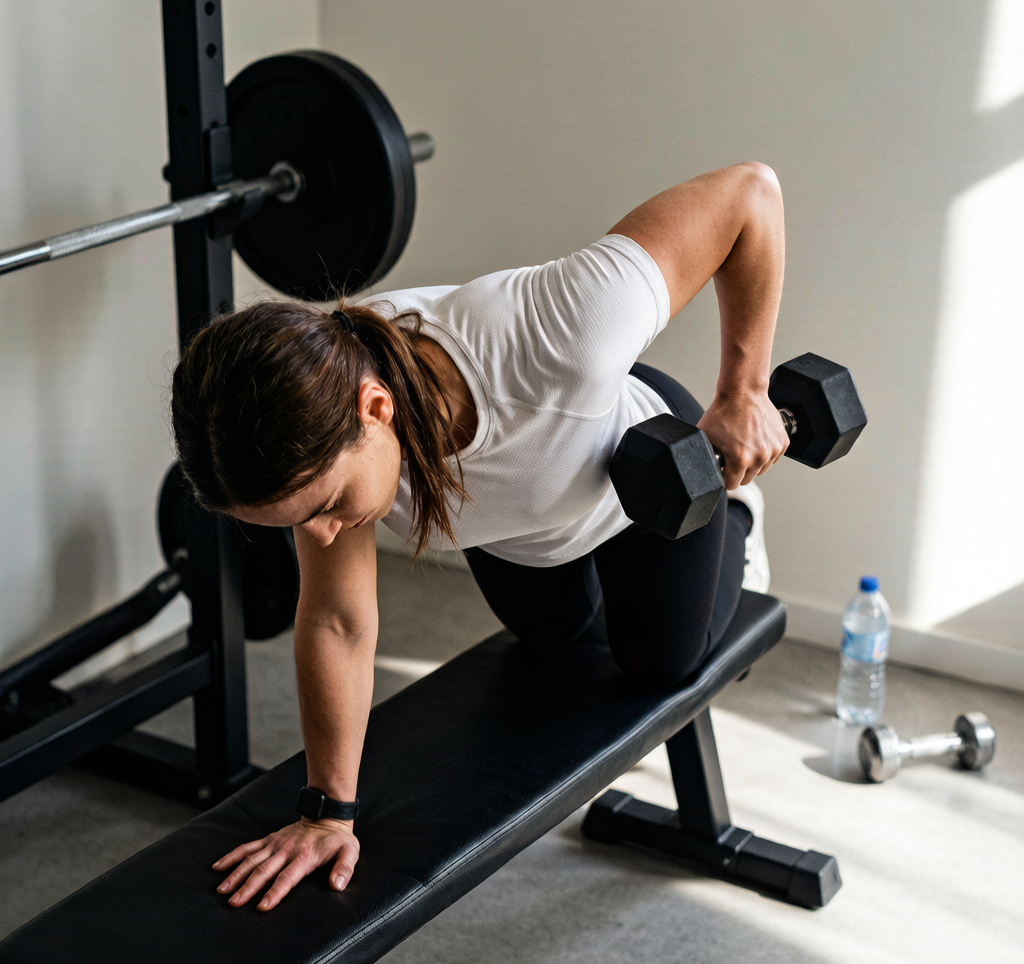
Here’s a simple but effective dumbbell row workout you can do at home. It’s built around the principles we’ve covered: strict form, controlled reps, and gradual overload. I’ve used this template myself when traveling, and it works.
The Workout Template
Start with 3 sets of 8–12 reps per arm. Rest 60–90 seconds between sets. Focus on perfect form before you even think about adding weight. If you can’t hit 8 clean reps, the weight is too heavy. If you can breeze past 12, it’s too light.
Here’s a sample session:
- Warm-up: 5 minutes of band pull-aparts or scapular push-ups to activate your back, plus arm circles and bodyweight rows (if you have a sturdy table).
- Main work: 3 sets of 8–12 reps per arm, dumbbell row. Rest 90 seconds between sets.
- Finisher: 2 sets of 15–20 reps per arm, using a lighter dumbbell (about 50% of your working weight). Move fast but controlled. This pumps blood into the back and shoulders.
I like to do this workout twice a week, with at least two days between sessions. It fits into a full-body routine or can be paired with push-ups and glute bridges.
How to Progress Over Time
Progression doesn’t have to mean piling on weight every week. In fact, rushing to heavier dumbbells often leads to sloppy form and injury. Here’s a smarter approach:
- Add weight: Once you can complete 12 clean reps on your last set, add 2–5 pounds. That’s a small jump, but it keeps your joints happy.
- Increase reps: If you don’t have heavier dumbbells, push to 15 reps per arm. This builds muscular endurance and still stimulates growth.
- Add a set: Go from 3 sets to 4. This increases total volume without changing the weight.
I’ve used all three methods at different times. When I was stuck at 30-pound dumbbells, I just added a fourth set and saw progress within a few weeks.
Tempo Work: A Secret Weapon
Try this: lower the dumbbell over 3 seconds, pause for 1 second at the bottom, then pull up explosively. That’s called tempo work. It increases time under tension without adding a single pound. I’ve done this with 25-pound dumbbells and felt it more than 35-pound regular reps.
To incorporate tempo work, do one of your weekly sessions with a slower tempo. For example, on Tuesday, do regular reps. On Friday, do tempo reps with the same weight. You’ll notice a deeper burn.
What to Do When You Plateau
Everyone hits a wall eventually. If you can’t add weight or reps for two weeks straight, try these tweaks:
- Change your grip: Use a neutral grip (palms facing each other) or a supinated grip (palms forward). This shifts the load slightly and can wake up new muscle fibers.
- Vary your stance: Widen your stance or bring your feet closer together. This changes your hip angle and can make the movement feel different.
- Take a deload week: Every 4–6 weeks, reduce weight by 20–30% for a week to allow recovery. I always come back stronger after a deload.
Remember, consistency beats intensity. A solid 8-rep set with perfect form is better than a sloppy 12-rep set with momentum. Stick with this template, progress slowly, and your back will get stronger.
Check current prices on Amazon for a set of adjustable dumbbells if you don’t have them yet. And drop a comment below—tell me how this workout feels for you. I’d love to hear your progress.
Medical & Editorial Review: This article was reviewed by Liam Smith, founder of Apexfito, for accuracy and safety. Content is for educational purposes and is not a substitute for professional medical advice. Consult your physician before starting any exercise or nutrition program.




One Comment