Tai Chi Walking: Harvard’s Simple Way to Make Every Walk Mindful
Full disclosure: Some links in this article are affiliate links. We may earn a small commission at no extra cost to you if you make a purchase through them. Our recommendations are based on what real users report, not on commission size.

What Tai Chi Walking Actually Is, and Why Harvard Flagged It
Tai chi walking is slow, deliberate stepping with a continuous side-to-side weight shift. You breathe steadily and pay attention to how your foot meets the ground. No memorized form. No sequence. No partner. It’s not a separate workout—it’s a way of doing the walking you already do.
On Friday, September 18, 2026, the Hindustan Times reported on Harvard’s description of tai chi walking as a simple way to practice mindfulness while you move. You don’t need a cushion or a quiet room. You need a few feet of floor and the willingness to slow down. Most mindfulness advice asks you to stop and sit. This asks you to keep walking, just differently.
How does it differ from a normal stroll? When you stroll, your attention drifts to distance or pace. Your steps are longer and your knees straighten more. With tai chi walking, the pace drops to about a quarter or half speed. Steps shorten. Knees stay slightly bent. The focus moves from where you’re going to how you’re moving—specifically, the transfer of weight from one foot to the other. You’re not covering ground. You’re feeling the ground.
It’s also different from seated tai chi and from a full standing form. Seated tai chi removes the balance challenge. A full standing form asks you to memorize choreography. Tai chi walking strips that away. No sequence to remember. No left-then-right pattern. You just step—forward, backward, or in place.
I tried this in my hallway (about 12 feet of clear floor) and was surprised by how hard it was to go that slowly without wobbling. That’s normal. It exposes the small balance adjustments you normally skip past. After five minutes, my ankles felt warm and my breathing had settled.
What can you realistically expect? Balance and confidence improve with regular practice over weeks, not days. Five to ten minutes most days might make reaching for a low shelf or turning to look behind you feel less shaky. Not a sudden transformation. A gradual change in security on your feet.
Safety note: if you have a history of falls, vertigo, or a recent joint replacement, clear it with a clinician or physical therapist first. They can tell you whether to start with support, like a countertop or sturdy chair nearby.
You’re not doing something obscure. Search interest in tai chi has edged up over the past year. More people are looking for low-impact ways to move and pay attention.
So try this: on your next walk to the kitchen or down the driveway, take ten steps like you’re trying not to spill a cup of water. Short steps. Knees soft. Feel your weight roll from heel to ball to toe. Then switch feet. That’s the whole practice, and it starts now.
Before Your First Step: Posture, Stance, and Safety Setup
A stable starting position and a clear path matter more than any technique you’ll learn later. I found that out the slow way: my first attempt happened on a thick living room rug, where my feet sank, my balance wavered, and I spent more energy worrying about falling than breathing. Ten minutes of setup prevents all of that.
Your posture checklist
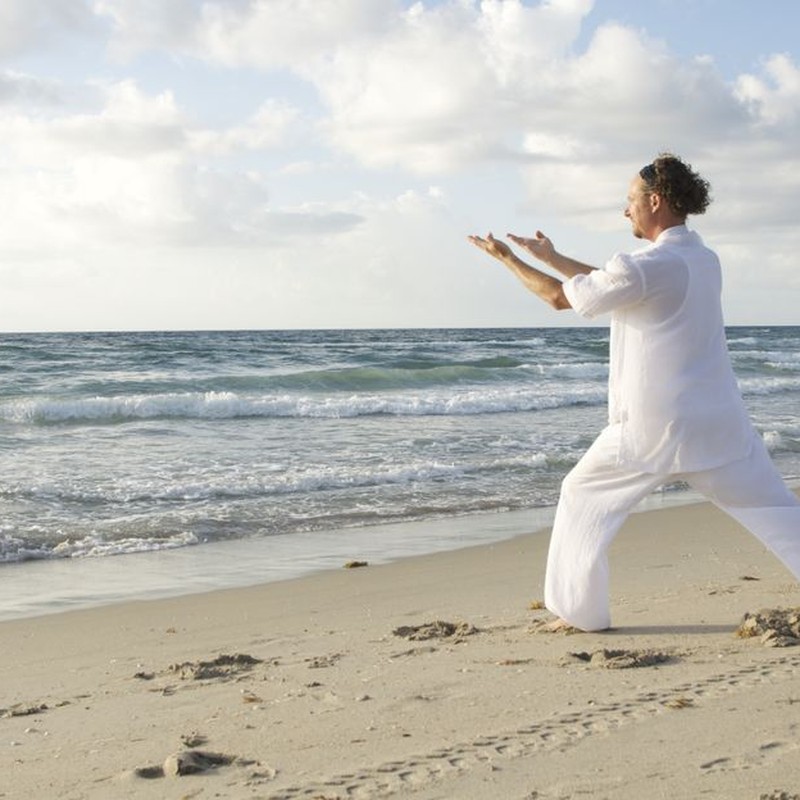
- Stand with your feet hip-width apart. Toes point forward, or turn out no more than about 15 degrees. Turn them wider and the knees follow, and the hips lose their level.
- Soften the knees. Don’t lock them. Picture a small spring in each one, ready to absorb a gentle bounce.
- Let the pelvis sit level, like a bowl of water you don’t want to spill.
- Lengthen the spine without arching the low back. The crown of your head floats up while the tailbone drops down. Gentle, not military.
- Keep the shoulders low and loose. If they creep toward your ears, roll them back and down once.
- Rest your tongue lightly on the roof of your mouth, just behind the front teeth, and breathe through your nose.
That last cue sounds trivial. It isn’t. A quiet jaw keeps the neck relaxed, and a relaxed neck lets your head stay balanced over your spine instead of drifting forward. I use the tongue trick whenever I catch myself tensing up mid-walk.
Your space and safety checklist
- Pick a surface. A clear hallway, a covered porch, or a flat stretch of sidewalk works well. Skip grass, gravel, sloped driveways, and thick carpet for the first few sessions. Those surfaces force your feet to work harder and blur the ground feedback you’re trying to feel.
- Clear the path. Dog bowls, throw rugs, shoes, charging cables — anything that could catch a toe goes somewhere else.
- Place a sturdy chair at one end of your walking line. You want to reach it without lunging. That chair is your safety net, not a crutch.
- Wear thin-soled, well-fitting shoes, or go barefoot indoors on a non-slip floor. Thick cushioned running shoes mute the feedback that makes this practice work, because your feet need to feel the floor to tell your brain where you are in space.
On footwear, I keep a pair of flat canvas sneakers by the door. Nothing fancy, no cushioning hype, but they let me feel the ground.
Your 30-second balance check
Stand near the chair and lift one foot off the floor. Hold for a few breaths. Switch sides. If you can’t hold it for even five seconds, start seated: sit in a firm chair with both feet flat and practice the weight shift and the breathing from there. Work up to standing when it feels easy. There’s no rush. The goal is controlled, not wobbly.
Run this check at the start of every session for the first couple of weeks. It takes less time than tying your shoes, and it tells you whether today is a standing day or a seated day.
The Step-by-Step Sequence: How to Walk Tai Chi Style
The whole walk is eight moves in a fixed order. Read through once, then try it in a hallway with a wall or counter within arm’s reach. September 2026 coverage described Harvard’s take on tai chi walking as a simple way to practice mindfulness while you move, and the point holds up once you try it: the slowness is not the goal, the attention is. Every part of the step has an order to it, and the order is what you are learning.
Set your stance and shift onto the left leg. Feet about hip-width apart, toes pointing forward. Stay still for three slow breaths before you go anywhere. Then shift your weight gradually onto the left leg until the left foot feels planted and the right side feels light. That shift is the whole exercise. Rush it and nothing after it works.
Lift the right heel first, then the ball of the foot, then the toes. In that order, every time. Heel and toes rising together means you are lifting the foot with muscle instead of letting it empty out. Before it moves, the foot should feel weightless, light enough to slide a piece of paper underneath it.
Step forward only about one foot length. Beginners almost always overshoot. A short step keeps the weight transfer honest. The right heel touches down first, then the sole rolls through the ball of the foot as your weight arrives. Heel, then ball. Not the whole foot at once.
As the right foot accepts weight, the left heel peels off the floor. Keep both knees slightly bent the entire time. There is no moment where you stand up straight between steps. That up-and-down bounce is exactly what makes tai chi walking look like ordinary walking, and it is the first habit to drop.
Travel at a quarter to half your normal walking speed. Audio check: if you can hear your feet land, you are moving too fast or dropping your weight instead of transferring it. Quiet feet mean the transfer is working.
Let your arms hang and swing only slightly. Or rest one hand lightly on your belly. Power-walk arm pumps pull the shoulders forward and speed you up, which defeats the purpose. The hand on the belly doubles as a breath cue for the next step.
Match the breath to the step. Inhale as your weight settles onto the front foot, exhale as the back foot releases. Four to six steps per breath is a comfortable starting rhythm. Running out of air at three? Slow down rather than forcing a deeper breath.
Keep your gaze level and soft, about 10 to 15 feet ahead. Looking down at your feet tilts the head forward and pulls the spine out of line, which is the posture you are trying to build. Soft focus, not staring.
Putting the cycle together: 10 steps forward, 10 steps back
Once the individual steps feel familiar, walk 10 steps forward, pause without lifting your feet, then take 10 steps backward using the same weight-shift pattern. Backward walking trains a different balance skill than forward walking, and it forces you to feel the shift rather than watch it.
Keep a counter or wall within arm’s reach for the backward portion. If you have a history of falls, or going backward makes you feel unsteady even with support, skip the backward steps entirely and repeat the forward cycle instead. Backward walking is worth training on a clear, flat surface, but it is not worth a fall.
Pick your surface before you start. A hallway, a quiet stretch of sidewalk, or a short loop in a park all work. I practiced in a hallway my first week, which meant turning around a lot. That was fine. Frequent gentle turns are their own balance drill.
Take your shoes off if the floor is not slippery, or wear thin, flat-soled shoes. Anything with a thick cushioned heel hides the heel-to-ball roll you are trying to feel under your foot. Five minutes is a reasonable starting session, and two or three short sessions a day beat one long one, mostly because the attention is easier to hold in short doses.
The first few times, you will catch yourself speeding up or standing tall between steps. That is normal, and noticing it is the practice. Tai chi walking is not a walk you perfect on day one. It is a walk you keep returning to.
Try the 10-and-10 today and tell me in the comments how it felt, especially the backward portion. That is the part most people find surprising.
Common Mistakes Beginners Make, and the Fix for Each
Almost everyone who tries tai chi walking makes at least four of these in the first two weeks. I made most of them. My first session actually felt wobblier than a normal walk, and the reason was boring: I was moving too fast and thinking too hard about moving slowly.
None of these errors will hurt you. They just stall progress. Six of them show up again and again, and every one has a fix you can try on your next lap down the hall.
Rushing the weight shift
If you can feel a moment of falling forward, you are transferring your weight too fast. That little lurch is your body catching itself, which is the opposite of what you are training. Slow the transfer until it feels almost dull. Count one full second from the moment your heel touches down to the moment your weight is completely on that foot. Say it out loud if that helps. One-one-thousand. This single correction cleans up more balance problems than anything else on the list.
Strides that are longer than they need to be
Big steps feel like progress. They are not. An oversized stride tips your torso forward and snaps your back knee straight, which takes away the support you were counting on. Shorten the step until your front knee stays slightly bent and your back heel only just lifts off the floor. Most beginners who shorten up say the same thing: it feels like it should be harder, but it is steadier.
Straight knees, even for a split second
A locked knee is a rigid column. A soft knee is a spring. That difference is the entire reason tai chi walking builds balance. If either knee straightens completely, even briefly, you lose the ability to correct a wobble when it starts. Keep a small bend through the whole cycle, including the moment you are balancing on one leg. Watched from the side, your knees should never form a flat line.
Holding the breath when the balance gets interesting
This one sneaks up on you. The instant standing on one leg gets tricky, most beginners stop breathing, and a stiff, oxygen-starved body wobbles more. Keep the exhale moving across four to six steps, the same rhythm you use in the basic cycle. Counting your steps out loud is a perfectly good way to keep it going. Here is a quick check: if you could not say a short sentence right now, you are either holding your breath or walking too fast.
Watching the floor instead of the room
Looking down at your feet feels safer. It is not. Your center of gravity drifts forward, and you take your inner ear and peripheral vision out of the balance equation, which are two of the tools you came here to sharpen. Pick a spot at eye level a few feet ahead and let your gaze rest there. Your feet can find the floor without your eyes supervising them.
Toes that grip the floor
Curled toes mean a tense foot, and a tense foot cannot roll smoothly from heel to ball. Before you start, stand still and wiggle your toes once. Then let them lie flat. The foot should feel wide and relaxed, spreading across the floor rather than clawing at it.
Pick one fix per session
Do not try to correct all six at once. Choose one, hold it in your head for the whole walk, and let the rest be whatever they are. Over a week or two the corrections stack up on their own, without you having to manage them.
A chair within arm’s reach is not a sign of weakness. It is the thing that lets you relax enough to actually improve. When you know you can grab something, your shoulders drop, your breathing slows, and your body stops bracing. I keep a kitchen chair at the end of my hallway for exactly this reason, and I still touch it on days when my legs are tired.
Thirty seconds before you start, run a short check:
- Wiggle the toes once, then let them flatten.
- Set your gaze at eye level, not at your feet.
- Name the one correction you are working on today.
If a fix clicked for you, or if one of these still feels impossible, tell me about it in the comments. A good chunk of what I know about this came from other people’s hallway experiments.
Building a Practice: Short Routines for Week One and Beyond
You have the posture, the weight shift, and the heel-to-ball footwork. What you need now is a rhythm you can repeat without thinking about it. Most beginners blow this part. They try twenty minutes on day one, feel unsteady, and quit by Thursday. Balance skills grow through repetition, not duration. Three minutes twice a day beats thirty minutes once a week, and it is not close.
Harvard’s take on tai chi walking, covered by the Hindustan Times in September 2026, framed it as a simple way to practice mindfulness while you move. That simplicity is the whole reason it sticks. No mat, no gym, no special clothes. A hallway and a few spare minutes.
Week One: Three Minutes, Twice a Day
Set a timer for three minutes. Walk your hallway or a quiet room using the slow step and the weight shift you already practiced. Do it before breakfast, then again after lunch. Two short sessions are easier to remember than one long one, and they reinforce the pattern while your nervous system is still filing it away.
Put a chair at the end of your walking line. I did this in my own hallway for the first week, and it changed everything. When I felt wobbly, I rested a hand on the back of it for a step or two, then let go. That small support is the difference between practicing and skipping. A wall works just as well. Needing support is not failing. It is how the skill gets built.
Week Two: Add the Arms
Once the steps feel less choppy, let your arms join in. On each step, the opposite arm drifts forward. Right foot forward, left arm floats ahead. Left foot forward, right arm floats ahead. Keep both hands below shoulder height the entire time.
Move from the shoulder, not the elbow. The arms should feel like they are drifting on their own, not pumping. If you notice your shoulders creeping up toward your ears, drop back to week one for a day. There is no rush here. Smooth matters more than fast.
The Five-Minute Bridge
Three minutes to ten minutes in one week is a bigger jump than it sounds, especially if you have been sitting more than usual. Add a five-minute step first. Five minutes, twice a day, for as long as it takes to feel ordinary. If that takes two weeks instead of one, take two weeks. Nothing about this plan breaks if you repeat a stage.
Week Three and Beyond: Ten Minutes Outdoors
When five minutes feels easy, extend to ten uninterrupted minutes on flat pavement. A sidewalk, an empty parking lot, or a park path all work. Walk slowly enough that you can breathe through your nose the whole way. If you cannot, you are going too fast.
After ten minutes feels manageable, add one turn. Turning is where most balance training actually happens. Your feet, hips, and eyes all have to negotiate the change in direction at once. Slow the turn down even more than the straight walking. Step, pivot, and let your head follow your body. Do not lead with the head.
Add Variety Without Adding Complexity
Two patterns keep practice from getting dull. Set two chairs about six feet apart and walk a figure-eight around them. Or weave a slow slalom down a hallway. Both ask your hips to rotate while your upper body stays quiet, which is the same skill you use reaching for a shelf or turning to answer a phone.
Pair With a Five-Minute Balance Block
Walking is the main course. This short standing block is the side dish. Do the walking first, while you are fresh, then run through it:
- Tandem stance: one foot directly behind the other, heel to toe, hold 20 to 30 seconds per side.
- Single-leg holds: lift one foot just off the floor, hold 10 to 20 seconds, switch.
- Slow heel raises: up on the balls of your feet, lower with control, 8 to 10 reps.
Hold a counter or the back of a chair if you need to. Five minutes is plenty. Stop before you get tired, not after.
Track It Simply
Write down three things after each session: the date, how many minutes you walked, and whether you used the chair. That is the whole log. Balance progress is slow enough that memory is unreliable, and a written record shows gains you would otherwise miss completely.
I looked back at my own notes after three weeks and noticed I had stopped reaching for the wall at some point without ever registering it. That is the kind of progress nobody feels in the moment.
Finding a Teacher or a Class
If you would rather learn alongside someone, you have more options than a shelf of DVDs. Streaming beginner tai chi classes are widely available online, and many let you pause and rewind, which suits this material. Local senior centers, YMCAs, and community centers commonly run low-cost tai chi and balance programs. If you have had a fall or a diagnosis that affects your feet, ask about a physical therapist-led balance class. That is the most targeted option of the four.
On footwear, thin-soled shoes let your feet feel the ground, which helps with balance. You likely already own a pair.
Safety note: Stop if you feel dizzy, and sit down if the room starts to spin. Talk with your doctor before starting if you have uncontrolled blood pressure, nerve damage in the feet, or a recent fall.
Try five minutes today, today being the operative word. Then come back and tell me in the comments what felt different: steadier, calmer, or just slower. Reader reports tend to help the next beginner more than any instruction I can write.