
Dumbbell Shoulder Press:
By Liam Smith — Fitness enthusiast and founder of Apexfito. I test gear at home and share what actually works.
Why the Dumbbell Shoulder Press Belongs in Your Routine

If you’re just starting out with shoulder training, the dumbbell shoulder press is one of the most effective and safest exercises you can do. I’ve seen many beginners jump straight to the barbell overhead press, only to struggle with form or hit a plateau early on. Dumbbells offer a more forgiving path that builds real strength and stability. Harvard Health notes that keep your back straight and lower your hips until your thighs are parallel to the floor.
The primary muscles worked are your deltoids—the front, side, and rear heads—along with your triceps and upper chest. That means every rep fires up multiple muscle groups, making it a compound movement that gives you more bang for your buck. When I first started lifting, I noticed my shoulders felt more balanced after switching to dumbbells, and my pressing strength improved steadily without the nagging discomfort I’d get from a barbell.
Why are dumbbells better for beginners? Two big reasons: natural range of motion and fixing imbalances. With a barbell, your shoulders are locked into a fixed path, which can strain the joint if you lack mobility. Dumbbells let each arm move independently, following your body’s natural groove. This reduces injury risk and helps you identify if one side is weaker—common in beginners. I’ve coached friends who couldn’t press evenly with a barbell, but after a few weeks with dumbbells, their strength evened out.
There’s also functional carryover. Pushing something overhead isn’t just a gym move—it’s how you lift luggage into an overhead bin, place a heavy box on a high shelf, or hoist a kayak onto a roof rack. Strengthening that motion with dumbbells makes everyday tasks easier and safer.
Before you start pressing, take five minutes to warm up your shoulders. A few arm circles, band pull-aparts, or light dumbbell rotations will get blood flowing and reduce your risk of injury. Cold shoulders are a recipe for trouble.
This article will teach you proper form, highlight common mistakes that can stall progress or cause injury, and offer variations to keep you progressing. By the end, you’ll have a clear plan to build strong, healthy shoulders.
Setting Up for Success: Grip, Stance, and Starting Position

Before you press a single pound, the setup determines whether you build strength or collect an injury. I’ve seen too many people grab dumbbells that look impressive, only to arch their backs into a banana shape and risk their lower back. Let’s fix that right now.
Choose the right weight. Pick a dumbbell you can press for 8–12 reps with strict control. If you have to heave, twist, or arch to get the weight up, it’s too heavy. For most beginners, that means starting with 10–15 lb dumbbells for women and 15–25 lb for men. Don’t ego-lift. Your shoulders will thank you.
Grip the dumbbells with a neutral grip — palms facing each other, like you’re holding two tall glasses of water. Bring them to shoulder height, elbows bent and slightly in front of your body. This position keeps your shoulders in a safer, more natural alignment than having elbows flared out to the sides.
Set your stance. Feet shoulder-width apart. Brace your core like someone’s about to punch you in the gut. Squeeze your glutes to lock your hips in place. This creates a stable base from your feet to your shoulders. I like to think of it as building a solid platform — if the foundation wobbles, the whole lift suffers.
Wrist position matters more than you think. Keep your wrists straight and directly above your elbows. If your wrists bend back, you’re transferring load to your forearm bones and joints, not your delts. Imagine you’re about to do a push-up — that’s the wrist alignment you want.
Stand in front of a mirror and check that your elbows are slightly in front of your torso, not flared out to the sides. This reduces impingement risk and lets your shoulders work through their full range of motion. If you feel any pinching in the front of your shoulder, adjust your elbow position forward.
Take a deep breath into your belly, hold it, and press. Exhale at the top. That breath brace is your built-in weight belt — use it every rep.
Now, before you start pressing, make sure your setup feels solid. If you’re wobbling or your lower back is arching, drop the weight or adjust your stance. There’s no shame in going lighter to get the form right. I’ve done it myself more times than I can count.
Once you’ve got the setup dialed, you’re ready to press with confidence.
The Press: Step-by-Step Form Cues

Now that you’re set up, it’s time to press. The movement itself is straightforward, but small details make the difference between building strong shoulders and risking injury. I’ve coached dozens of beginners through this exercise, and these cues have helped every single one of them press more safely and effectively.
Starting Position: The Setup
Begin with the dumbbells resting on your thighs, just above your knees. In one smooth motion, kick the dumbbells up to your shoulders. This is the most efficient way to get into position without straining your lower back. Your palms should face each other, and the dumbbells should be slightly in front of your shoulders, not directly over them.
The Press: Upward Arc
Press the dumbbells upward in a slight arc, not straight up. Imagine you’re tracing a gentle curve that starts in front of your face and ends above your head. This arc keeps your shoulders in a safe, externally rotated position. Pressing straight up can jam your shoulder joints and limit your range of motion.
As you press, rotate your palms to face forward at the top. This rotation isn’t forced — it happens naturally as your arms move through the arc. I’ve found that thinking about ”turning the key” in a lock helps beginners get the feel for it. The rotation allows for a smoother movement and better shoulder engagement.
Lockout: Top Position
Fully extend your arms at the top without locking your elbows hard. You want a straight arm, but not a hyperextended one. Keep the dumbbells in line with your ears, not behind your head. If the weights drift backward, you’ll lose stability and put unnecessary stress on your shoulders.
Pause for a brief second at the top. This isn’t a rest — it’s a check-in. Feel your shoulders working. If you feel any pinching or sharp pain, lower the weight and try again with lighter dumbbells.
The Descent: Controlled Lowering
Lower the dumbbells slowly and with control. Don’t let gravity do the work. Bring them back to shoulder height with your elbows at about a 45-degree angle from your torso. This angle is the sweet spot for shoulder health — it protects your rotator cuff while still targeting the deltoids effectively.
I tell my clients to imagine they’re lowering the dumbbells onto a table. The movement should be smooth and steady, not jerky. If you find yourself rushing the descent, you’re probably using too much weight. Drop down a size and focus on control.
Take your time with each rep. Quality beats quantity every time. Once you can press with perfect form for 8–12 reps, then consider increasing the weight.
Ready to try these cues? Check current prices on Amazon for a pair of adjustable dumbbells that will let you progress safely. And if you’ve tried this exercise before, share your experience in the comments — what helped you nail the form?
5 Common Mistakes and How to Fix Them

Building on the form cues above, here are the most common errors I see. Fix these early, and you’ll build stronger, safer shoulders for years.
1. Skipping the Warm-Up
Jumping straight into heavy pressing with cold shoulders is asking for trouble. Your rotator cuff and shoulder capsule need blood flow and activation before they’re ready to handle load.
How to fix it: Spend 5 minutes on shoulder-specific prep. I do arm circles, band pull-aparts, and 10–15 light reps with no weight or very light dumbbells. Your shoulders should feel warm and loose before you grab your working weight. One client told me this single change eliminated the clicking in his left shoulder.
2. Arching Your Lower Back
This is the classic sign the dumbbells are too heavy or your core isn’t braced. When your back arches, your rib cage flares up, and your shoulders lose stability. You might feel it in your lower back the next day—not your shoulders.
How to fix it: Before you press, squeeze your glutes hard and pull your ribs down toward your hips. Imagine you’re trying to press your lower back into the bench (if you’re seated) or keep your torso rigid (if standing). If you can’t stop the arch, drop the weight by 5–10 pounds. I’ve had to do this myself—it’s humbling, but your shoulders will thank you.
3. Flaring Your Elbows Out to the Sides
When your elbows point straight out (like a T-pose), you jam the shoulder joint into a vulnerable position. This increases impingement risk and takes tension off the delts.
How to fix it: Keep your elbows at about a 45-degree angle from your torso. Think of tucking them slightly forward, as if you’re about to do a close-grip press. If you’re unsure, record a set from the front and check your elbow angle. It should look like an arrow, not a cross.
4. Not Pressing in a Straight Line
Some people push the dumbbells forward (toward their nose) or backward (over their head). This wastes energy and can strain the shoulder capsule.
How to fix it: The dumbbells should travel in a straight, slightly arcing path from your shoulders to directly overhead. Use a mirror or record a side view. At the top, the dumbbells should be aligned with your ears—not in front of or behind your head. I cue myself: ”Press up and slightly back, like I’m punching the ceiling.”
5. Using Momentum to Jerk the Weight Up
When the weight gets heavy, it’s tempting to bounce or heave the dumbbells up. This reduces muscle activation and shifts load to your joints and lower back.
How to fix it: Control the weight on both the way up and the way down. Lower the dumbbells in about 2–3 seconds, pause briefly at the bottom, then press up with a controlled tempo. If you can’t lower slowly without losing form, the weight is too heavy. I tell my clients: ”The eccentric (lowering) phase is where the muscle grows. Don’t cheat yourself.”
6. Looking Up or Tilting Your Head
It’s natural to want to watch the dumbbells go up, but tilting your head back strains your neck and can throw off your whole alignment.
How to fix it: Keep your chin tucked and eyes forward throughout the movement. Imagine you’re holding a tennis ball under your chin. Your head should stay still—only your arms move. If you catch yourself looking up, reset your neck position before the next rep.
These fixes are simple but take practice. Pick one mistake to work on each session. Over a few weeks, you’ll build a press that’s both stronger and safer. Have you caught yourself making any of these errors? Drop a comment below—I’d love to hear what helped you fix it. And if you’re shopping for dumbbells, check current prices on Amazon to find a set that suits your home gym.
Variations to Build Strength and Avoid Plateaus

Sticking with the same dumbbell shoulder press week after week can lead to boredom and stalled progress. Adding a few smart variations keeps your shoulders guessing and helps you target different parts of the deltoid. Here are five proven options to rotate into your routine. I recommend swapping one variation every four weeks—this gives your muscles enough time to adapt and keeps your training fresh.
Seated Dumbbell Press
Using a bench with back support lets you focus entirely on your shoulders without worrying about lower back strain. I find this variation especially helpful on heavy days because it locks your torso in place. To do it: sit on an adjustable bench set to 90 degrees, hold dumbbells at shoulder height, and press straight up without arching your back. Keep your feet flat on the floor for stability.
Alternating Dumbbell Press
Pressing one arm at a time forces your core to work harder to keep you balanced. This is a great way to correct strength imbalances between your left and right sides. Start with both dumbbells at your shoulders, press one arm overhead, lower it with control, then press the other. Don’t rush — each rep should be smooth and deliberate.
Arnold Press
Named after Arnold Schwarzenegger, this move hits all three deltoid heads by adding a rotation. Begin with dumbbells in front of your shoulders, palms facing you. As you press up, rotate your palms to face forward. At the top, your palms should be facing forward. Reverse the motion on the way down. I’ve noticed this variation really lights up the side delts.
Incline Dumbbell Press
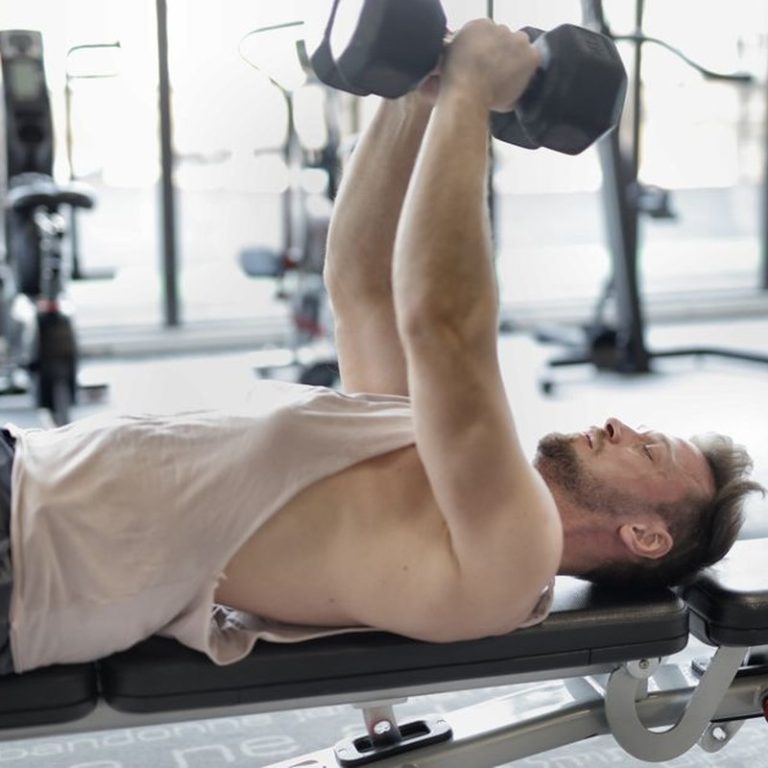
Set your bench to a 45-degree angle and lie back. This angle shifts more work to the front delt and reduces stress on the shoulder joint, making it a good option if you have any shoulder discomfort. Press the dumbbells straight up from your shoulders, keeping your elbows slightly bent at the top. Lower slowly to feel the stretch.
Pause Press
Adding a 2-second pause at the bottom of each rep eliminates momentum and increases time under tension. This is brutal but effective for building strength. Press the dumbbells up, then lower them until your elbows are just below 90 degrees. Hold for two seconds, then explode up. I like to do these with lighter weight than my regular press.
Try swapping one of these variations into your shoulder day every four weeks. Your muscles will adapt, and you’ll keep making progress. If you’re looking for dumbbells to try these with, check current prices on Amazon and share your experience in the comments below.
Medical & Editorial Review: This article was reviewed by Liam Smith, founder of Apexfito, for accuracy and safety. Content is for educational purposes and is not a substitute for professional medical advice. Consult your physician before starting any exercise or nutrition program.

One Comment