The 20-Minute Home Workout for People Who Hate Exercising: No Equipment, No Gym, No Excuses
Full disclosure: Some links in this article are affiliate links. We may earn a small commission at no extra cost to you if you make a purchase through them. Our recommendations are based on what real users report, not on commission size.
Why a 20-Minute No-Equipment Home Workout Actually Works for Exercise Avoiders
If the word “workout” makes you want to sit down, the problem isn’t your body. It’s everything that usually surrounds exercise: the drive to a gym, the clothes you need to pack, the people who seem to know exactly what they’re doing. A 20-minute home workout strips all of that away. You need a small patch of floor, a shirt you don’t mind getting sweaty, and nothing else.
I spent months walking past the corner of my living room where I’d told myself I’d “start tomorrow.” Every time I imagined a proper workout, I pictured at least an hour. So I did nothing. The day I gave myself permission to aim for 20 minutes was the day the routine finally became a habit.
If you’re someone who avoids exercise, you probably don’t have a fitness problem. You have a setup problem. Let’s look at three walls that stop you before you start.
The real barrier isn’t your fitness level
- The commute wall: A gym trip costs 40 minutes round-trip before you touch a single weight. Walking to your living room costs 10 seconds. On a low-energy day, that difference is everything.
- The judgment wall: At a gym, you feel watched. At home, nobody cares if you pause after 30 seconds, mess up a move, or have a tomato stain on your shirt. You can look ridiculous and still get it done.
- The planning wall: Gym sessions need a bag, a lock, a route, and a schedule. A home workout needs zero planning. You stand up, push the coffee table aside, and start.
Once those walls come down, a 20-minute block feels doable. It’s long enough to raise your heart rate and make you feel alive, but short enough that you don’t have to mentally armor yourself for an hour. You can almost always find 20 minutes.
Consistency beats intensity
When I started, I couldn’t do one proper push-up. My plan was boring: Monday, Wednesday, Friday, 20 minutes. I put a reminder in my phone and treated it like a meeting with myself. Some days I wanted to quit after ten minutes. But because the session was short, I never had to talk myself out of starting.
Here’s the math that changed my mind: a 20-minute workout three days a week gives you 60 minutes of movement. A perfect two-hour workout once a month also gives you 60 minutes, but it doesn’t build a habit. Repeating a short routine teaches your brain that exercise is safe, normal, and doable. That repetition is what most people actually need.
So before you think about intensity, set the schedule. Pick three days that fit your week. Write the day and the time in your phone. When the alarm goes off, you don’t ask yourself whether you feel like it. The decision was already made.
If you’re not sure how to begin, know this: the first step is not a test. It’s a warm-up. March in place for one minute, swing your arms, and let your body know you’re about to move. That’s not the workout; it’s just the opening door.
Tell yourself “only 20 minutes.” It sounds too easy, and that’s exactly the point. Once you start moving, momentum usually carries you through the whole session. If it doesn’t, you still showed up. That’s a win.
When you’re ready, clear a space on the floor and try this 20-minute plan. Leave a comment below to tell me how it went. If you want a mat for extra cushioning, check current prices on Amazon—but don’t wait for a package to arrive. A carpeted floor works fine today. The only equipment you truly need is a floor and a little bit of self-belief.
The 20-Minute Workout: Your Full Body Circuit

This whole session runs on one timer and a little bit of open floor. No equipment, no commute, no need to change into anything special. I’ve done this exact circuit in my living room on days when I didn’t want to move at all, and the countdown always made it feel less painful than I expected.
You might remember a 30-second interval version from the intro. That’s a perfect starting point if you’re brand new. Here, we’re using the full 45-second version, but you can absolutely drop back to 30-second intervals whenever you need to. The only rule is that you keep moving for the full 20 minutes.
Warm-Up (3 Minutes)
Set your timer for 3 minutes and work through these four moves. Take them slow. Let your body wake up before you ask it to do anything hard.
- March in place (45 seconds): Swing your arms and lift your knees to a comfortable height. You don’t need to look like a runner. Just get the blood moving.
- Arm circles (45 seconds): Extend your arms out to your sides and draw small circles. Reverse direction halfway through.
- Hip circles (45 seconds): Put your hands on your hips and make circles with your pelvis. Switch directions after 20 seconds.
- Shoulder rolls (45 seconds): Roll your shoulders forward, up, back, and down. Let your breathing settle into a rhythm.
If you’re still stiff, repeat one of those moves for another 30 seconds before moving into the circuit.
The Circuit (15 Minutes)
Here’s the exact timing system so there’s no guesswork. Set your timer for 15 minutes. Do the first exercise for 45 seconds. Rest for 15 seconds. Move to the next exercise. Do each one that way. Yes, rest after every single move, including the last one. After you finish the eighth exercise, rest for 15 seconds, then start back at the first exercise and keep going until the timer hits 15 minutes.
You will not finish two full rounds in 15 minutes. That’s fine. Most people get through all eight exercises once and then into the first few moves of round two. That counts as a complete workout. If you only get through all eight exercises and the final 15-second rest, that also counts. Here’s the minimum acceptable version: warm up, do each move once at a pace that feels doable, then finish with the cooldown. That is a successful session.
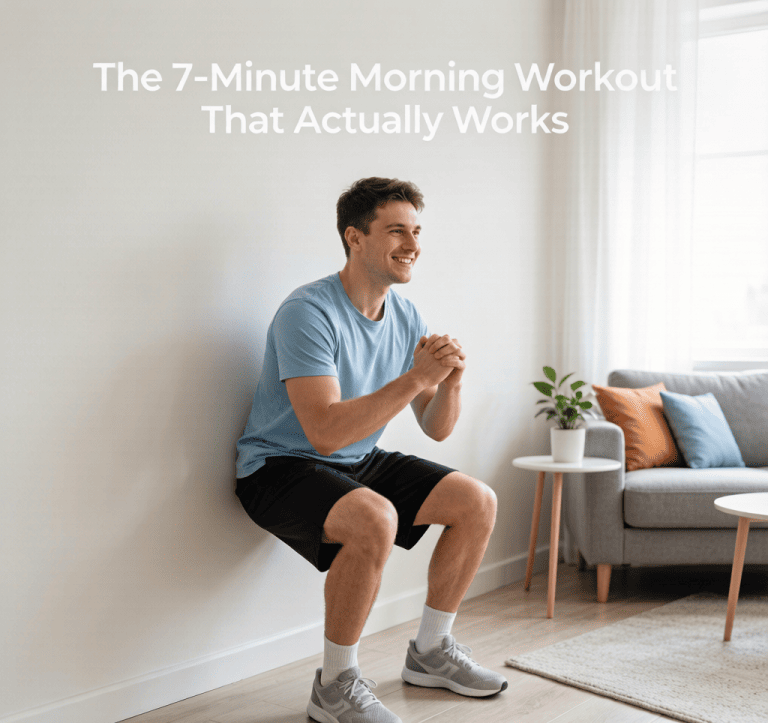
- Bodyweight squats: Stand with your feet about shoulder-width apart. Send your hips back and down as if you’re sitting into a chair, keep your heels on the floor, then push back up.
- Wall push-ups: Place your hands on a wall at shoulder height, step your feet back, and bend your elbows to lower your chest toward the wall. Press back out. The farther your feet are from the wall, the harder this gets.
- Reverse lunges: Step one foot back and lower your back knee toward the floor. Keep your front knee over your ankle. Push through your front foot to stand and switch sides.
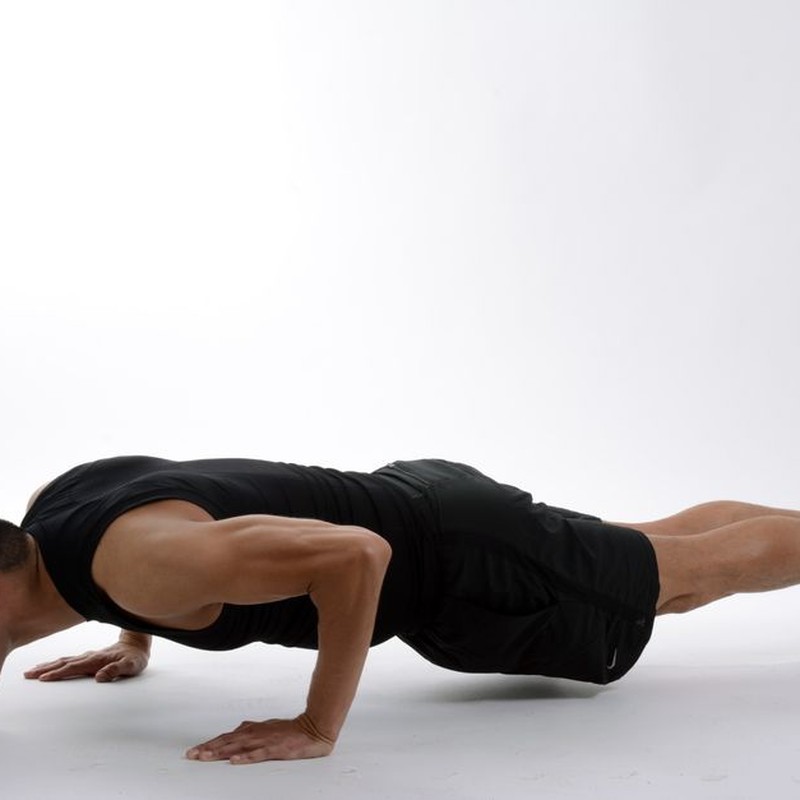
- Plank shoulder taps: Start in a high plank with your hands under your shoulders. Lift one hand and tap the opposite shoulder while keeping your hips still. If your wrists complain, drop to your forearms.
- Glute bridges: Lie on your back with your knees bent and feet flat. Push through your heels to raise your hips, squeeze your backside at the top, then lower slowly.
- Mountain climbers: From a high plank, drive one knee toward your chest, then switch sides. Go at a pace that keeps your shoulders over your hands.
- Seated knee lifts: Sit near the edge of a sturdy chair. Lean back slightly, lift one knee, then the other. This one feels deceptively hard even though you’re sitting down.
- Step-ups: Use the bottom stair or a sturdy chair placed against a wall. Step one foot up, bring the other up, then step back down. Hold the wall or a rail if you need balance.
Go at your own pace. If 45 seconds feels too long, drop to 30 seconds of work and 15 seconds of rest. Missing a few reps never ruins a workout. Stopping early is the only real failure.
Cool-Down (2 Minutes)
Don’t collapse the second the timer beeps. Move into these stretches while your heart rate is still up.
- Standing forward fold (40 seconds): Hinge at your hips, let your arms hang, and bend your knees as much as you need.
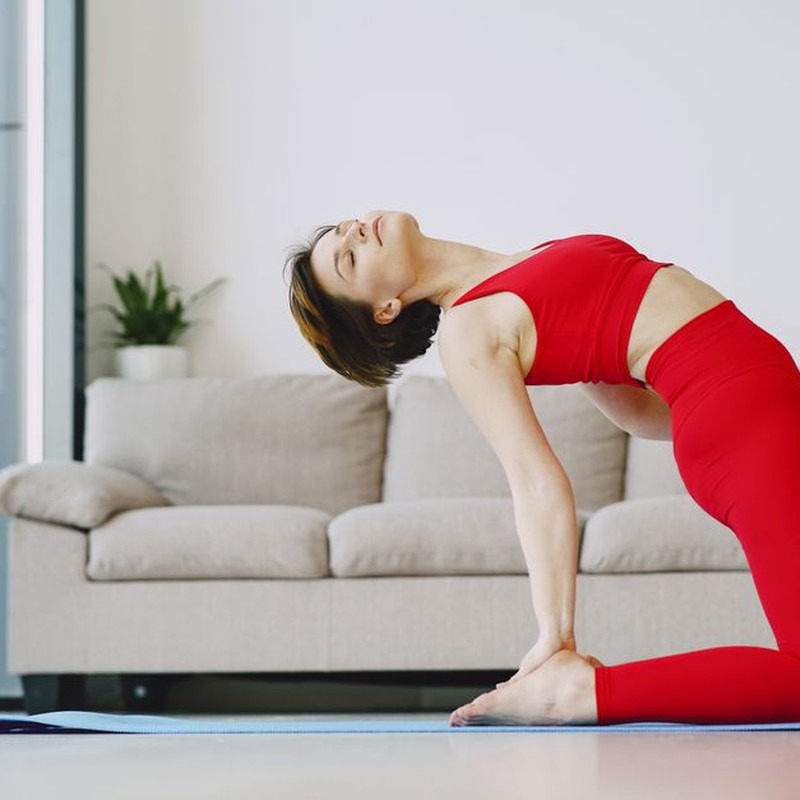
- Cat-cow (40 seconds): Get on your hands and knees. Inhale, drop your belly, and look slightly up. Exhale, round your back, and tuck your chin.
- Child’s pose (40 seconds): Sit back on your heels, stretch your arms forward, and rest your forehead on the floor.
If 40 seconds each feels hurried, stretch each one to a full minute and let the cooldown run longer.
How to Make This Work Without Overthinking It
Three non-consecutive days per week is a realistic starting point. Maybe that’s Monday, Wednesday, and Friday. Maybe it’s Tuesday, Thursday, and Sunday. Pick a rhythm that feels boring and repeatable.
In week one, your only goal is to complete the 20 minutes. If you need an extra rest day, take it. When you finish the full session three times in one week, add a small challenge: extend the work intervals from 45 seconds to 50 seconds, or slow down the lowering phase of each move. That keeps progress coming without turning your workout into a punishment.
If you decide you want a little cushioning for floor moves, a basic yoga mat makes mountain climbers and glute bridges more comfortable. Check current prices on Amazon before you buy anything. Then come back and tell us in the comments how the 45-second intervals felt. Did one move surprise you?
Your Weekly Schedule: How Often to Do This Workout
If you’ve tried workout plans before and bailed by day four, the problem usually isn’t your motivation. It’s the schedule. You don’t need to train every day to see results, and you shouldn’t. Three days a week is plenty.
Three sessions give your muscles time to recover and still build a rhythm you can actually keep. That’s one rest day between each workout, so you’re never asking your body to go again while it’s still sore from last time.
Try Monday, Wednesday, and Friday. It works well because you start the week with a win, have a break in the middle, and end on a high note. But any three non-consecutive days work. The day names don’t matter, the consistency does.
Pick a time of day and attach it to something you already do. For me, that’s right after my morning coffee. For you, it might be just before the evening shower. When the workout is anchored to a regular habit, it stops being a daily negotiation.
On your off days, you don’t have to do anything. A short walk around the block is great, and light stretching feels good if you’re stiff. But taking a full rest day is also completely fine. Some of my most consistent weeks included a day on the couch, and the workout routine survived.
For the first two weeks, your only goal is to show up. Do one full round of the circuit. If that feels like too much, do almost all of it. A shortened round still counts as a workout. The point is to build the habit, not to crush yourself on day one.
Once the first two weeks feel comfortable, the next section explains how to add a little more time and a few extra moves. That’s a gradual increase, not a leap. You won’t need a whole new mindset for it.
And there will be days when you miss a workout. I’ve had plenty. Maybe you’re tired, maybe work ran late, maybe you just didn’t want to. Missing one day doesn’t cancel the plan. The next scheduled day is still there, and you can pick it back up without any guilt trip.
If you follow this schedule for a week, come back and tell me how it felt in the comments. I’m curious which time of day worked best for you.
How to Progress Without Overthinking It

If you made it through week one, you already did the hard part. Now it’s about repeating the circuit, letting your body adjust, and not turning this into a second job. You don’t need a spreadsheet or a coach in your ear. You need a path that bends around how you actually feel on any given day.
For the first two weeks, do one round of the circuit. The 15-second rest between moves is a floor, not a countdown timer. If you’re still catching your breath when it’s time to start again, take 30 or 45 seconds. The workout still counts. If 45 seconds of work feels brutal, drop to 30 seconds per move. You’re not cutting corners. You’re building the habit first, and the fitness will follow.
Starting in week 3, the only change is this: add a second round of the circuit. Same moves, same order, same pace. Take two full minutes of rest between rounds. That bumps the total session to about 25 minutes and doubles the work without any new equipment or mental overhead. If two full rounds sound like too much, do one round and then repeat three of the moves for the second round. That still counts as progress.
- Weeks 1-2: One round of the circuit, 30-45 seconds per move, rest as needed between moves.
- Week 3: Two rounds, 30-45 seconds per move, 2-minute rest between rounds.
- Week 4: Same two rounds. No extra changes. Let your body get used to the volume.
Habit tracking is what makes the workout stick. Use a paper calendar or a free habit-tracking app and mark an X on every day you finish. A seven-day streak makes you think twice before breaking it. I keep a paper calendar on my kitchen counter because seeing the streak beats relying on memory.
Don’t try to make every move harder at once. Pick one exercise each week and push that one slightly. Maybe that means two extra squats, or lowering your chest another inch before you push back up. Leave the rest exactly the same. That’s enough to keep your body improving without turning the workout into a stressful event.
Now, about soreness. A little muscle soreness in the first week is normal. You might feel like your legs are full of wet cement the day after. That’s fine. But sharp pain that stops you in the middle of a move is your cue to stop and rest. Don’t grit your teeth through it. Step away, shake out your arms and legs, and decide if you need to skip that move today. There is no trophy for pushing through a warning sign.
No equipment is required for this plan, but if you want a mat for floor work or a soft surface to protect your knees, check current prices on Amazon before you buy. And if you give this progression a shot, come back and tell us how week 3 felt. Your comment might be the nudge someone else needs to start.
Balancing Strength, Cardio, and Keeping the Momentum Going
This workout is mostly strength with a light cardio buzz. There are no separate cardio days, and you don’t need a treadmill or a bike. The body-weight moves get you off the floor, challenge your muscles, and push your heart rate up at the same time. For someone who hates exercise, that’s ideal: one block, 20 minutes, no decisions about what kind of training to do today.
I’ve done this exact setup on a living room rug with the fan on high. The first time, I finished and thought, ‘Did I really work out?’ Then my legs answered the next morning. That weird mix of ‘that was manageable’ and ‘my muscles know I used them’ is the light cardio buzz doing its job. It doesn’t feel like a run you have to survive. It feels like a decent movement break that happens to build strength.
On days when you have extra energy, add a brisk 5-minute walk before or after the circuit. That’s enough to warm up or clear your head. It doesn’t need to be longer, and it shouldn’t replace the circuit. The circuit stays the main dish; the walk is a side.
A Weekly Mix That Actually Fits a Normal Week
The only mission is to show up for 20 minutes. Here’s a simple way to spread that across the week:
- Monday: 20-minute circuit
- Tuesday: rest, or a 10-minute easy walk if you feel restless
- Wednesday: 20-minute circuit
- Thursday: rest
- Friday: 20-minute circuit, plus an optional 5-minute walk before or after
- Saturday: light stretch or a short walk
- Sunday: rest
That’s three sessions a week, with plenty of recovery in between. If your week doesn’t line up neatly, swap the days. Monday could be Tuesday. Friday could be Sunday. The pattern matters more than the labels on the calendar.
About Progression (Don’t Overthink It)
For the first few weeks, keep the circuit exactly the same. Same moves, same order, same work time. Your brain needs the familiarity, and your body needs time to adapt. There is no week-three checklist waiting for you. The only progression that matters right now is doing the circuit again the following week.
Body weight alone builds functional strength because you’re moving your own body through patterns you actually use outside of exercise: bending, standing, stepping, pulling. That’s why a no-equipment routine works for beginners. Later, if you decide you want more of a challenge, light dumbbells can upgrade a few moves. They’re optional, not required.
Tell Us What Held You Back
After your first 20-minute session, drop a comment and leave a note. What kept you from working out before? Long days at work? Feeling out of place in a gym? Not knowing where to start? Say it. Then describe how the 20 minutes actually felt. Breathless? Bored? Surprised? Honest notes help other people realize they’re not the only one starting from zero.
One Recommended Extra (Optional)
You can do this whole program on carpet. But if you want to make starting slightly easier, check prices on Amazon for a simple yoga mat or a basic interval timer. A mat gives you a clear spot that says ‘this is where I train,’ and a timer keeps you from scrolling your phone during rest. No need for anything else.
You don’t need a home gym. You don’t need to rearrange your living room. You need 20 minutes, a floor, and three sessions this week. That’s the win. Try the circuit, then come back to the comments and tell us how it went.
Medical & Editorial Review: This article was reviewed by Liam Smith, founder of Apexfito, for accuracy and safety. Content is for educational purposes and is not a substitute for professional medical advice. Consult your physician before starting any exercise or nutrition program.