How to Do a Proper Hip Hinge: The Foundation of Safe Lifting
Full disclosure: Some links in this article are affiliate links. We may earn a small commission at no extra cost to you if you make a purchase through them. Our recommendations are based on what real users report, not on commission size.
What Exactly Is a Hip Hinge and Why Your Back Needs It
Before you deadlift, swing a kettlebell, or row a dumbbell, you need the hip hinge. It’s the movement pattern that lets you bend forward without making your lower back the weak link. In simplest terms, a hip hinge is a fold at your hip crease. Your butt pushes straight back and your spine stays long and neutral.
I remember teaching this to my mom. I asked her to hinge, and she defaulted to a squat. That’s normal. Squatting drives your hips down and your knees forward. Hinging pushes your hips back and lets your chest tip toward the floor. Your knees stay mostly straight, with just a slight bend to keep them unlocked.
Here’s the difference side by side:
- Squat: hips drop down, knees bend a lot, torso stays fairly upright.
- Hinge: hips push back, knees bend only a little, torso folds forward from the hips.
Confuse those two and your spine pays. When you try to load a squat-like position with a barbell or heavy dumbbell, the weight ends up in front of you and your lower back has to fight the leverage. That’s how backs get cranky. The hinge changes the path of force. Your glutes and hamstrings do the work, and your spine stays stable.
Your torso works like a door, and your hip joints are the hinges. A good hinge keeps the door straight as it swings. If you round your back, the door is bending in the middle. That never ends well.
Why practice before adding weight? Because every time you pick something off the floor, lift a kettlebell, or row a dumbbell, you rely on this same pattern. The hip hinge is the safety net that transfers force through your legs instead of dumping it into your vertebrae. Training it without load first builds a movement habit you can trust under pressure.
There’s another reason to practice early: your hamstrings and glutes need to learn their job. Most beginners have tight hamstrings and glutes that don’t fire on cue. The hinge wakes them up. Once those muscles start working together, lifts feel more solid and your lower back stops complaining.
Here’s a drill you can do right now with no equipment. Stand tall with your feet hip-width apart. Soften your knees. Place your hands on your hip crease, thumbs pointing back toward your glutes. Push your hips back as if you’re closing a car door with your rear end, and let your upper body fall forward naturally. Keep your neck long and your chin tucked slightly. Pause when your torso is roughly parallel to the floor, then squeeze your glutes and stand up. That’s the hinge.
If your low back tightens or your shoulders start to round, stop and reset. Aim for a long spine from tailbone to crown. If you can only fold down halfway before your hamstrings scream, that’s fine. Range will improve.
Once the movement feels clear, you can move on to deadlifts, kettlebell swings, and bent-over rows. Without the hinge, those exercises become risky instead of foundational. With it, they build real strength from a stable base.
Find Your Hinge with a Bodyweight Setup That Feels Natural
Before you push your first rep, take one minute to set up. The hip hinge is a position first and a movement second. If your starting posture is off, every hinge you do after it will be off too.
Bodyweight is the right way to start. With no weight in your hands, you can feel where your hips, spine, and feet are without the noise of a loaded bar. Once this position feels boring and repeatable, you can add weight and keep the same shape. Rushing past this step is the most common way I see beginners end up with lower back pain instead of stronger hips.
Stand tall with your feet hip-width apart. The outside of your feet should line up under the outside of your hips, and your toes should point straight ahead. Press all three corners of each foot into the floor: the base of your big toe, the base of your pinky toe, and your heel. That three-point contact keeps your weight balanced and gives you something to root into when you hinge.
Soften your knees just enough to let your kneecaps track over your shoelaces. This is not a squat. Your shins should stay fairly vertical, and your knees should stay behind your toes. I’ve had clients turn this into a half-squat on the first try; the easiest fix is to straighten the legs a few degrees until the backs of the knees feel open rather than compressed.
Now set your spine. Gently brace your core like you’re about to catch a light medicine ball in your stomach. You should feel tension around your whole midsection, not just the front. Draw your shoulder blades slightly down and back, but don’t pinch them hard. I like to imagine sliding them into my back pockets. This creates a stable shelf for your upper body. If you feel your ribs flaring up, breathe out and let them drop back down.
Place your hands on your cheekbones or collarbones. This simple tactile cue does two things: it keeps your elbows from pulling your spine forward, and it gives your brain a reference point when you start to hinge. When I first tried the cheekbone cue at home, I realized my shoulders had been rounding forward for years. Getting them quiet changed how my hips moved.
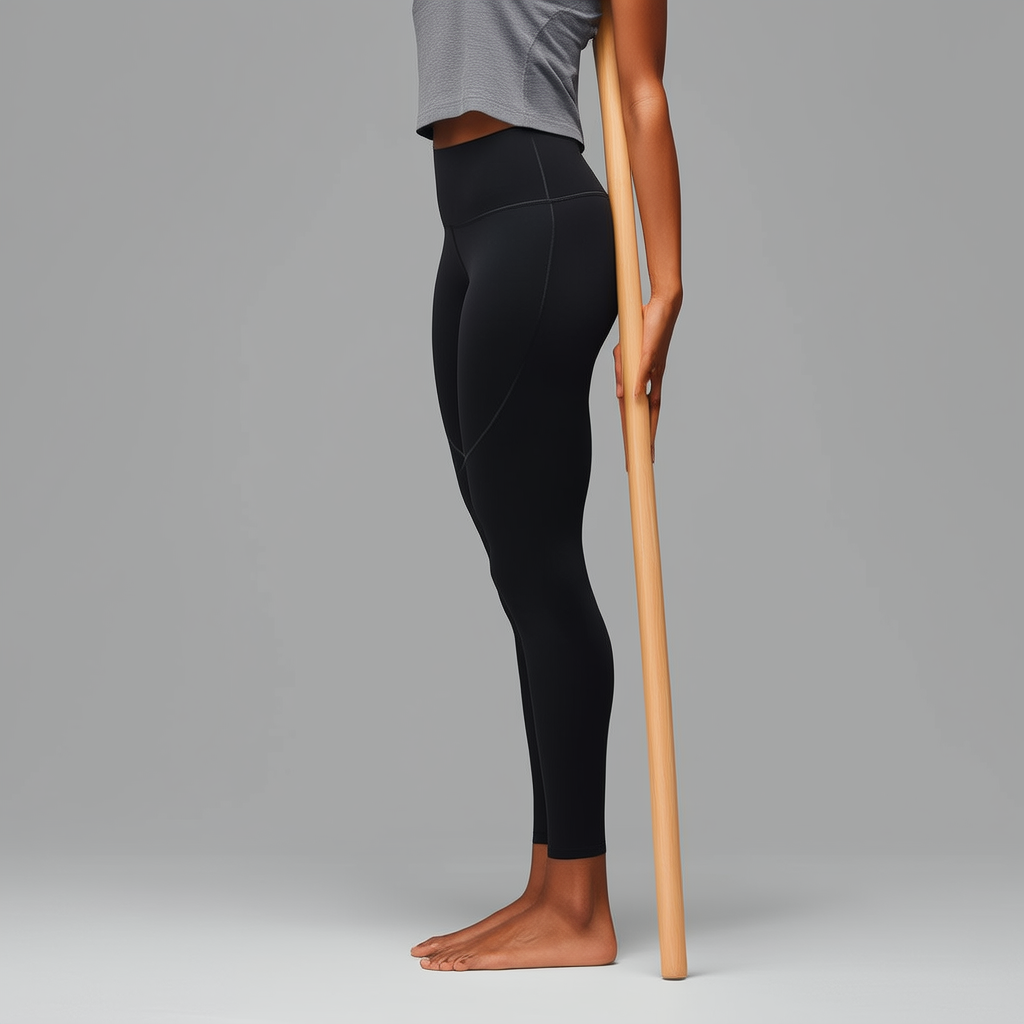
The best checkpoint for this foundation is the dowel test. Take a dowel or a long broomstick and hold it against your spine, or have a partner hold it for you. In a good setup, the dowel should touch your head, your upper back, and your tailbone at the same time. If the dowel loses contact with your tailbone when you lean, your spine has left neutral. Practice this in front of a mirror or record a side view with your phone. It feels awkward at first, but it catches drift that your hands can’t feel.
Here are the setup mistakes I see most often before anyone starts hinging:
- Knees too bent. Your hips drop and your shins angle forward. That’s a squat pattern, not a hinge. Fix it by straightening your legs until your shins are closer to vertical and your weight stays centered.
- Shoulder blades pinched. Squeezing them together jams your lower back into extension and flares your ribcage. Keep your ribs stacked over your pelvis and let your shoulder blades sit in a neutral, stable spot.
- Hands on the thighs. If you let your hands rest on your thighs, it’s too easy to push off them when you hinge. Hands on your cheekbones or collarbones keep your upper body quiet and force your hips to lead.
Once you’re in position, run through one final check. From the side, your ear, shoulder, and hip should line up. Your hamstrings and glutes should feel lightly engaged, but there should be no sharp tension in your lower back. If you feel a pinch, reset by softening your knees and letting your pelvis rock slightly forward and back until it finds a comfortable middle spot.
Take a few relaxed breaths in this setup. You should be able to inhale and exhale without shifting your spine or letting your ribs pop up. That’s your new starting point for every hip hinge variation.
The Step-by-Step Hip Hinge: From Setup to Full Range of Motion
Before you add any load, spend time practicing the hinge pattern with your body weight. The goal is to groove a movement your spine can trust when the bar gets heavy. In my experience coaching beginners, most people nail the setup in two sessions if they follow the steps in order.
You need about four feet of open floor. Flat-soled shoes help, but socks on a hard floor work fine. If you are on carpet, wear shoes with a firm sole so you can feel your foot contact.
Phase 1: Set your stance
Stand with your feet hip-width apart. Point your toes straight ahead or slightly out, whichever feels natural. Your knees should be soft, never locked. Shift your weight until you feel it balanced across the whole foot, then check your gaze: eyes on a spot on the floor six to eight feet ahead.
Phase 2: Set your arms and brace
Let your arms hang loose from your shoulders. If that feels too free, put your hands on your hips. The point is to give your upper body no job other than staying long and relaxed. Stack your ribs over your pelvis. Take a normal breath, then lightly brace your belly as if someone were going to poke you.
Phase 3: Push the hips back
Shift your body weight onto your heels. From there, push your hips straight back like you are closing a car door with your glutes. That image works better than “stick your butt out” because it gives the hips direction: back, not down. I’ve also heard trainers use the cue “keep your knees behind an invisible line,” but that can make you think about your knees and end up squatting. Picture a wall right behind your heels and send your hips back to it instead.
As your hips move backward, let your torso fold forward naturally. Do not fight it. Your hands should stay hanging or rest on your hips. Your knees will bend a little, but they should not travel far forward. If your shins stay vertical and your knees stay over your ankles, that’s a hinge. If your knees shoot forward, that’s a squat.
Phase 4: Keep your neck neutral
Let your head follow your torso. Keep your chin tucked slightly and your eyes on that same spot on the floor six to eight feet ahead. This keeps your cervical spine aligned without forcing your neck to crank upward. A common mistake is to look up at a mirror to check form. Don’t. That kinks your neck and pulls your upper back out of position.
Phase 5: Lower to the right depth
Continue sending your hips back until your torso is roughly parallel to the floor, or until you feel a strong stretch in your hamstrings. For many people, the hamstring stretch happens before your torso reaches parallel. Stop there. Do not force depth.
Pause for one full second at the bottom. This pause kills momentum and teaches your glutes and hamstrings to work from a lengthened position. You should feel tension through the back of your legs and your glutes, not your lower back.
Phase 6: Return by driving your hips forward
Exhale and squeeze your glutes to drive your hips forward. Think about pushing the floor away through your heels rather than pulling yourself up with your lower back. Your arms stay loose. Your chest and shoulders should move at the same speed as your hips.
At the top, stand tall and squeeze your glutes once more. Do not overarch your lower back. Your hips should finish directly under your shoulders, not in front of them.
Your first sets
Now put it together. Use this tempo for your first few sessions:
- Lower for three seconds.
- Pause for one second.
- Return for two seconds.
Perform 10 to 15 controlled reps per set. That gives you enough time under tension to feel mistakes without so many reps that fatigue wrecks your form. If you can’t keep your ribs stacked by rep 12, stop and reset rather than grinding out ugly reps. Do three sets. If this is your first time hinging, start with two sets and add one when the movement feels smooth.
Common problems and quick fixes
Round back in the bottom position: Shorten your range of motion. You might be chasing parallel when your hamstrings aren’t ready. Keep your spine long and hinge only as far as you can without losing neutral.
Knees traveling forward: This is a squat pattern. Reset your stance, shift more weight into your heels, and push your hips back earlier.
Shoulders shooting up on the return: That means you’re pulling with your back, not driving with your glutes. Slow down the return phase and squeeze your glutes before anything else moves.
Lower back feels pinched: You are probably letting your ribs flare. Keep your ribs stacked over your pelvis and use a smaller range of motion until the pinch goes away.
Making the pattern stick
Before you ever pick up a bar, practice this sequence at home. Film one set from the side and watch it back. I’ve had beginners swear their back was straight until they saw a video and spotted the curve. Use your phone, not the gym mirror.
Once you can do 15 slow, clean reps with your arms hanging and no weight in your hands, you have earned the right to pick up a kettlebell or empty barbell.
Now that you have the pattern, check current prices on Amazon for a kettlebell if you want to progress. And share your experience in the comments – I’d like to know whether you felt this more in your hamstrings or glutes.
Common Hip Hinge Mistakes That Cause Back Pain and How to Fix Them
Most beginners don’t fail at the hip hinge because they’re weak. They fail because their body doesn’t know where it’s supposed to feel the movement. After coaching dozens of first-time lifters, I can tell you these five mistakes show up over and over. Each one has a simple fix, but you have to slow down, strip away the weight, and practice the pattern until it becomes automatic.
Before we get into the mistakes, grab a light dowel or a broomstick. If you don’t have one, a rolled-up poster board works. This tool will give you instant feedback. I tried it at home with a curtain rod once, and it worked perfectly. You’ll use it for several of the corrections below.
Mistake 1: Rounding Your Lower Back
This is the mistake I see most often. Someone tries to bend forward, and their spine curls like a scared cat. Usually they feel it in their lower back, and then that tender area complains for days.
Your spine should stay in a neutral position from your skull to your tailbone throughout the hinge. That doesn’t mean stiff like a board; it means no dramatic curling or arching. Your hips are the hinge, not your vertebrae.
The fix: Before you move, take a big breath into your belly and brace your abs like someone’s about to poke you in the stomach. Then stick your butt out as far as you can while keeping your chest proud. Imagine you’re showing off a giant belt buckle to someone standing in front of you. That visual cue works because your chest naturally lifts and your lower back stays flat.
If you still feel your back rounding, place one hand on your lower back and one on your belly. Move slowly. The second your spine starts to curl, stop and reset. Don’t push past that point.
Mistake 2: Bending Your Knees Too Much
The hip hinge is not a squat. When your knees bend a lot, your torso stays upright and your hips drop straight down. That’s a squat pattern, and it completely changes the muscles you’re working. The hinge should load your hamstrings and glutes, not your quads.
I once had a lifter tell me he couldn’t feel his hamstrings at all. I watched one rep and saw him dropping into a deep knee bend. His shins were tilted way forward. No wonder his thighs were doing all the work.
The fix: Keep your shins as vertical as possible. Imagine there’s a wall right in front of your toes, and you’re not allowed to touch it. As you hinge, think about sending your hips straight backward toward that wall behind you, not downward toward the floor. Your knees should stay almost locked, with just a slight bend. If you’re using a dowel, hold it against your chest and let it guide your torso back as a unit.
A useful wall-tap drill: stand about a foot away from a wall, facing away from it. Hinge back until your butt gently taps the wall. This stops you from dropping down. Your shins will stay vertical because they have to.
Mistake 3: Hyperextending at the Top
Once people nail the hinge, they often swing too far the other way. They stand all the way up and then lean back, arching their spine like they’re doing a standing backbend. This puts compression on the lumbar spine and can be just as painful as rounding.
I see this a lot when people try to show off how strong their lower back is. But the hip hinge isn’t about overusing your lower back. It’s about standing tall with your hips fully extended.
The fix: Stop the upward movement the moment your hips and shoulders form a straight vertical line. That’s your neutral standing position. Then hold for one second and squeeze your glutes lightly. Don’t lean back. Don’t push your hips forward past the line. If you have a mirror, check your side profile. You should look like a tall plank, not a banana.
Here’s an easy mental cue: imagine you’re pressing your hip bones up toward your ribcage. That gets you to full extension without over-arching.
Mistake 4: Letting the Bar or Weight Drift Away From Your Body
When you hold a dumbbell or a barbell, gravity pulls it forward. If you don’t actively fight that, the weight ends up a few inches in front of your thighs. That increases the leverage on your lower back and makes the hinge feel twice as hard.
I watched a new lifter struggle with a 30-pound dumbbell because it was hanging out near his knees. As soon as I told him to drag it up his thighs, the set got easier. It wasn’t about strength. It was about mechanics.
The fix: Keep the weight brushing against your thighs from start to finish. When you hinge down, the weight should slide along your thighs like it’s on a track. At the bottom, it will sit right below your knees. When you stand up, drag it back up your thighs. If there’s any space between the weight and your legs, you’ve drifted.
If you’re using just a dowel, you can practice the same principle. Press the dowel against your chest. It should stay in contact with your torso the entire movement. That contact gives you feedback and forces you to keep your chest up.
Mistake 5: Feeling It in Your Lower Back Instead of Your Hamstrings
This is the final check. After a few reps, ask yourself this question: Where is the tension? If your lower back is burning, you’ve lost neutral spine somewhere. If your hamstrings feel stretched and slightly loaded, you’re doing it right. The glutes should also feel engaged at the top.
I’ve had people tell me they felt no hamstring stretch at all. Their lower back was screaming, and they thought that was normal. It’s not. Your lower back is a stabilizer here, not the primary mover. The hamstrings and glutes own this pattern.
The fix: The moment you feel that tightness in your lower back, step away from the weight. Reset your posture: tall chest, braced abs, neutral spine. Then shorten your range of motion. Instead of hinging until your torso is parallel to the floor, stop when it’s at a 45-degree angle. Practice there until the hamstring stretch shows up. Once you feel it in the right place, gradually lower further over the course of several workouts.
Another tip: before you do a working set, do five empty-handed reps with a dowel. Focus entirely on where you feel the pull. Your nervous system needs that reminder, especially after sitting all day.
Putting the Fixes Together
Here’s a quick checklist to use every time you set up for a hip hinge:
- Stand with feet hip-width apart, toes forward.
- Brace your abs and lift your chest like you’re showing your belt buckle.
- Shift your hips straight back, keeping shins vertical.
- Let the weight glide along your thighs.
- Stop when your torso is near parallel (or earlier if you still feel your back).
- Stand up by squeezing glutes, stopping at a neutral standing line.
Read that list before you start your next set, even if you’ve done this movement a hundred times. I still do it with my own clients every single session. It takes two seconds and it catches little slips before they turn into bad habits.
The hip hinge is a skill, not just a lift. Expect to feel clumsy for the first few sessions. That’s normal. You’re retraining a pattern that years of sitting and slouching have buried. Give yourself a couple of weeks of consistent practice before you judge your progress.
When you’re ready to load the hinge, a light dumbbell or a kettlebell is plenty. You don’t need anything heavy. A simple dowel costs almost nothing and works wonders for form practice. Check current prices on Amazon for a wood dowel or a lightweight dumbbell to get started. And after you’ve tried these fixes, let me know in the comments which mistake was the hardest for you to shake. Your feedback helps me write better guides for other beginners.
Beginner Drills to Lock In the Hip Hinge and What to Do Next
You have the setup and the form cues. Now it’s time to make the hinge feel automatic before you add real load. These drills give you instant feedback, and that feedback matters more than perfect theory.
Wall Tap Drill
Stand about a foot away from a wall, facing away from it. Feet hip-width apart with your toes pointing forward. Push your hips back like you’re closing a car door with your glutes. Let your butt tap the wall lightly, then drive your feet into the floor to stand back up.
The wall acts as a physical stop. It shows you where the hinge should finish and forces you to repeat the same path every rep. If you don’t have a wall, a foam roller or a sturdy chair works the same way.
- Do 2 sets of 10 taps to start.
- Move slowly and keep your spine neutral.
- Pause for one second at the wall if you need to feel the position.
I’ve had clients practice this in socks on a smooth floor. The slight slide of the feet helps them feel that the hips travel back, not down.
Box Tap Hinge
Place a sturdy chair or bench behind you. Stand close enough so that when you hinge, your glutes just graze the seat. Push your hips back until you feel the tap, then stand up by squeezing your glutes. This is not a rest stop. You want a light touch, not a sit.
The most common fault here is turning the hinge into a squat. If you drop straight down and land on the chair, raise the seat height or narrow your stance. You want your hamstrings to load, not your quads.
Try 3 sets of 8 taps with a controlled tempo. If your lower back starts to round, make the movement smaller and check your neck position. Don’t force your eyes to stay on a spot at eye level as you hinge; that cue can make people look up as their torso leans forward, which pulls the head back and rounds the lower back. Instead, choose a spot on the floor about four feet in front of you and keep your neck neutral.
When to Add Weight
Before you pick up a barbell, get consistent with bodyweight hinges. The number I use is 15 controlled reps with a neutral spine and no breath-holding. If you can do 2 to 3 sets of 15 without your form breaking down, you’re ready for light resistance.
Hold a light dumbbell or kettlebell vertically against your chest. That keeps the load close to your center and stops your shoulders from rolling forward. Keep the same cues: hips back, chest proud, spine tall. Lower for a slow three seconds, pause one second, then stand up by squeezing your glutes.
At home, I use a 10-pound kettlebell for this. It’s enough to feel the posterior chain switch on without turning the drill into a strength workout. If the reps speed up or you start holding your breath, take the weight out and go back to bodyweight.
Band Hinge Practice
Set a light resistance band at knee height around a solid anchor point. Check the anchor before you start. A door anchor, a low rack hook, or a heavy piece of furniture that won’t move all work. Don’t loop the band around an office chair unless you want to chase it across the room.
Loop the band around your hips and walk forward until there’s tension. Hinge back against the band. The band pulls your hips backward and forces your glutes and hamstrings to fire. It teaches you to load the hinge pattern before you ever take a deadlift grip.
Start with a light band and do 2 sets of 10 as a warm-up. Focus on feeling your hamstrings load and your glutes contract at the top.
Lock It In Now
Here’s a simple way to use all of this: for the next three training sessions, start with one of these drills before your regular warm-up. Run through the cues, hit your target reps, and only then move on to your planned workout. Once the bodyweight movement feels solid, progress to the dumbbell or band version.
Bookmark this guide and revisit it whenever your form starts to feel sloppy. If you need a dowel, light dumbbells, or a resistance band for home practice, check current prices on Amazon. After you try these drills, leave a comment and tell me how they felt. I read every comment, and your questions help me plan future tutorials.
Medical & Editorial Review: This article was reviewed by Liam Smith, founder of Apexfito, for accuracy and safety. Content is for educational purposes and is not a substitute for professional medical advice. Consult your physician before starting any exercise or nutrition program.