Dead Hang Test: How Long Should You Be Able to Hang by Age?
Full disclosure: Some links in this article are affiliate links. We may earn a small commission at no extra cost to you if you make a purchase through them. Our recommendations are based on what real users report, not on commission size.
Why the Dead Hang Test Is Worth 60 Seconds of Your Time
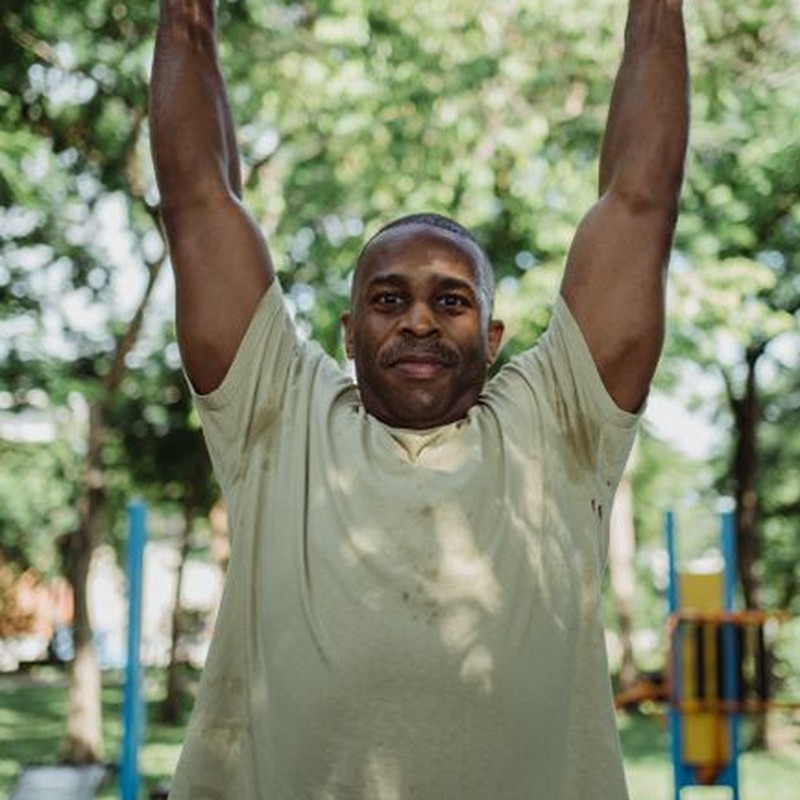
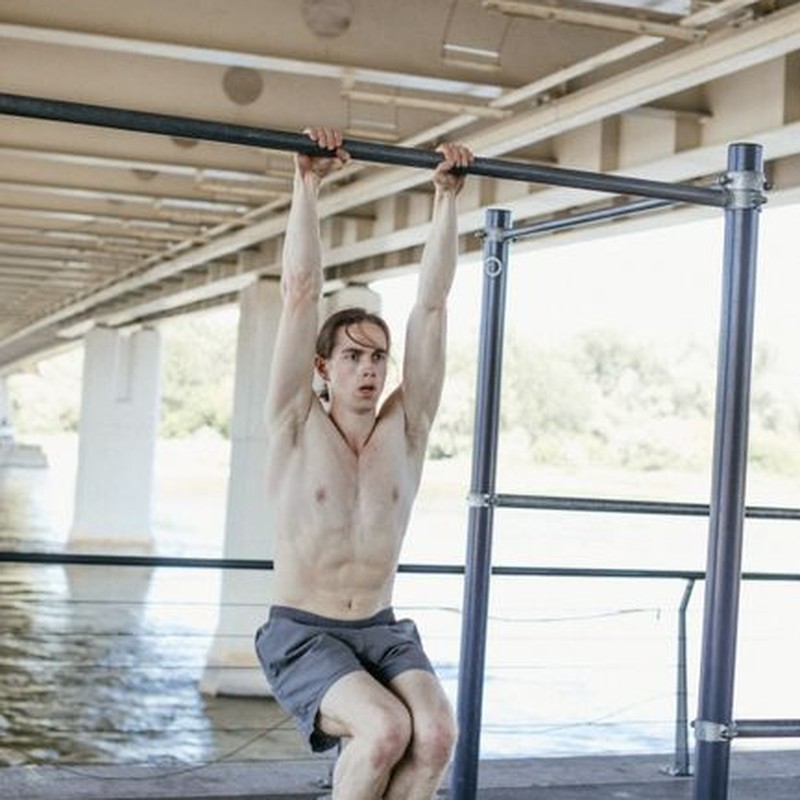
A dead hang is exactly what it sounds like: both hands on a bar, feet off the ground, no pulling, no swinging, no kipping. You hang until your grip gives out or you decide to drop. No rep count, no strategy beyond holding on.
Grip strength keeps turning up in clinical settings as a quick, cheap screen for overall strength and healthy aging. Not because forearms are magic, but because how hard you can squeeze tends to track with how well the rest of your body is holding up. A doctor who measures your grip gets a fast read on your trajectory without any expensive equipment.
That’s part of why a September 2026 health.com piece, “How Long Can You Hold a Dead Hang? Here’s How You Compare By Age,” moved so fast through group chats and gym floors. It laid out how long adults at different ages tend to hold a dead hang, and suddenly everyone with a pull-up bar wanted a number. Google Trends backs up the surge: over the past month, searches for “dead hang” have run above their 12-month average, with a recent 30-day average of 79.5 against 69.9 for the year.
The test costs nothing beyond a bar and a timer, and your phone handles the second part. It also doubles as a shoulder check. A passive hang exposes stiffness and asymmetry that a normal workout hides. If one side burns or your ribs shift, you’ll feel it right away. That’s free feedback, and it’s worth having.
Setup takes about ten seconds:
- Use a bar you can reach without jumping, or step up from a sturdy chair.
- Grip slightly wider than shoulder width, thumbs wrapped around if your mobility allows.
- Let your body hang long. Don’t tuck your pelvis or shrug your shoulders up toward your ears.
- Keep breathing. Step off or drop the moment your grip starts to slip.
- Don’t chase a personal record on day one.
I tested my own hang for a few weeks before writing this. The first session was humbling: left shoulder tight, right side noticeably stronger, grip quitting well before my ego wanted it to. That’s normal. The goal isn’t to be good at hanging on day one. It’s to get a baseline and then watch it move.
If you don’t own a pull-up bar yet, check current prices on Amazon. A basic doorway bar or a wall-mounted option is plenty for this. Once you’ve tested yourself, share your time and how it felt in the comments. I read every one.
How to Set Up and Perform the Dead Hang Test, Step by Step
Your dead hang number only means something if you can repeat it. A sloppy setup can hand you five free seconds or steal five from you, and then your score means nothing next to age-based benchmarks like the ones in Health.com’s September 2026 dead hang comparison. I ran this test on a doorway bar and on a gym rig on the same afternoon. The gap between a rushed jump-up and a controlled settle was three seconds on my first attempt, and nothing else changed. Setup was the only variable.
Here is the sequence I use now, and the one I walk beginners through at the gym.
- Warm up first. Ten arm circles each direction, a handful of band pull-aparts, then 30 seconds of easy hanging with your feet on the floor so you’re only taking a little weight. Cold hangs feel sticky and short. My first attempt is consistently better after the warm-up, usually by two or three seconds.
- Get the bar high enough. Your feet need to be completely off the floor at the bottom of the hang. If the bar is low, bend your knees behind you instead of letting your toes tap down. Toe taps give your shoulders a micro-rest and inflate your time. I’ve watched people add 10 seconds just by grazing the floor with a big toe.
- Use an overhand grip, roughly shoulder-width. Wrap your thumbs around the bar. A thumbless grip feels easier at the start, but it slips, and slipping mid-test with tired hands is how shoulders get tweaked. Slightly wider than shoulder-width is fine. Go so wide that your shoulders feel pinched and you’re testing your ego, not your grip.
- Get on the bar without burning energy. Step up from a box or bench when you have one. If you have to jump, jump softly. Once you’re up there, hang passively for a two-count before you start the clock. Starting the timer mid-jump adds a second or two that isn’t real.
- Find the active hang position. Start passive, just hanging, then pull your shoulder blades down and slightly back so your ears are clear of your shoulders. Ribs stay down, spine stays long, no arching and no rounding. That’s an active hang, and it’s the position most coaches recommend for testing because it protects the shoulder joint and gives you the same starting point every time.
- Start the clock and breathe. Use a timer you can see or a partner with a stopwatch. Breathe normally. Holding your breath spikes your heart rate and makes you let go sooner.
- Stop at the first sign of breakdown. The moment your hands start to open or your shoulders creep back up toward your ears, stop the clock. Don’t ride it out with a rounded spine to pad the number. A shrugged, rounded hang isn’t a strength test, and it’s a shoulder injury waiting to happen. Your score is the time from start to that first breakdown, not the time until you drop off the bar.
- Rest two to three minutes, then go again. Shake out your arms, roll your shoulders, take a few easy breaths. Your best of two is your score. If attempt two falls off a cliff, you either didn’t rest long enough or you emptied the tank on attempt one.
One more thing separates a useful number from a random one: test under the same conditions every time. Same bar, same grip, same time of day if you can manage it. Do that, and the age brackets you’ll see later actually mean something for you instead of being a party trick.
If you don’t own a bar yet, check current prices on Amazon before you buy. A basic doorway bar runs cheap, takes five minutes to install, and gives you a repeatable test at home. Once you have your number, drop it in the comments. I want to see how our readers stack up against those age brackets.
What Your Hang Time Says About Your Grip, Shoulders, and Age
Your first dead hang number is data, not a grade. The age breakdown that health.com published on September 19, 2026 is there so you can see where you land relative to a general population, not so you can hand yourself a pass or a fail. Read it once, write your time down, and move on.
Where do most people actually land? Somewhere in the 20-to-60-second range on a first honest attempt. If you’re new to hanging, under 20 seconds is the normal starting line, not a red flag. I’ve watched guys pull 405 off the floor and quit a bar at 28 seconds, because grip endurance is its own quality. Nothing about a heavy deadlift trains your forearms to hold on for a full minute.
If your number sits well below the band for your age, the likeliest explanation is simple: you’ve never trained this. That’s a grip endurance gap, and it closes faster than almost anything else in the gym. Six weeks of consistent hanging moves the needle in a way that six weeks of bench pressing never will.
What the charts can’t see is your bodyweight. A 220-pound lifter hanging 25 seconds is holding more load than a 140-pound lifter holding 40. Hand size plays in too, since bigger hands wrap more bar, and arm length changes the leverage at the shoulder. None of that reflects how fit you are.
Your setup matters as well. A full overhand grip with the thumb wrapped is harder than a thumbless grip. Chalk buys you seconds. So does a bar with a little texture instead of a glossy chrome one. If you tested on a fat bar at the gym last time and a standard bar at home today, you changed the test.
So the only fair comparison is you versus your last test. Five extra seconds over six weeks tells you your forearms, lats, and shoulders are adapting. That’s the signal worth chasing.
How to use your number without overthinking it
- Test the same way every time. Same bar, same overhand grip, same rest before the attempt. I test after a rest day, never after a heavy pulling session.
- Log the details. Date, bodyweight, how your hands and shoulders felt. A notes app is plenty. After a month you’ll spot patterns you’d otherwise miss.
- Set a process goal. “Add three seconds this month” beats “hang for 90 seconds.”
- Listen to your shoulders. A dead hang should feel like traction, not pinching. Sharp pain means stop, and you build up with active hangs and scapular pulls first.
Age does shift the baseline. Grip strength tends to decline as the decades stack up, and the health.com numbers reflect that general trend. Training history can override it, though. I know 60-year-olds who out-hang 25-year-olds because they’ve been climbing or doing pull-ups since before those 25-year-olds were born.
Record your number today and leave the judgment out of it. Grab a bar, give it one clean attempt, and post your first honest hang time in the comments. If you don’t have a bar at home yet, you can check current prices on Amazon before you commit. I’m curious where everyone starts.
Common Dead Hang Mistakes and How to Fix Them
The dead hang looks like the simplest thing in the gym. Grab a bar, hang on, don’t let go. But after watching a lot of beginners run this test, I can tell you the clock is usually stopped by setup, not by hand strength. Health.com’s September 2026 piece on age-based dead hang benchmarks makes a similar point: how you grab and hold the bar changes your number.
These are the seven errors I see most often, with a fix for each one.
1. Shrugging your shoulders up to your ears
This is the default for most first-timers. You grab the bar, your shoulders ride up toward your ears, and you just hang there. That parked shrug puts load on the joint capsule instead of the muscles that should be doing the work. Ten seconds in, your neck starts complaining.
How to fix it: Before you commit to the hold, actively pull your shoulder blades down and back. I tell beginners to imagine putting their shoulder blades in their back pockets. A quick way to find that position: do two or three scapular pull-downs. Hang with straight arms, then pull your body up an inch or two without bending your elbows, and feel your lats switch on. Step off, reset your grip, and start the test from that packed position. Most people add time immediately.
2. Holding your breath
Beginners do this without noticing. They tense everything, stop breathing, and twenty seconds later their face is red and their grip is fading faster than it should. Breath-holding spikes full-body tension, and tension works against a long, relaxed hang.
How to fix it: Breathe slowly from the first second. Inhale through your nose as you set your grip, then exhale through the middle of the hang. One breath every three or four seconds is a solid rhythm. If you catch yourself holding it, let go, shake out your arms, and start again.
3. Sneaking into a thumbless grip
A thumbless grip feels fine for about ten seconds. Then your hands rotate, your palms slip, and you slide off before your grip actually fails. It’s a common shortcut because wrapping the thumb feels awkward at first.
How to fix it: Wrap your thumbs around the bar. For a max test, a full grip is non-negotiable. Set the bar deep in your palm at the base of your fingers, not up near your fingertips. If the bar feels too thick to get your thumb around, find a thinner bar or wrap a tightly secured towel around the one you have. You want your hands quitting when your muscles quit, not when your thumb slips.
4. Testing cold
First thing in the morning is the worst time to test. Shoulders are stiff, forearms are cold, and your connective tissue hasn’t caught up with your brain yet. I tried a cold hang right after waking up and lost several seconds compared to an afternoon attempt. Same body, same bar, different preparation.
How to fix it: Two minutes of prep adds real seconds to your result. Arm circles, a few band pull-aparts if you have a band handy, and wrist flexor and extensor stretches. Then do two easy hangs of five to ten seconds with a full grip. That’s the whole warm-up. You’re not trying to fatigue anything, just wake the tissues up.
5. Fighting for one more second after the grip fails
Once your hands start to open, you’re done. Hanging on with your fingertips for a few extra seconds doesn’t give you a better training effect. It strains tendons and sets you up for an ugly landing when you finally drop.
How to fix it: End the set the moment your hands begin to open or your shoulders creep back up toward your ears. Step down if you can, or drop and land with soft knees. Rest two to three minutes between max attempts so your grip has time to come back. A clean ten-second hang beats a sloppy fifteen-second struggle every time.
6. Slippery hands in a humid gym
Summer gyms are brutal. Sweat, humidity, and a shiny chrome bar can cost you five seconds before your muscles even get tired. I’ve watched people blame their grip when the real problem was a slick bar.
How to fix it: Chalk, a towel, or a quick wipe makes a bigger difference than most people expect. If your gym doesn’t allow chalk, use liquid chalk or keep a small towel in your bag. Wipe the bar and your hands before every attempt. Dry hands grip better. That’s it.
7. Testing every single day
Grip tissue recovers slowly. Tendons and connective tissue don’t bounce back the way your biceps do. Daily max attempts leave your hands cooked, your numbers drop, and then you assume you’re getting weaker when you’re really just under-recovered.
How to fix it: Test twice a week at most. If you want more grip work, do submaximal hangs on the other days, something like three sets of ten seconds at about 70 percent effort. Keep those separate from max testing. That way, when you do test, you get a real number instead of a tired one.
Clean up those seven habits and your next test will be more accurate and a lot easier on your shoulders. The number matters less than the trend, so write it down and compare over weeks, not days. If you need chalk, a towel, or a bar for testing at home, check current prices on Amazon. And if you’ve made one of these mistakes, tell me about it in the comments. I’ve made most of them myself.
A Six-Week Plan to Hang Longer, Plus Grip Work That Sticks
Benchmarks only matter if you can move the number. Six weeks of steady hanging is enough for most beginners to add real seconds, and short enough that you will not burn out on it. This is the progression I would hand to someone who tested at 12 seconds and wants to be closer to 25 by the end of next month.
The age brackets health.com published this month are a reference point, not a verdict. They tell you where you sit today. What follows is how you climb.
Weeks 1 and 2: Build the Base
Three sessions a week, with at least one rest day between them. Each session is three sets of 15 to 20 second hangs, with 60 seconds of rest between sets. That is full recovery, not a quick shakeout. The rest is part of the workout.
Every rep stays in the active shoulder position: shoulders pulled slightly down away from your ears, ribs stacked, legs quiet. If your shoulders creep up toward your ears in the last five seconds, the set is over. Cut it there and log what you actually held. A clean 15 beats a sloppy 25 at this stage.
The first time I ran this with a friend who could barely hold 14 seconds, the thing that moved his number was not extra sets. It was cutting every rep the moment his shoulders shrugged. Two weeks later he was holding 22, and nothing else about his training had changed.
Weeks 3 and 4: Add a Little
Pick one change: a fourth set, or five extra seconds on each of the three sets. Beginners usually do better adding the set, because longer single hangs are where form falls apart first. Do not stack both changes in the same week.
If your shoulders feel cranky, switch to a mixed grip, with one hand facing each way. It changes the angle of pull on each shoulder and often quiets that pinchy feeling in the front of the joint without costing you much time on the bar.
Weeks 5 and 6: Hold Steady, Then Retest
Keep volume steady at whatever you built in week four. The job here is not more work, it is showing up three times a week while your tissue adapts. At the end of week six, retest using the exact same protocol you used on day one: same bar, same grip, same time of day if you can manage it. Change any of those variables and your number moves for reasons that have nothing to do with your grip.
Support Work That Transfers
- Farmer’s carries with the heaviest dumbbells you can hold for 30 to 40 seconds. Two or three trips at the end of a session.
- Towel hangs. Drape a towel over the bar and grip the fabric. Brutal on the fingers, and close to the demands of hauling groceries or a suitcase up a flight of stairs.
- Scapular pull-ups. Hang, then pull your shoulder blades down and together without bending your elbows. Five to eight slow reps teaches the exact shoulder position you are trying to hold.
- Wrist curls at the end of a session, two sets of 15. Light weight, full range, no rush.
Recovery Rules
Grip tissue is slow to bounce back. If your forearms still feel fried 48 hours after a grip session, cut a set from the next one. More is not better here. Elbow tendon irritation tends to show up about two weeks after you start ignoring the early warning signs, and it can sideline you for a month.
What You Actually Need
A pull-up bar is the only piece of equipment this plan requires, and a doorway model works fine for beginners. No drilling, no permanent install, and you can take it down when guests come over. I used one for two years before upgrading, and it handled everything in this plan without flexing or slipping.
Before you buy, check current prices on Amazon, since doorway and wall-mounted versions swing a lot in price depending on the brand and the time of year.
Run your test, write the number down somewhere you will actually see it, and come back in six weeks. Then drop your age and your hang time in the comments so other readers can see where they stack up.