Kettlebell Workout for Beginners: 5 Full-Body Exercises + Simple Training Plan
Full disclosure: Some links in this article are affiliate links. We may earn a small commission at no extra cost to you if you make a purchase through them. Our recommendations are based on what real users report, not on commission size.
Getting Started: Choosing Your Kettlebell and Staying Safe
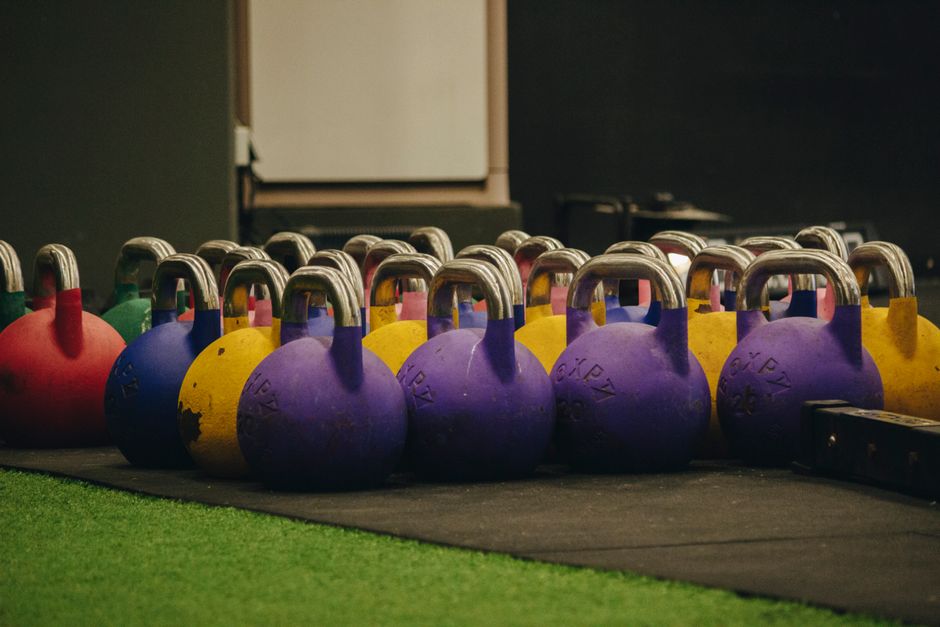
Kettlebells are one of the most efficient tools for building strength, conditioning, and mobility. But if you’re new to them, the first step isn’t swinging — it’s picking the right weight and learning how to move safely. I’ve seen too many beginners grab a bell that’s too heavy because they thought heavier equaled better. Spoiler: it doesn’t. Here’s how to choose your first kettlebell and set yourself up for success without injury.
Picking Your First Kettlebell: Weight Matters
Most gyms stock kettlebells in 4 kg increments, but for home use I’d recommend starting with these ranges:
- Women: 8–12 kg (18–26 lbs)
- Men: 12–16 kg (26–35 lbs)
If you’re already active and have decent strength, go toward the top of that range. If you’re completely new to weight training or returning after a break, start at the bottom. You can always buy a heavier bell later — and you will, once you get hooked. I started with a 12 kg and within three months I needed a 16 kg. But that 12 kg taught me every ounce of technique first.
One caveat: avoid those neon plastic-coated kettlebells. They’re often cheap, unbalanced, and the coating makes them tricky to grip when your palms sweat. A cast-iron or competition-style kettlebell with a smooth handle will serve you better. If you’re shopping on Amazon, expect to pay $50–80 for a solid 12 kg cast-iron bell — it’s a one-time investment that will last for years.
Master the Hip Hinge Before You Swing
The hip hinge is the foundation of almost every kettlebell exercise. It’s not a squat — your knees stay soft, your back stays neutral, and you push your hips back like you’re closing a car door with your butt. Practice this without the bell first: stand with feet hip-width apart, soften your knees, and push your hips behind you while keeping your spine long. Your torso should tilt forward about 45 degrees. Hold that position for a few seconds, then squeeze your glutes to return to standing. Do 10–15 reps until it feels natural.
I used to coach clients by having them touch a wall with their butt as they hinged. That simple cue often fixed the movement in seconds.
Keep the Bell Close to Your Body
During swings and deadlifts, the kettlebell should travel close to your torso. The further the weight gets from your center of mass, the more stress on your lower back. Think of the chain as a lever — the longer you let it go, the harder your spine has to work. When you swing, the bell should stay near your hips and come up to about chest height. If it flies above your forehead, either your core or your hips aren’t controlling it.
Footwear Matters More Than You Think
Kettlebells demand stability from the ground up. Running shoes with thick, squishy soles make you feel like you’re balancing on pillows. I’ve done enough workouts in old Nikes to know — it’s uncomfortable and safer to go barefoot or wear flat-soled shoes like Converse, Vans, or minimalist trainers. If you’re training at home, kicking off your socks and going barefoot gives you the best grip and feedback. Just make sure your floor isn’t slippery.
Warm Up for at Least Five Minutes
Kettlebells aren’t something you jump into cold. Spend at least five minutes doing light cardio (jumping jacks, high knees, or a quick jog in place), followed by dynamic stretches that open up your hips and shoulders. A few hip circles, cat-cow stretches, and arm circles will do. Then do 10 hip hinges without the bell and 10 bodyweight squats. Your body will thank you when you start swinging.
Final Safety Tip: Listen to Your Grip
Your grip will fatigue before your legs or lungs do. If your fingers start to open involuntarily during a swing, set the bell down. Pushing through a fatigued grip can lead to the bell slipping and — worst case — hitting you or breaking something. Take a 30-second rest and shake out your hands. Over time your grip will adapt.
Choosing the right kettlebell and learning these safety fundamentals will make your first workout feel controlled and effective. Once you’ve got your bell, you’re ready to move on to the actual exercises. And if you’re still shopping, check current prices on Amazon to see what fits your budget — a decent cast-iron bell is a worthwhile investment for years of use.
The Warm-Up: Preparing Your Body for Kettlebell Work
I remember when I first picked up a kettlebell. I was eager to swing and press, so I skipped the warm-up. Big mistake. After two weeks, my lower back was tight and my hips felt locked up. I learned the hard way that five minutes of prep can save you weeks of recovery. The warm-up isn’t a box to check—it’s the foundation for a safe, effective workout.
For this warm-up, we’re focusing on dynamic movements that increase your heart rate, open up your hips, shoulders, and spine, and wake up the muscles you’ll use in the kettlebell workout. No static stretching here. You want to activate, not relax. Static stretching before strength work can actually reduce your power output and increase injury risk. Save that for after your session or on recovery days.
How to Warm Up for a Kettlebell Workout
This warm-up takes about five minutes. You don’t need any equipment except a light kettlebell for the final exercise. If you’re working out at home in a small space, these moves require only enough room to extend your arms and legs fully. I’ve done this in a 6×6 foot space and it works fine.
1. Hip Circles and Arm Circles (1.5 minutes)
Start standing with feet shoulder-width apart. Place your hands on your hips and slowly make large circles with your hips—ten clockwise, then ten counterclockwise. This lubricates the hip joints and gets blood flowing to the glutes and lower back. Follow that with arm circles: extend your arms out to the sides and make forward circles, starting small and gradually increasing to full circles. Do ten forward, then ten backward. Keep your shoulders down and back, not hunched up by your ears. I like to imagine I’m drawing big circles on the wall with my hands.
2. Cat-Cow (45 seconds)
Drop to all fours with wrists under shoulders and knees under hips. Inhale, drop your belly toward the floor, lift your chin and tailbone—that’s cow pose. Exhale, round your spine like a Halloween cat, tucking your chin to your chest. Move slowly through each position for about five breaths total. This wakes up your entire spine and helps with the hinging motion you’ll use in kettlebell deadlifts and swings. If your wrists bother you, make fists and rest on your knuckles instead of flat palms.
3. Bodyweight Squats (45 seconds)
Stand with feet slightly wider than hip-width, toes turned out slightly. Raise your arms straight out in front for balance. Now squat like you’re sitting back into a chair: push your hips back, bend your knees, and lower until your thighs are at least parallel to the floor (or as deep as you can comfortably go). Keep your chest up and weight in your heels. Do ten to fifteen slow, controlled reps. This gets your quads, glutes, and core ready for the kettlebell movements. If you can’t go deep, that’s fine—work on depth over time. Focus on keeping your torso upright and your lower back neutral.
4. Glute Bridges (45 seconds)
Lie on your back with knees bent, feet flat on the floor hip-width apart. Arms by your sides, palms down. Press through your heels and lift your hips until your body forms a straight line from shoulders to knees. Squeeze your glutes at the top, then lower slowly. Do ten reps. This wakes up your posterior chain—glutes and hamstrings—which are crucial for the hinge pattern in kettlebell exercises. I always feel more stable in my deadlifts after glute bridges.
5. Slow Kettlebell Deadlifts (1.5 minutes)
Grab the lightest kettlebell you have. I recommend starting with 8 kg (about 18 lbs) for women and 12 kg (about 26 lbs) for men if you’re new to kettlebells. Look for a cast iron kettlebell with a wide handle—it’s durable and gives you a consistent grip. You can check current prices on Amazon to find a good starter bell. Stand with feet hip-width apart, kettlebell on the floor in front of you. Hinge at your hips, keeping a flat back, and grip the handle with both hands. Brace your core, then drive through your heels to stand up, keeping the kettlebell close to your body. At the top, squeeze your glutes. Then hinge back down, pushing your hips back, and control the weight down to the floor. Do five to ten slow, controlled reps. This reinforces the hip hinge pattern without the momentum of a swing. Go slow—three seconds down, two seconds up. If you feel any strain in your lower back, check your form: your spine should be straight, not rounded, and your hips should move back, not your knees forward.
After this warm-up, you’re ready for the main kettlebell exercises. Your heart rate should be up, your joints should feel mobile, and your body should feel primed. Trust me, taking those five minutes now will make your workout safer and stronger.
The 5 Core Exercises: Full-Body Kettlebell Moves
These five exercises—squat, deadlift, row, swing, and press—cover every major movement pattern. Master them in the right order, and you’ll build strength, stability, and cardio without spending an hour in the gym. Beginners often try to rush through, but spending a few sessions just grooving each move pays off fast. I’ve seen it time and again: people who take the first week to practice only the hinge and squat end up progressing much faster on swings and cleans. Let me walk you through each one with the form cues that have helped my own clients the most.
1. Goblet Squat
Setup: Hold the kettlebell by the horns—the handle sides—with both hands. Plant your feet slightly wider than hip-width, toes turned out about 15 degrees. Keep the bell pressed against your chest; this forces your torso upright.
Movement: Take a big breath and brace your core. Push your hips back and bend your knees as if sitting into a low chair. Lower until your thighs are at least parallel to the floor—or lower if your mobility allows. Pause, then drive through your heels to stand. Keep the bell glued to your chest throughout.
Common mistakes: Letting the bell drift away from your chest, which pulls you forward. Also, heels lifting off the ground. If you can’t hit parallel with good form, just go as low as you can while keeping your chest up.
Why it works: This squat variation is safer than a barbell back squat for beginners because the weight is in front, making it harder to round your lower back. It also builds leg and core strength you’ll use in the other moves.
2. Deadlift
Setup: Place the kettlebell between your feet, about mid-foot. Hinge at your hips—push your butt back—keeping your spine neutral. Reach down and grab the handle with both hands. Your shins should be vertical, shoulders directly over the kettlebell.
Movement: Take a deep breath and brace. Drive your hips forward by squeezing your glutes and pressing through your heels. Keep your arms straight—they’re just ropes. Stand tall, hips fully extended, then reverse the motion by pushing your hips back and lowering the bell to the floor with control.
Common mistakes: Rounding your lower back at the bottom. If you feel a stretch in your hamstrings but your back is rounding, start with the kettlebell elevated on a couple of yoga blocks. Also, yanking the weight up with your arms—use your hips.
Why it works: The deadlift teaches hip hinging, the foundation for every explosive move in kettlebell training. Most people have tight hamstrings, so go slow and don’t force depth.
Note for the plan ahead: The deadlift is your hinge teacher. If the Russian swing feels too aggressive at first, substitute the deadlift for swings in your workout. Or use it as a warm-up before swings—two sets of 5 reps with a light bell will groove the movement without draining you. Either way, this exercise stays in your toolkit.
3. Single-Arm Row
Setup: Place one knee and the same-side hand on a bench, step, or sturdy chair. Your back should be flat like a tabletop. Hold the kettlebell in the opposite hand with an overhand grip. Let that arm hang straight down, palm facing in.
Movement: Squeeze your shoulder blade and pull the kettlebell toward your hip, keeping your elbow tucked close to your body. Squeeze at the top for a second. Lower with control. Don’t twist your torso—your hips and shoulders stay square.
Common mistakes: Letting your back round or your hips rotate to make the pull easier. Start with a lighter bell if you can’t maintain a stable torso. Also, jerking the weight up—this move is about control, not momentum.
Why it works: Rows balance out all the pushing and swinging you’ll do. They build back strength that improves posture and protects your shoulders.
4. Russian Swing
Setup: Stand with feet slightly wider than hip-width, kettlebell a foot in front of you. Hinge at the hips, push your butt back, and reach for the bell with both hands. Keep your back flat and your arms long.
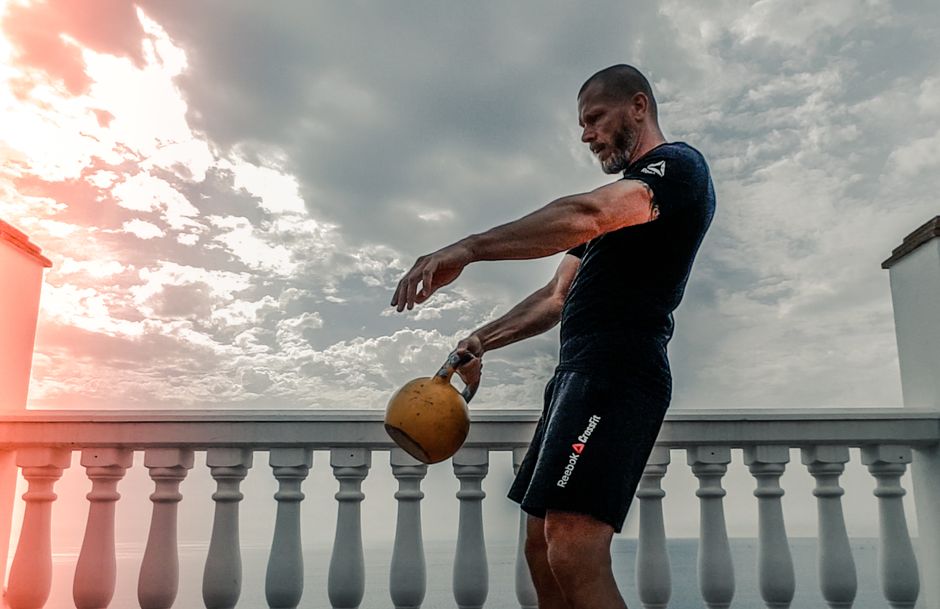
Movement: Hike the bell between your legs like you’re snapping a football. Without pausing, explosively drive your hips forward and squeeze your glutes to swing the bell up to chest height. Your arms just guide the bell—the power comes from your hips. Let the bell float back down as you hinge again.
Common mistakes: Using your arms and shoulders to lift the bell—your arms should stay relaxed. Also, letting the bell go above shoulder height; for beginners, chest height is the safe limit. Don’t squat the swing—it’s a hinge, not a squat.
Why it works: The Russian swing is the king of kettlebell exercises for conditioning and posterior chain strength. It’s also the move most beginners get wrong, so take your time. I’ve had clients who couldn’t swing without pain until they spent a week on deadlifts first—then it clicked. If that sounds like you, swap in deadlifts until you feel the hip snap.
5. Press
Setup: From standing, clean the kettlebell to your shoulder: hike it between your legs, then snap your hips to bring it up, guiding it to rest on the back of your forearm with your elbow tucked into your ribs. Keep your wrist straight. Your free hand can be out for balance or at your side.
Movement: Brace your core and squeeze your glutes. Press the kettlebell straight overhead, keeping your bicep close to your ear at the top. Don’t lean back or tilt to the side. Pause, then lower it back to your shoulder with control. Complete all reps on one side before switching.
Common mistakes: Leaning away from the weighted side—you’re compensating for a weak shoulder or poor core stability. Start with a very light bell. Also, flaring your elbow out to the side; keep it pointed forward.
Why it works: The overhead press builds shoulder strength and stability. It also teaches you to brace your entire body under a load. Many beginners find this move humbling, so don’t be afraid to use a 10-pound bell if you need to.
Now that you know the moves, you’ll need a quality kettlebell to practice. I recommend checking current prices on Amazon to find a good starter bell—cast iron with a flat base is best for these exercises. Start with the lightest weight that lets you do each move with perfect form, and increase only when you can complete three sets of eight reps without any compensation. This sequence will give you a full-body workout in under 20 minutes. Stick with it, and you’ll be surprised how quickly you progress.
The Beginner Workout Plan: Sets, Reps, and Frequency

When I first picked up a kettlebell, I tried to train every day. That lasted about four sessions before my lower back yelled at me. The mistake was obvious: I wasn’t giving my muscles and nervous system time to adapt. Beginners need recovery more than volume. So here’s what actually works.
Weekly Schedule: Start Small
For the first two weeks, do two workouts per week on non-consecutive days. Monday and Thursday works well for most people. That gives your body three days to recover between sessions. If you’re coming from a completely sedentary lifestyle, even two days might feel like a lot at first. That’s okay. Stick with it, and your work capacity will build faster than you expect.
Workout Structure: The Circuit
This isn’t a straight-set plan where you grind out three sets of one exercise before moving to the next. Instead, you’ll run through all five exercises in a circuit. Here’s how it works:
- Perform each exercise for 30 seconds of controlled work.
- Rest exactly 60 seconds after each exercise.
- Move to the next exercise in the order below.
- After completing all five exercises, you’ve finished one round. Rest 2 minutes before starting the next round.
- Complete 3 total rounds.
The work-to-rest ratio for each exercise is 1:2 (30 seconds work, 60 seconds rest). That’s enough downtime to reset your grip, check your stance, and take a couple of deep breaths. I’ve tried shorter rests with beginners, and they ended up chasing the clock instead of focusing on technique. With 60 seconds of rest, you can reset and hit the next interval with good form.
The Five Exercises in Order
Do these in exactly this order for every round. The sequence is designed to alternate big pushing and pulling patterns so one muscle group rests while another works.
- Kettlebell Swing – Explosive hinge that fires up your glutes, hamstrings, and lower back. This is your main dynamic move.
- Kettlebell Deadlift – A slow, controlled hinge from the floor. This teaches you the proper hip hinge pattern for swings and protects your lower back. Don’t skip it.
- Goblet Squat – Deep squat holding the kettlebell against your chest. Builds leg strength and hip mobility.
- Single-Arm Overhead Press – Push the kettlebell overhead, one arm at a time. Keep the core braced so you don’t arch your back.
- Two-Arm Bent-Over Row – Hinge forward and pull the kettlebell up to your lower ribs with both hands. This balances all the pushing from the press.
Start with swings and deadlifts first—they warm up your hips and hamstrings. Then goblet squats build leg endurance. Then presses and rows finish off your upper body while your legs recover.
Sample First Round Breakdown
Here’s what a typical round looks like on the clock:
- 0:00–0:30 — Swings. 0:30–1:30 — Rest.
- 1:30–2:00 — Deadlifts. 2:00–3:00 — Rest.
- 3:00–3:30 — Goblet squats. 3:30–4:30 — Rest.
- 4:30–5:00 — Press (right arm). 5:00–6:00 — Rest.
- 6:00–6:30 — Press (left arm). 6:30–7:30 — Rest.
- 7:30–8:00 — Rows. 8:00–9:00 — Rest.
That’s one round in about 9 minutes. Then rest 2 minutes and repeat two more times. Total workout time: roughly 30–35 minutes including warm-up. You can use a timer app on your phone—most have interval settings for work and rest.
Progression: Adding a Third Session
After two weeks of consistent work, if your form feels solid and you’re not waking up with unusual soreness, add a third weekly session. I like Wednesday, so your week looks like Monday, Wednesday, Friday. Keep the same work-to-rest ratio (30–60). Do not increase the work duration or the number of rounds yet. Just add one extra day per week. If you feel wiped out after that third session for two weeks in a row, drop back to two sessions and give yourself another week before trying again. There’s no prize for rushing.
Quality Over Speed
Your goal in these early weeks is not to move fast. It’s to move well. Slow, controlled reps build neural pathways. Fast, sloppy reps teach your body bad habits that take months to unlearn. I’ve seen plenty of beginners try to crank out as many swings as possible in 30 seconds. Their backs round, their shoulders hunch, and they end up with hip flexor pain. Instead, aim for 8–12 solid swings in that 30-second window. For deadlifts, 6–8 reps is plenty—focus on the hinge. For presses and rows, 6–8 reps per set is enough. For goblet squats, 10–12. Watch your form in a mirror or record yourself on your phone if you can.
When to Add Weight or Increase Work Time
You might be tempted to jump to a heavier kettlebell after a week. Don’t. Stick with the same weight for at least four to six weeks. Progress by mastering the movement pattern first. Once you can do every rep with a dead stop at the bottom of the swing, a full depth in the squat, and a locked-out press without wobbling, then consider moving up by 4–8 lbs (roughly 2–4 kg). Another option: increase work time from 30 seconds to 40 seconds while keeping the same rest. But make that change only after you’ve been consistent for three weeks with solid form.
Equipment Reminder
If you don’t already own a kettlebell, you’ll need one for this plan. I use a 35‑pounder for men starting out and a 25‑pounder for women. Go lighter if you’re unsure—you can always buy a heavier one later. The deadlift and goblet squat especially reward a weight you can control at full depth. Check current prices on Amazon to see what fits your budget. Their cast iron kettlebells with flat bottoms won’t roll away and will last for years.
Stick with this circuit for three to four weeks. Your strength will improve, your endurance will climb, and you’ll start feeling comfortable with the movements. That’s when the real fun begins.
Recovery and Progression: Building on Your Foundation
You’ve made it to the final section of this plan. By now, you should be feeling more confident swinging and squatting with that kettlebell—maybe even a little addicted to the clang of iron. That’s great. But the fastest way to lose your momentum is to ignore the two pillars that turn a beginner into a consistent athlete: recovery and smart progression. In this section, we’ll talk about how to rest effectively, when and how to push harder, and how to know it’s time to buy a second, heavier bell.
Why Recovery Is Non‑Negotiable
When you swing a kettlebell, you load your hips, legs, core, back, and shoulders under tension. That’s a lot of stress on your nervous system and muscle fibers. Contrary to what many beginners think, you don’t get stronger during the workout—you get stronger in the 48 hours afterward, when your body repairs the micro‑tears and rebuilds tissue a little stronger than before.
I remember when I first started, I was so pumped that I did kettlebell swings every single day for a week. By day five, my lower back was fried and my hips felt tight. A coach told me: “Take at least two full days off between sessions.” I ignored him for another week, then finally listened. The difference was night and day. Suddenly, I felt explosive again on my work days, and the nagging tightness vanished. Your central nervous system needs that same recovery window—not just your muscles.
For this plan, stick to a schedule of 2–3 sessions per week, with at least 48 hours between them. For example, Monday, Wednesday, Friday works perfectly. If you’re feeling unusually sore, take an extra day. It’s not a failure—it’s listening to your body.
How to Progress Without Hurting Yourself
Once you can complete the five exercises in this workout with clean form and without gasping for air after every set, you’re ready to bump up the challenge. The rule of thumb: increase reps or time before you increase weight. And do it in small steps.
Start with 30 seconds of work per exercise. Once you can hit 30 seconds with good form for all five rounds, increase to 35 seconds. Then 40. Go up in five‑second increments, not big jumps. That might sound slow, but it’s how you build resilience and avoid compensations that lead to injury.
When you can finish 45 seconds of work per exercise with a consistent tempo (no hurried or sloppy reps), and you feel you could do more, then it’s time to think about a heavier kettlebell. As a general guide, add 2–4 kg (4–8 lbs) for the same movement. If you started with a 12 kg (26 lb) kettlebell, the next step is a 14 or 16 kg (31–35 lb) one.
But be careful: a heavier kettlebell changes the leverage and sometimes reveals form flaws you didn’t know you had. The first few sessions with a new weight, drop back to 30 seconds of work and focus entirely on technique. Don’t rush. I’ve seen people buy a 20 kg bell and then hunch their backs trying to swing it—disaster waiting to happen.
Keep a Workout Log (It’s Not Just for Nerds)
I used to think logging workouts was overkill. Then I forgot what weight I used the previous week and ended up doing the same easy workout three times in a row. Since then, I keep a simple notebook (or a notes app on my phone) with three columns: weight used, reps/time per exercise, and a one‑line note about how I felt. For example:
- 12 kg, 35 sec work, felt tight in right shoulder during cleans
- 12 kg, 40 sec work, felt strong and controlled
- First session with 14 kg, 30 sec work, back was good but grip gave out on rows
This is gold. Over time, you’ll see patterns: maybe you always feel worse on Monday mornings, or your form breaks down after the third round. That data helps you tweak your plan better than any generic advice.
Sharp Pain vs. Muscle Soreness
Here’s a hard line: if you feel a sharp, stabbing, or sudden pain during any exercise—especially in a joint, like your shoulder, hip, or lower back—stop immediately. This is not the same as the burn of muscle fatigue or the ache of a good workout. Sharp pain means something is wrong. Don’t push through it. Review your form. If it persists, see a physio.
I once ignored a small catch in my left shoulder during kettlebell cleans. After a month, it turned into a full‑blown impingement that kept me from lifting anything overhead for three months. Not worth it.
On the other hand, general muscle soreness (especially day‑after soreness) is normal, especially in your glutes, hamstrings, and upper back. That feeling of “I walked down stairs funny today” is your body adapting. Light movement, like a 10‑minute walk or some gentle stretching, helps. But if you’re still very sore after 48 hours, you might have done too much. Dial back the reps or the weight next session.
A Sample Progression Path (6 Weeks)
Here’s what a realistic progression could look like for a beginner using a 12 kg kettlebell:
- Weeks 1–2: 2 sessions per week, 30 sec work per exercise, 60 sec rest. Focus on form. No weight increase.
- Weeks 3–4: Increase to 3 sessions per week. Bump work time to 35 sec. If form stays solid, try 40 sec by the end of week 4. Keep rest at 60 sec.
- Weeks 5–6: Work up to 45 sec per exercise. If you finish all five exercises at 45 sec with good form, order a 14–16 kg kettlebell. When it arrives, do your first session with 30‑sec intervals using the new weight, and drop back to 2 sessions that week to let your body adjust. Maintain 60 sec rest.
This is just a template. If you need more time at one stage, take it. The goal isn’t to rush—it’s to build a habit that keeps you moving for years.
When to Invest in a Heavier Kettlebell
Let’s talk money. Kettlebells aren’t cheap, but a good one (like a cast‑iron competition style or a powder‑coated steel bell) will last decades if you don’t drop it. The moment you can finish your entire workout with the current weight and feel like you’re not being challenged, it’s time to upgrade. For most beginners, that happens somewhere between week 4 and week 8.
A common mistake is to buy a single “all‑purpose” kettlebell that’s either too heavy to swing or too light for squats. For many women, starting with 12 kg is typical; for many men, 16 kg. But that’s a generalization. If you’re smaller or less conditioned, start with 8 kg. If you’re already active, 16 kg might work. You want a weight that lets you do the hang clean and the overhead press without excessive strain or joint discomfort. Once you outgrow that weight—i.e., you can do all five exercises at 40 seconds of work for three rounds without your form breaking down—then look for a bell that’s 2–4 kg heavier.
Now, here’s the practical call to action I promised. If you think you’re close to needing that next kettlebell, check current prices on Amazon. They usually have a good selection of cast‑iron kettlebells in the 12–20 kg range. Look for ones with a flat base (so they don’t roll) and a wide, smooth handle. Read a few reviews before you click buy. And remember, a used kettlebell from a garage sale or Facebook Marketplace can be just as good if the handle isn’t rusty.
Take your time, respect the process, and let recovery be your secret weapon. Your body will thank you—and so will your kettlebell.
Medical & Editorial Review: This article was reviewed by Liam Smith, founder of Apexfito, for accuracy and safety. Content is for educational purposes and is not a substitute for professional medical advice. Consult your physician before starting any exercise or nutrition program.
Related: Kettlebell Swing Form Guide

One Comment